Requirements Specification
To make life easier for Timo and me, I've written a 16-page requirment spec, where all details and agreements regarding body works are included. Firewall, fender, etc. etc.
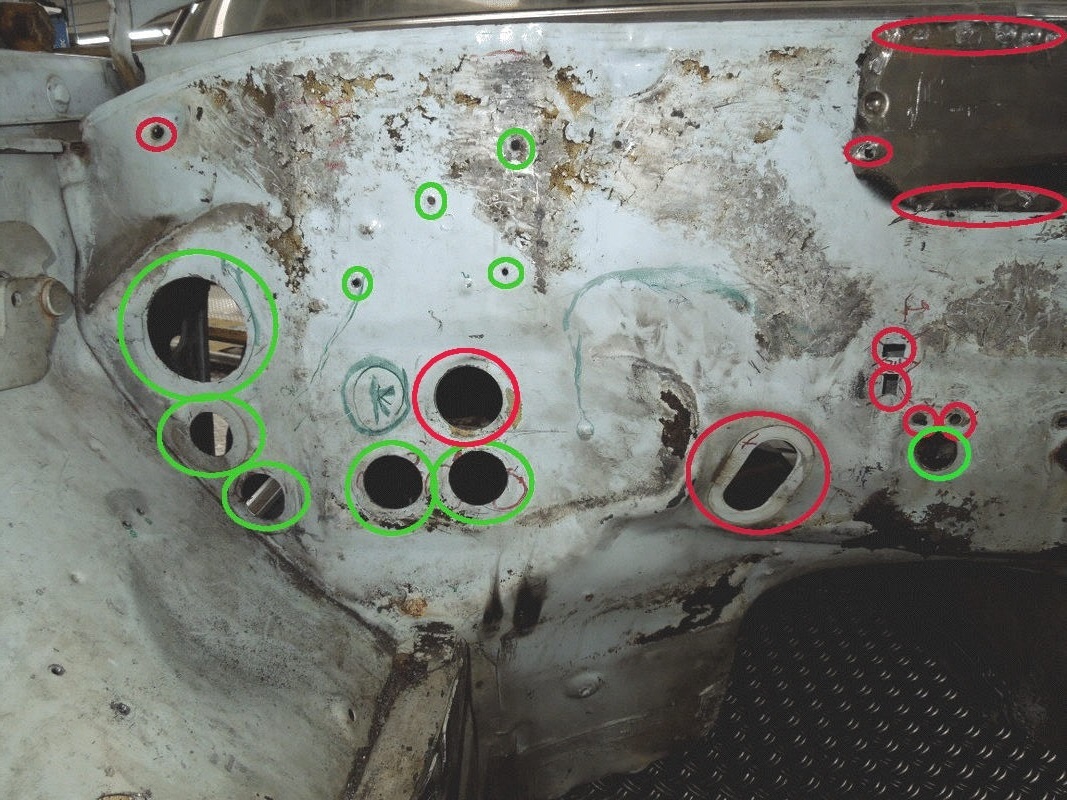
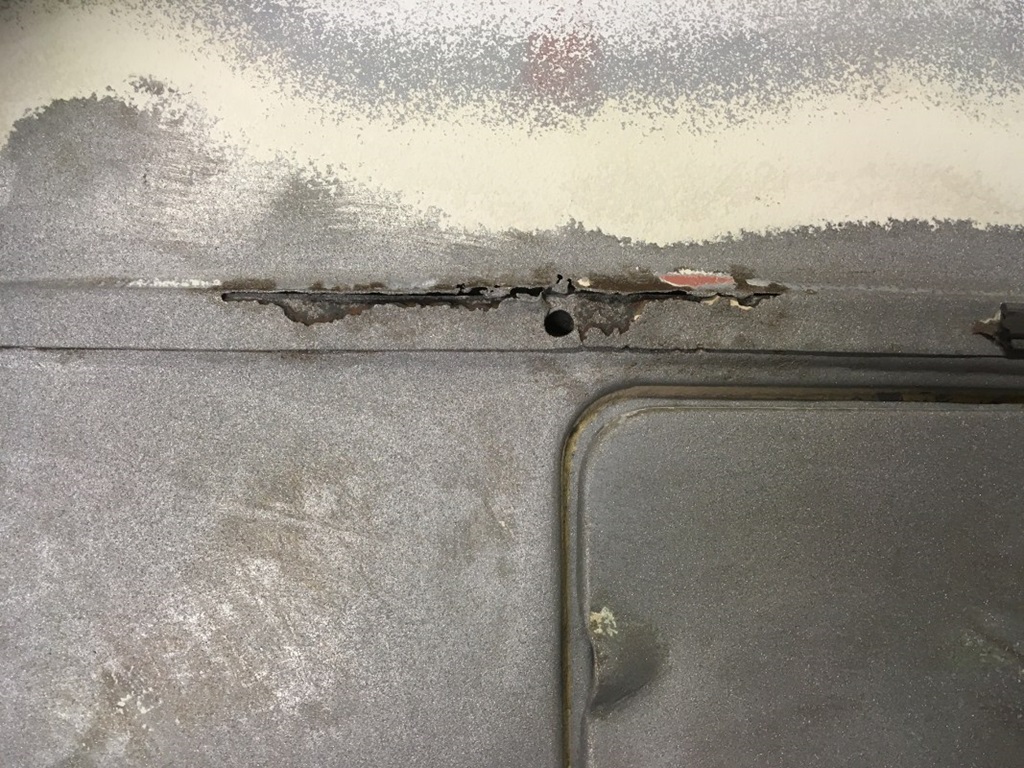
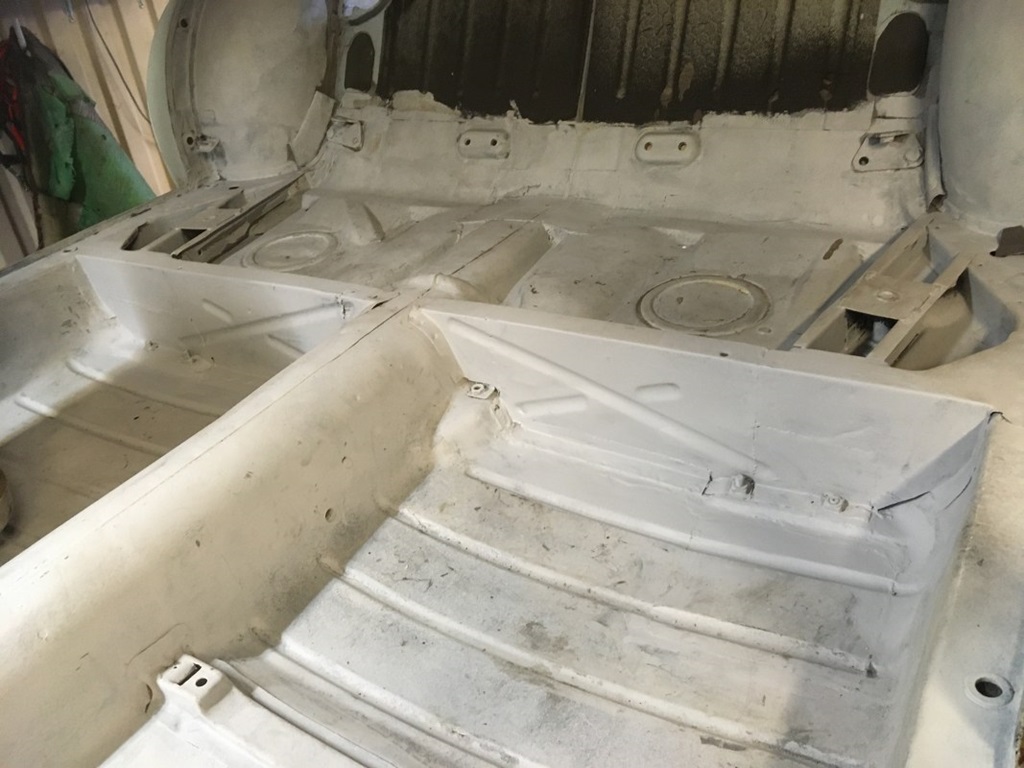
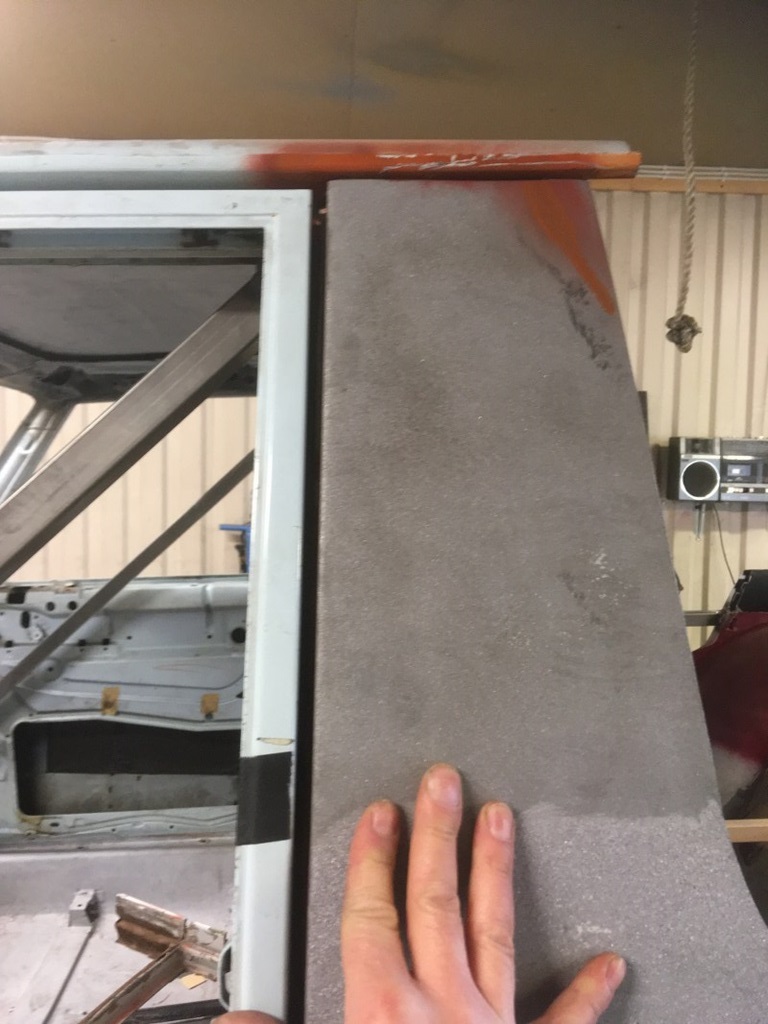
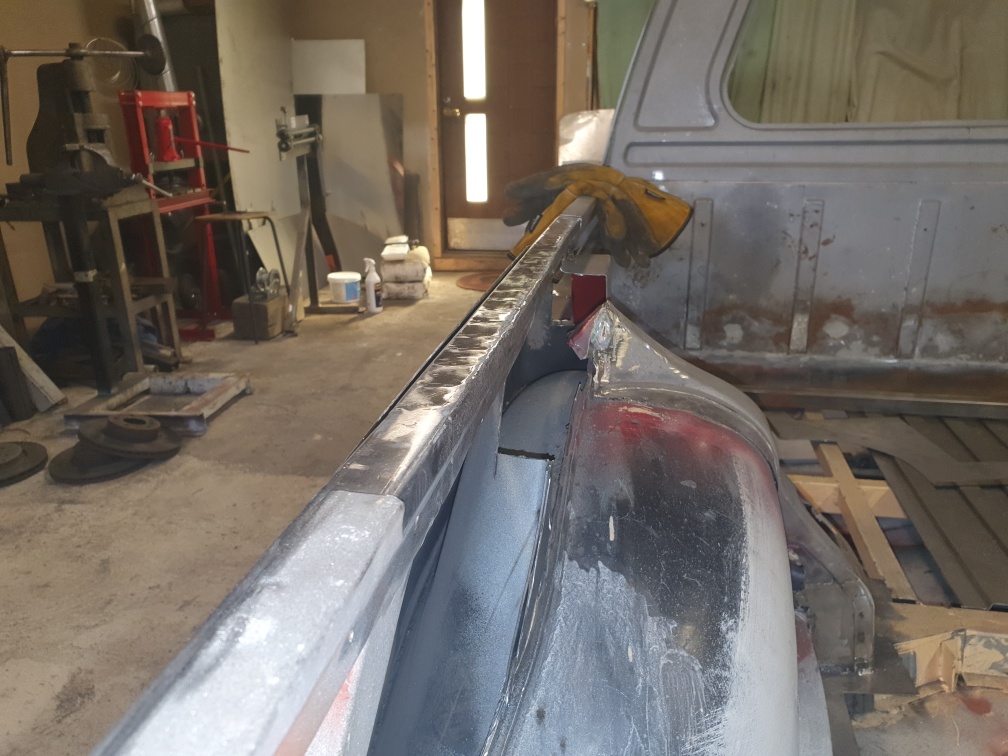
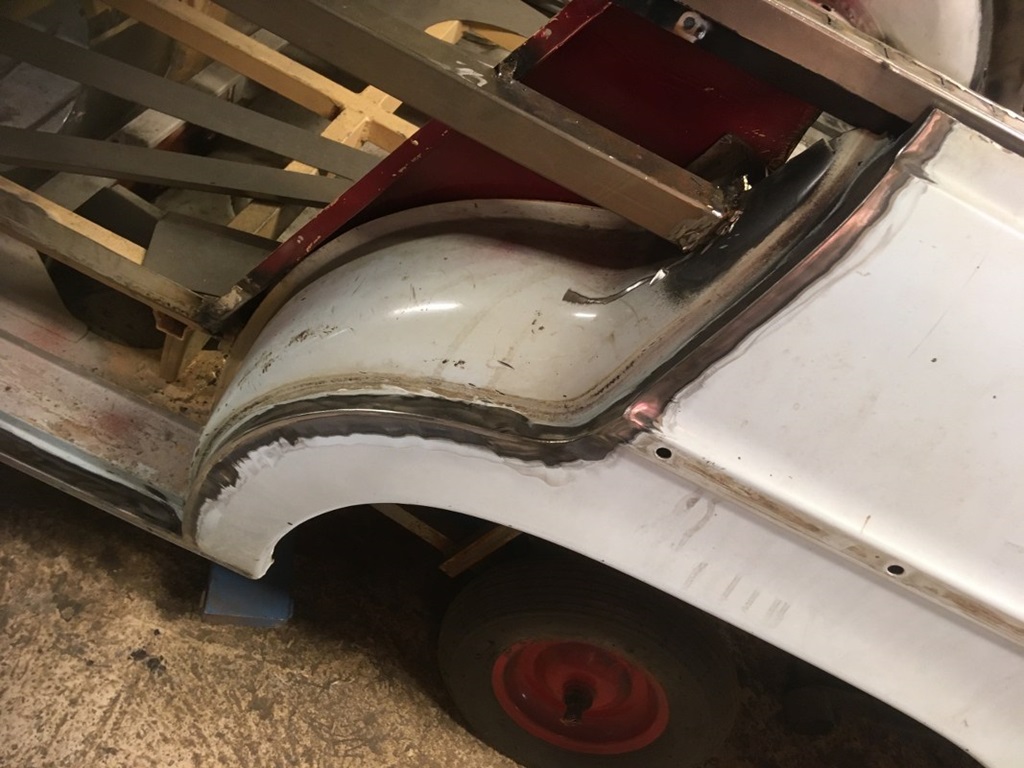
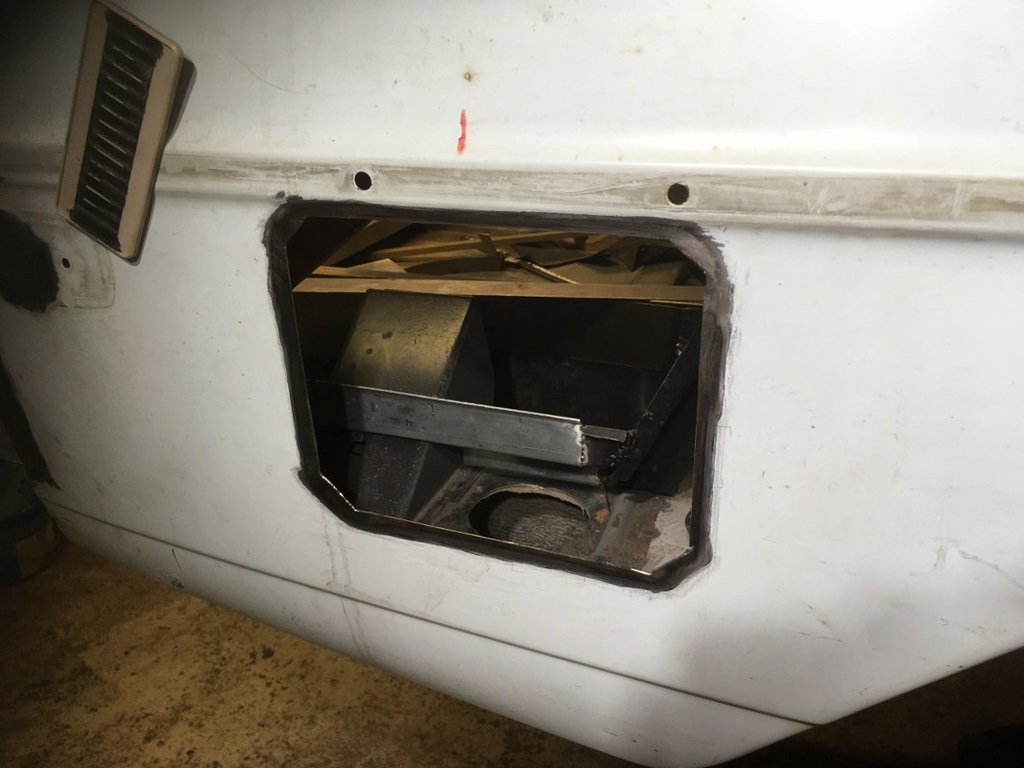
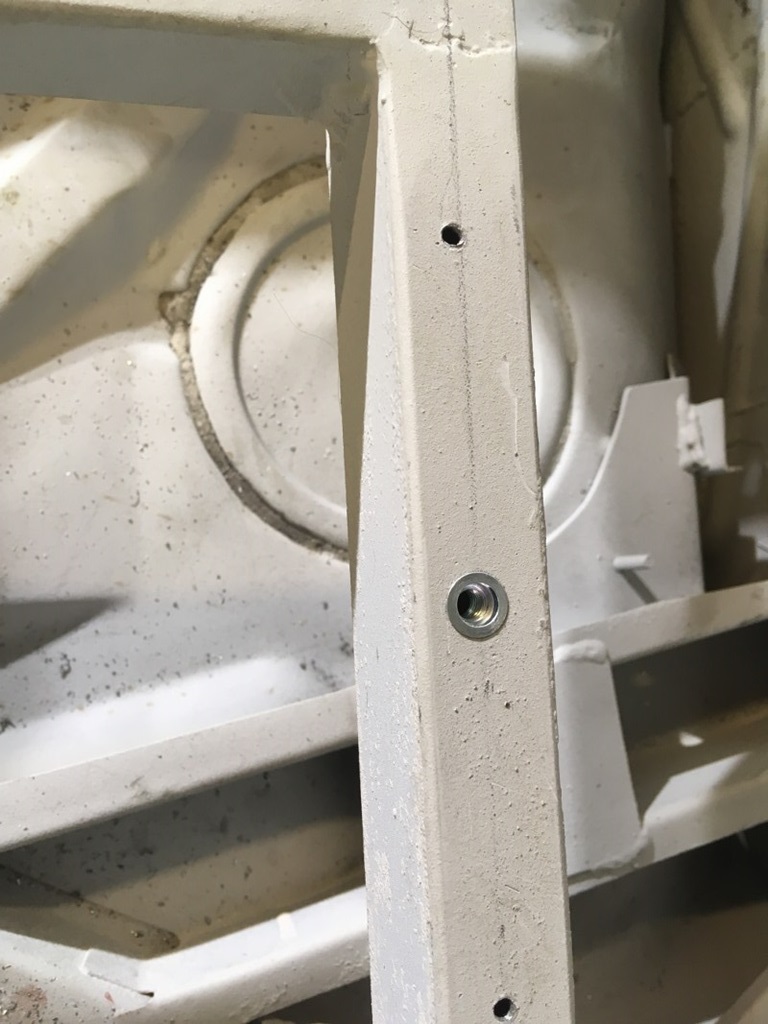
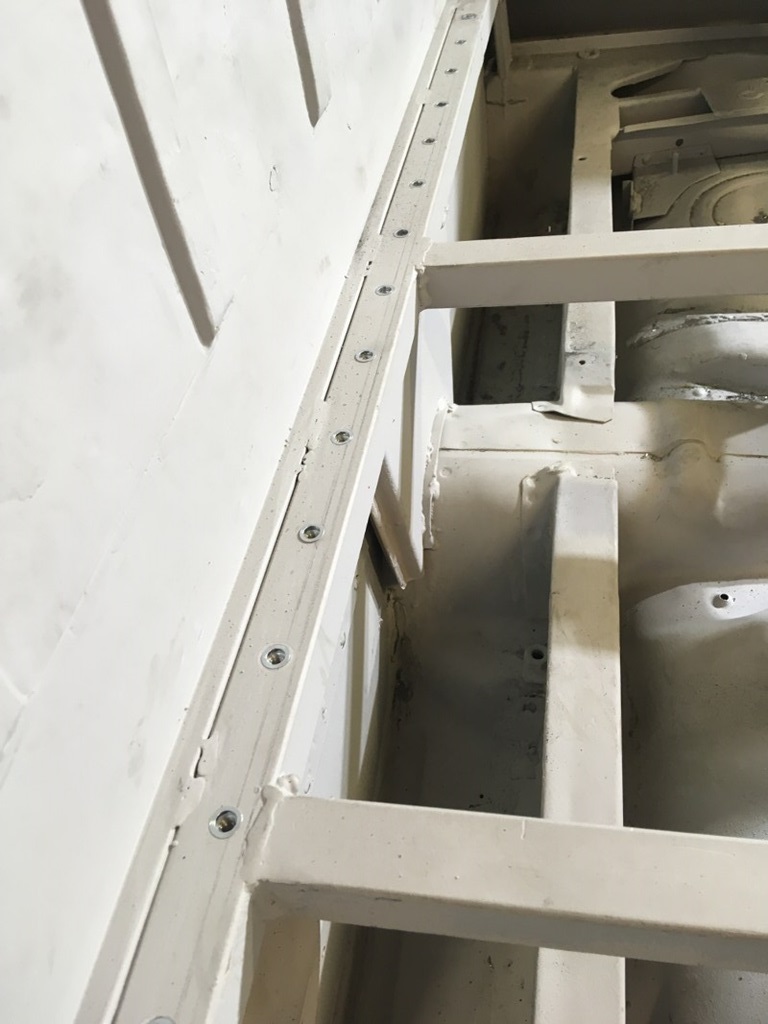
One example here: I've marked all holes in photos: Green should be left open, red is not needed anymore due to the modifications ...
Start of rebuilding: Cargo Area support ...
15 October 2019
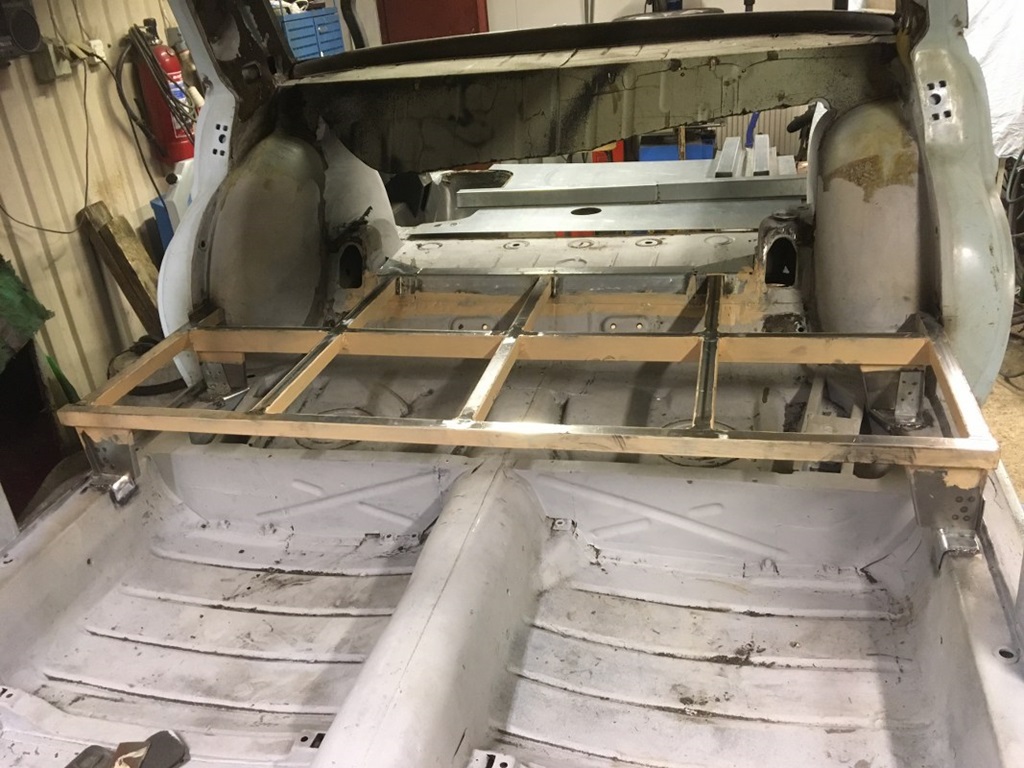
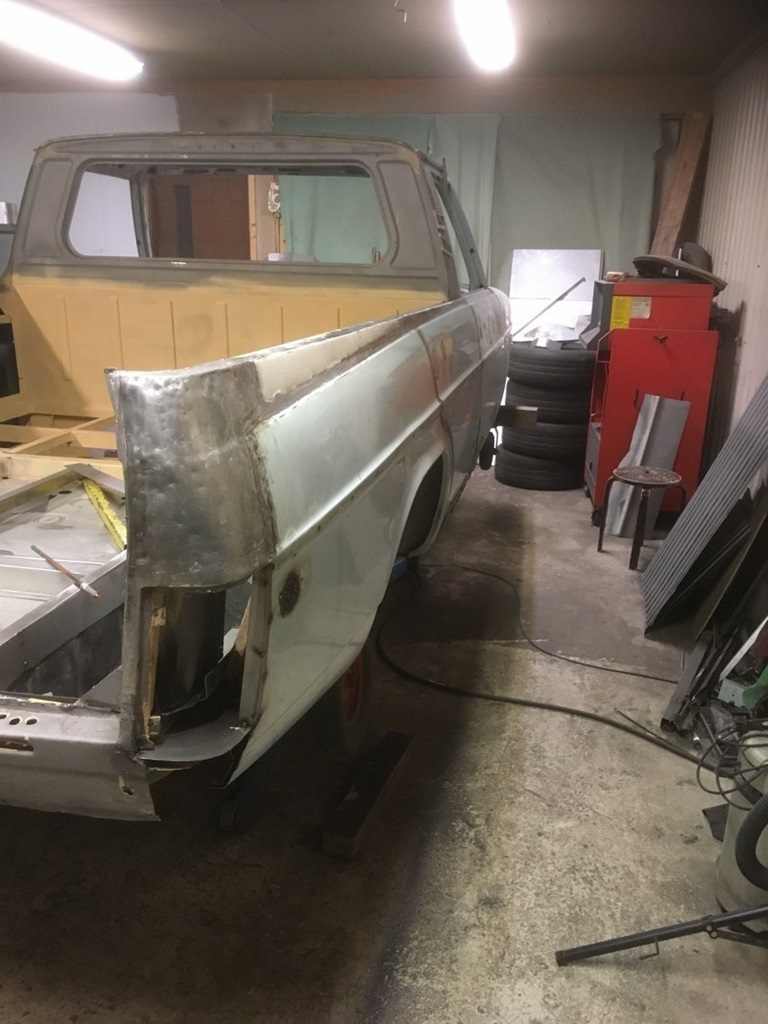
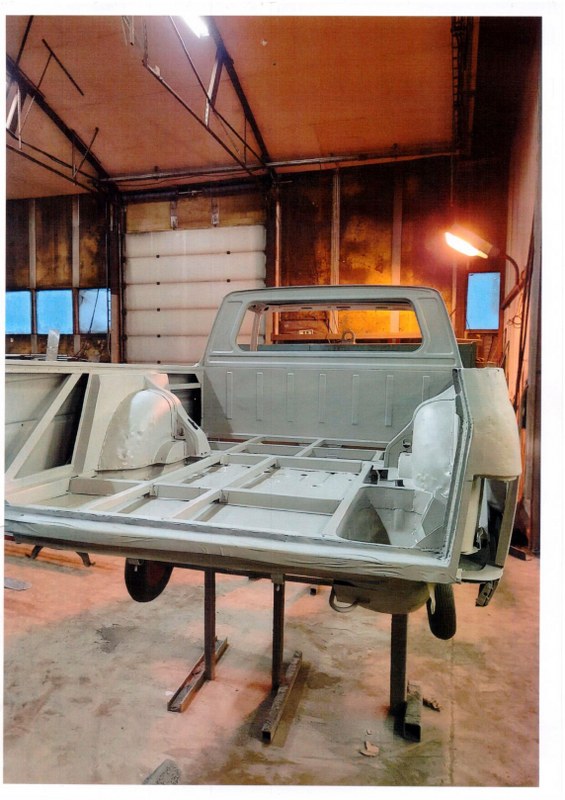
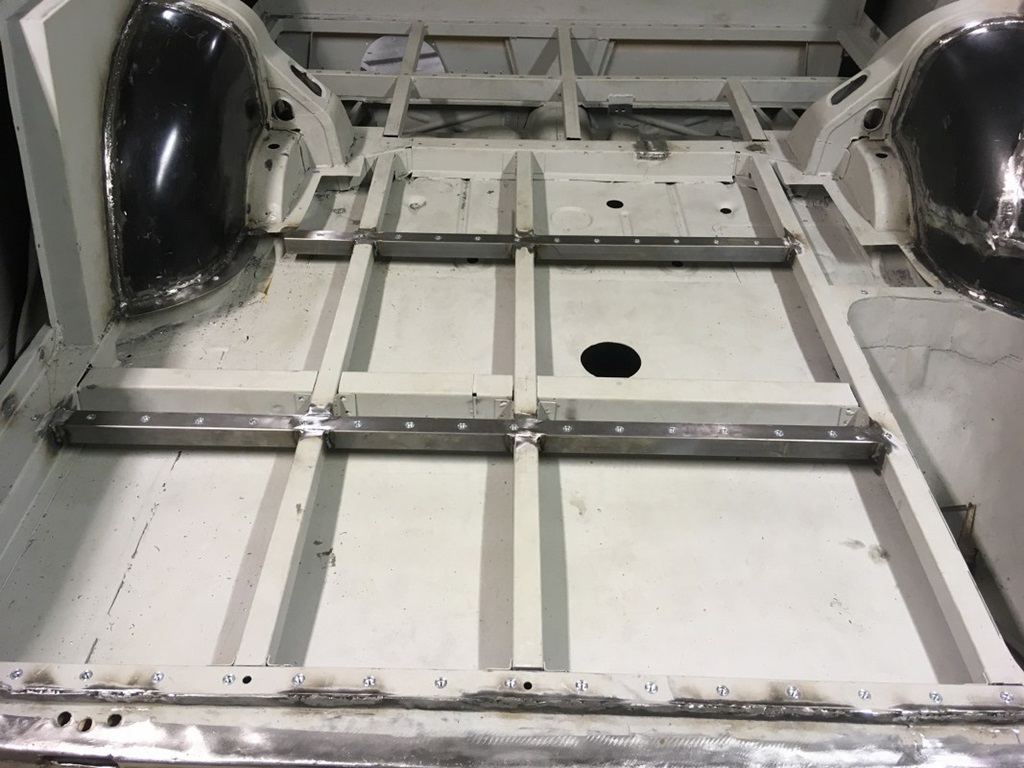
Unfortunately the whole support construction of the cargo area is completely rotted away. So this will be rebuilt from scratch, but exactly as it has been.
However, Timo found out, that some parts of the Binz construction is not really up to standard, so some reinforcements will be included, so the whole body is much more stable.
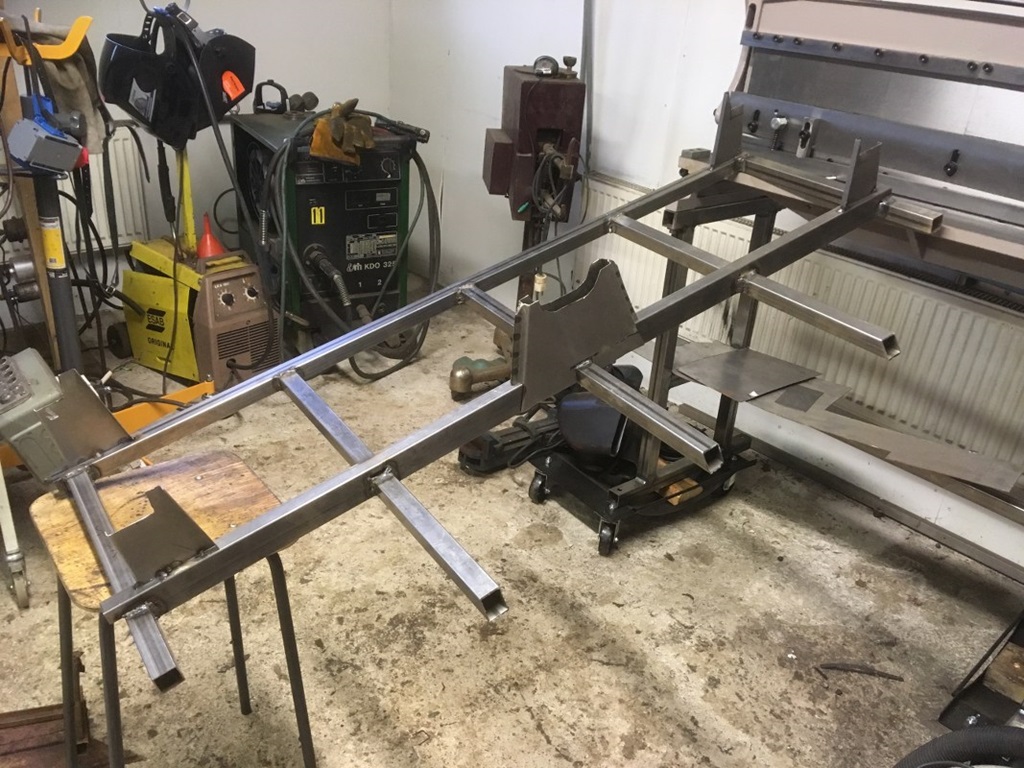
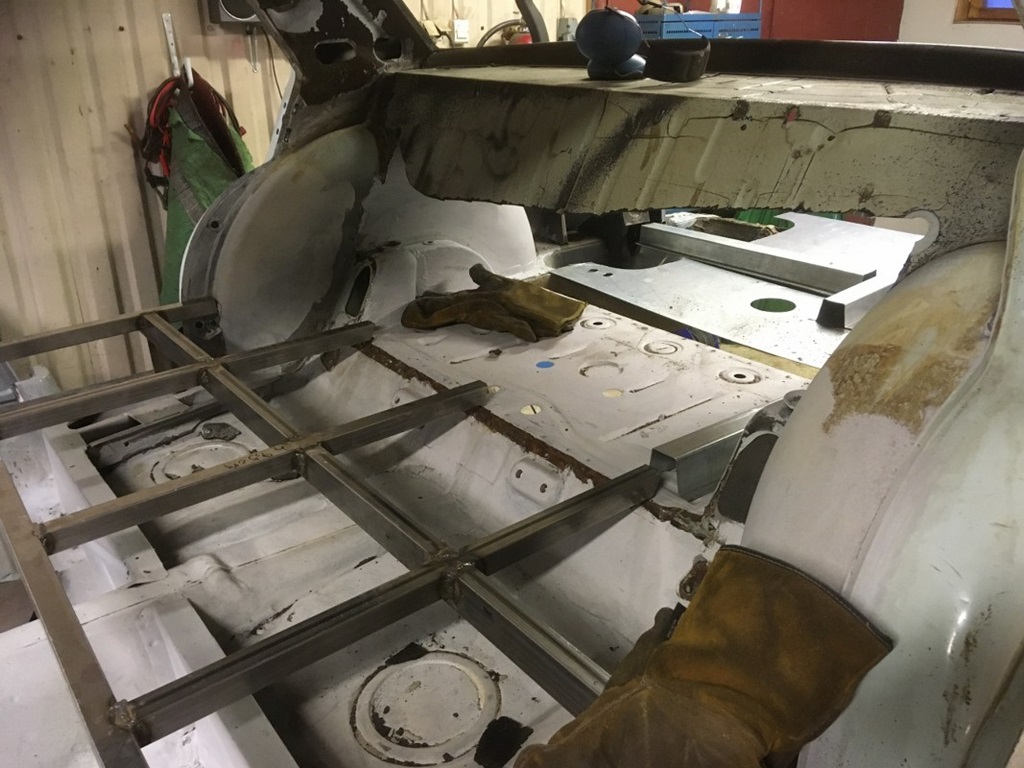
It is planned to put this subframe into the sedan first, so it will stabilise the whole body before anything is cut off.
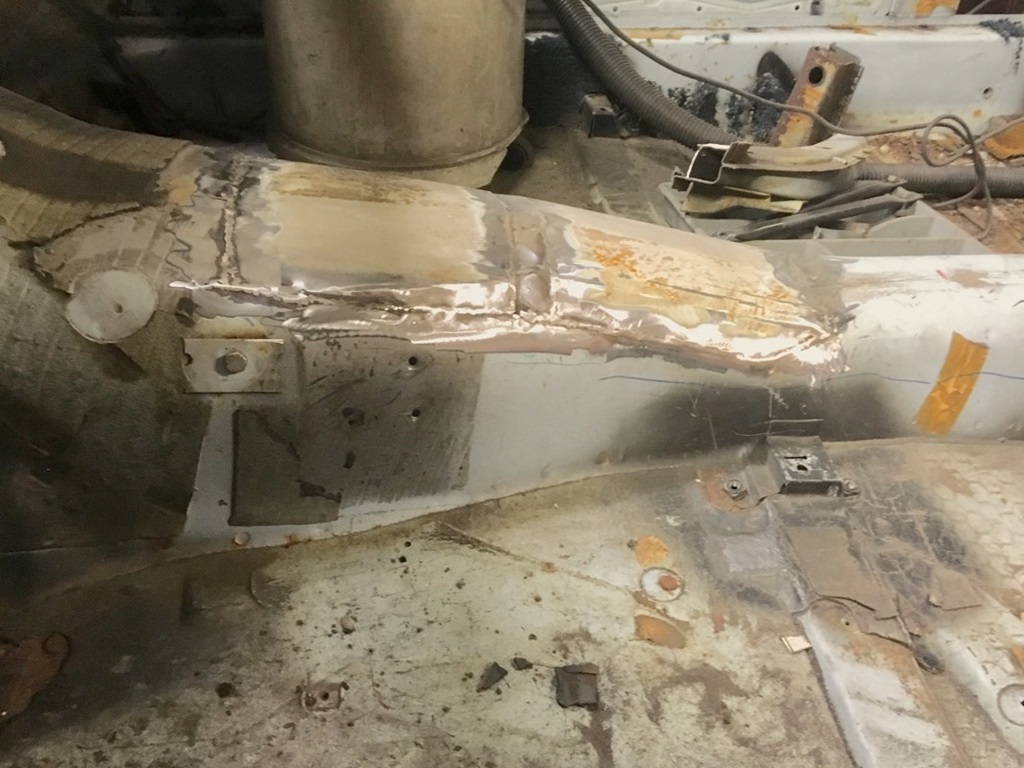
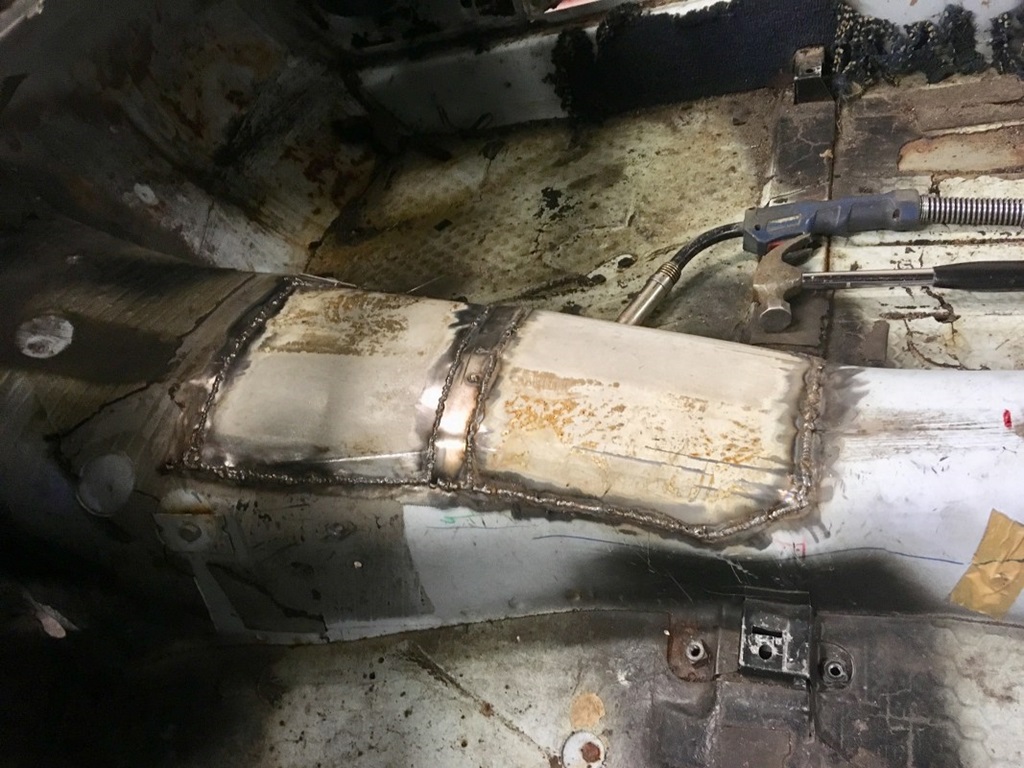
Modifying the sedan: tunnel ...
7 December 2019
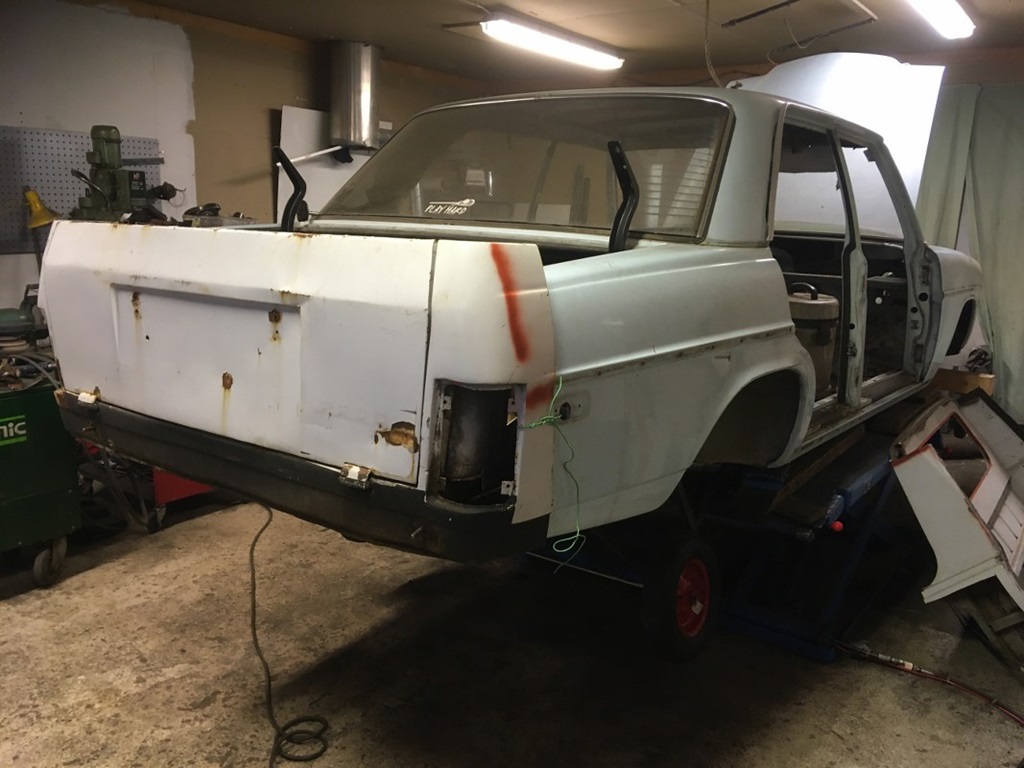
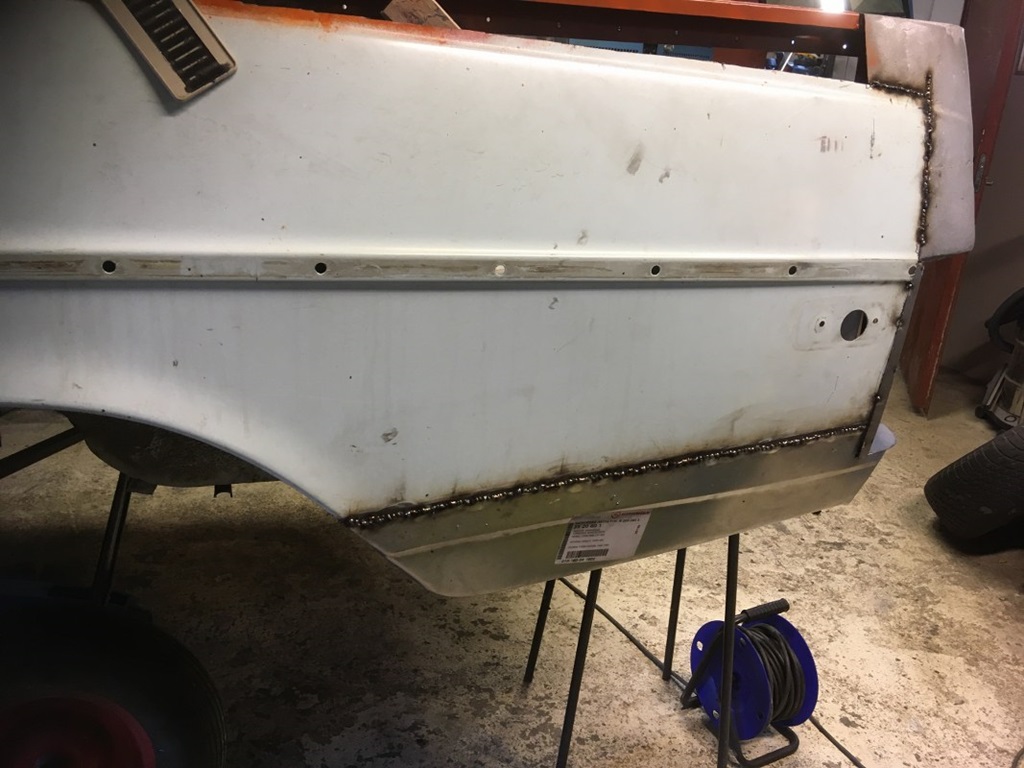
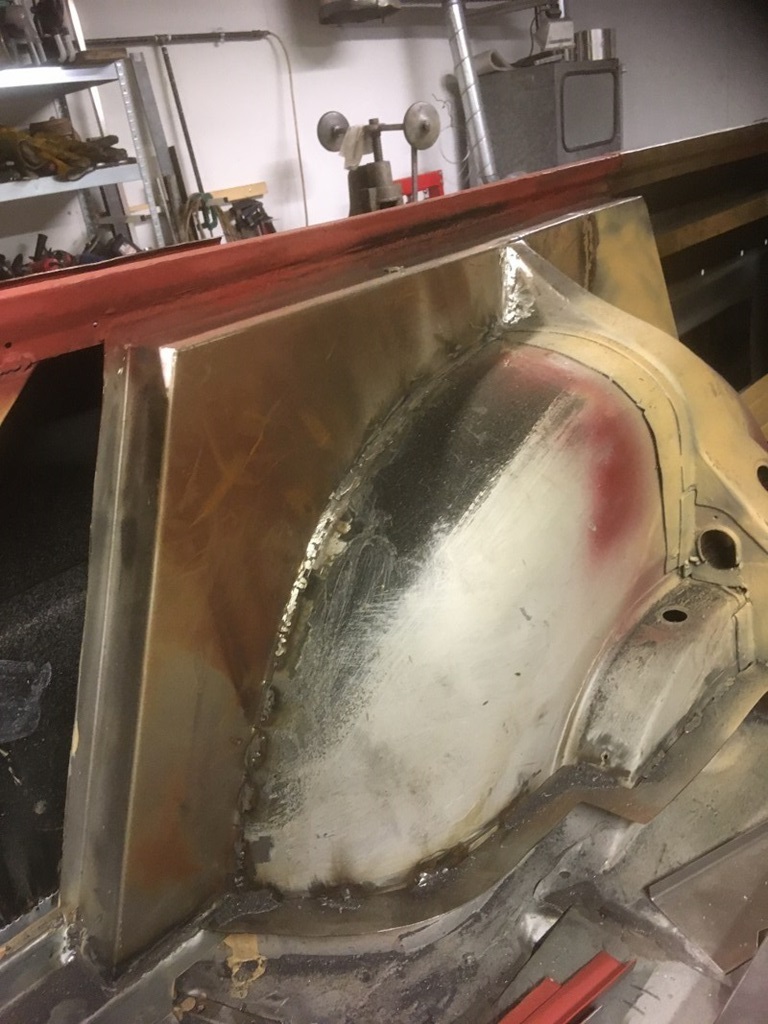
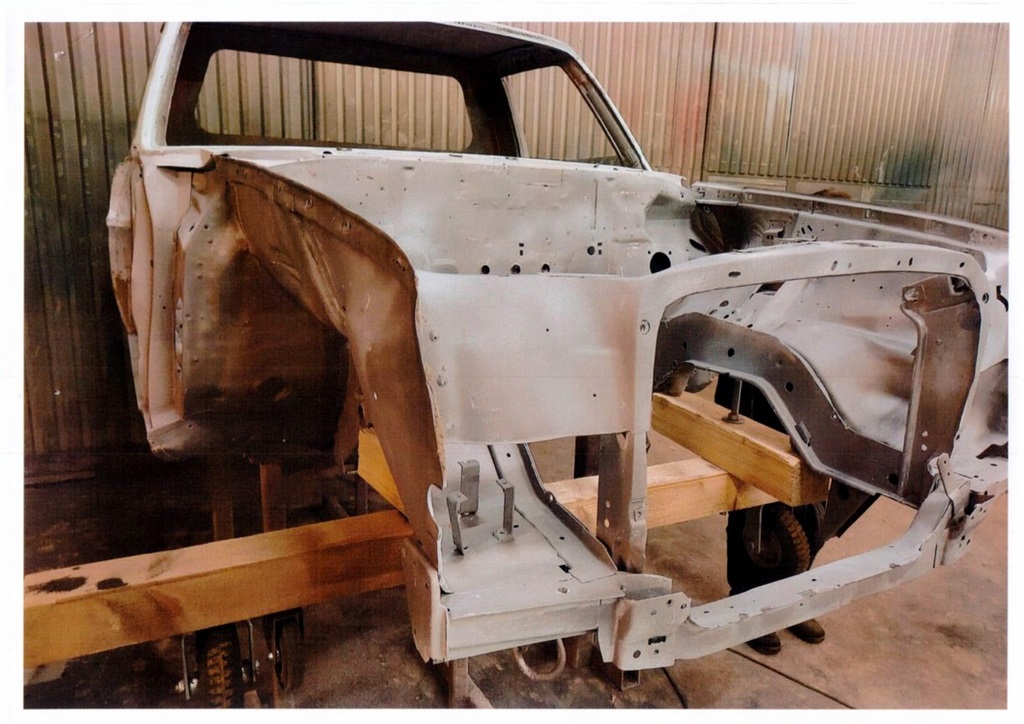
The sedan's front (donor car) is now nearly finished; all obsolete holes are closed, the left fender is modified and the battery rust issues are done.
Due to the V8-gearbox the W115 tunnel had to be extended. As a hint for Timo we welded in two bars, so he knows how far the extension has to go. Also the shape is very important as the "new" centre console has to properly fit on top.
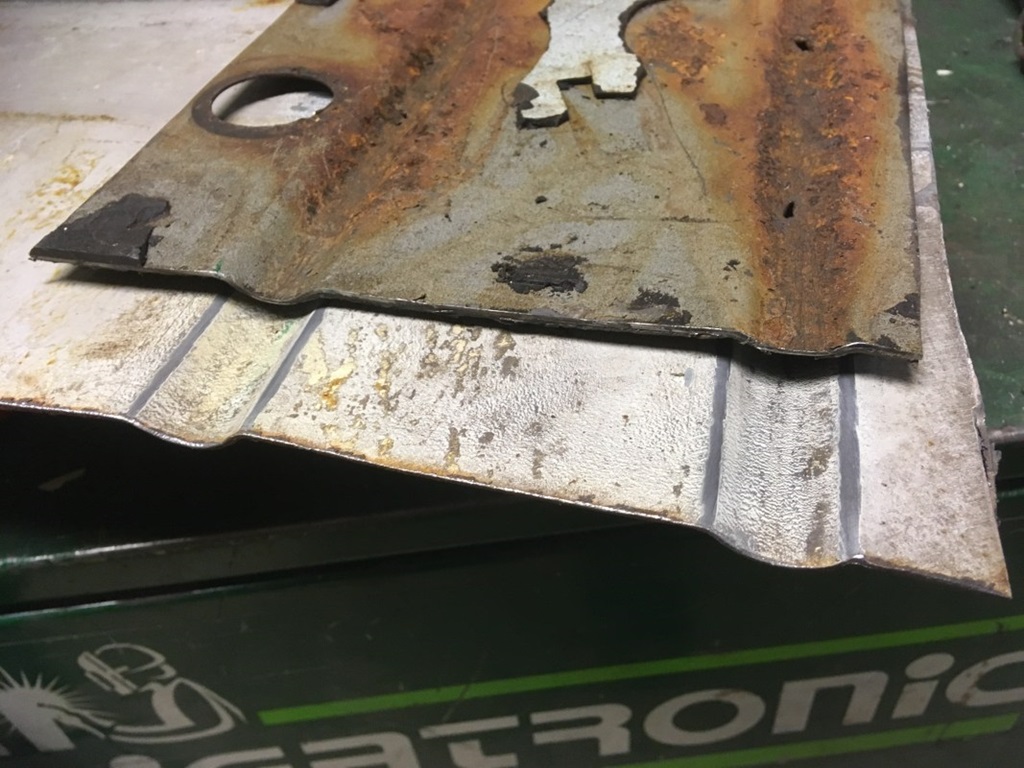
Fixing rust on the floor ...
12 December 2019
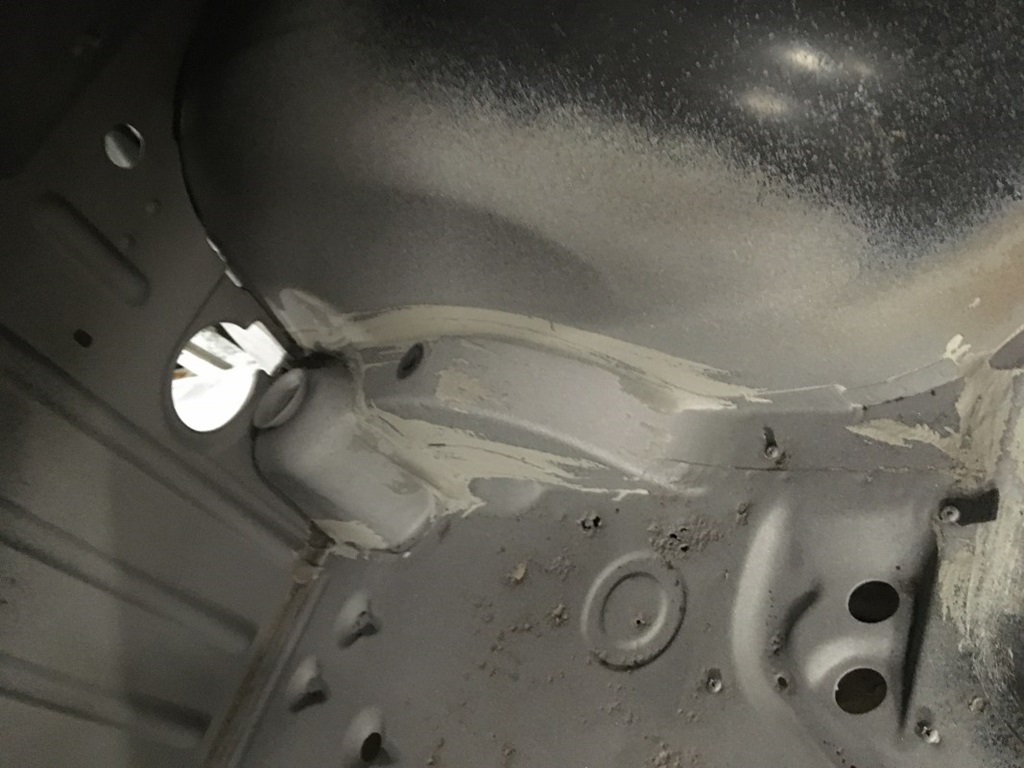
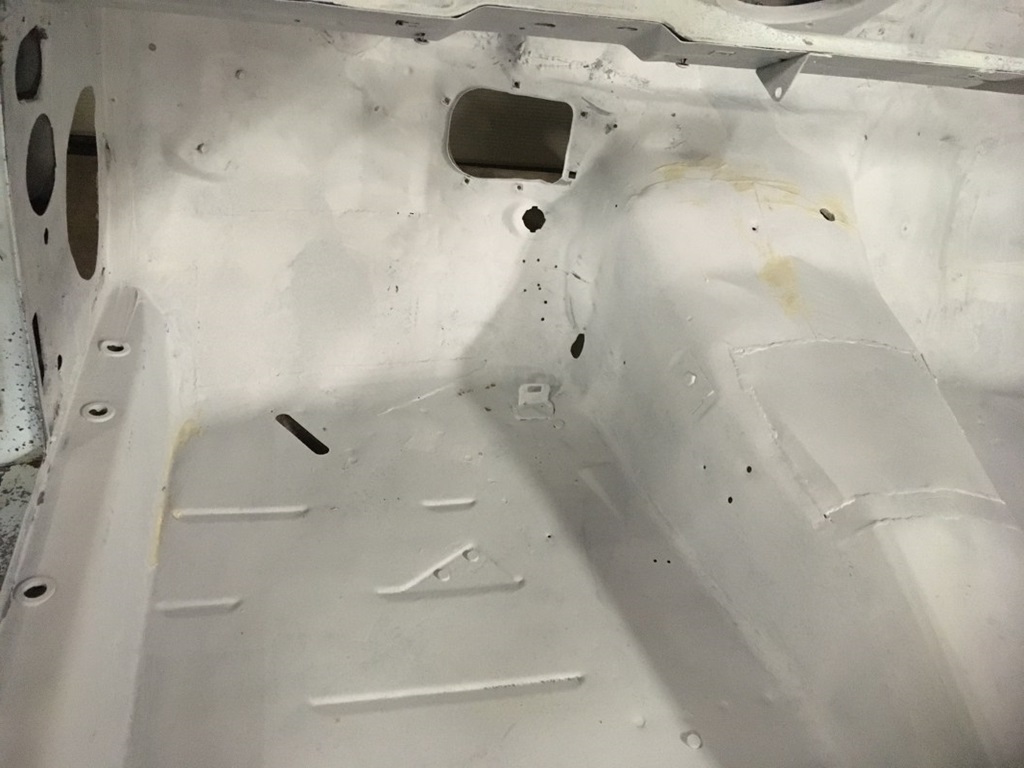
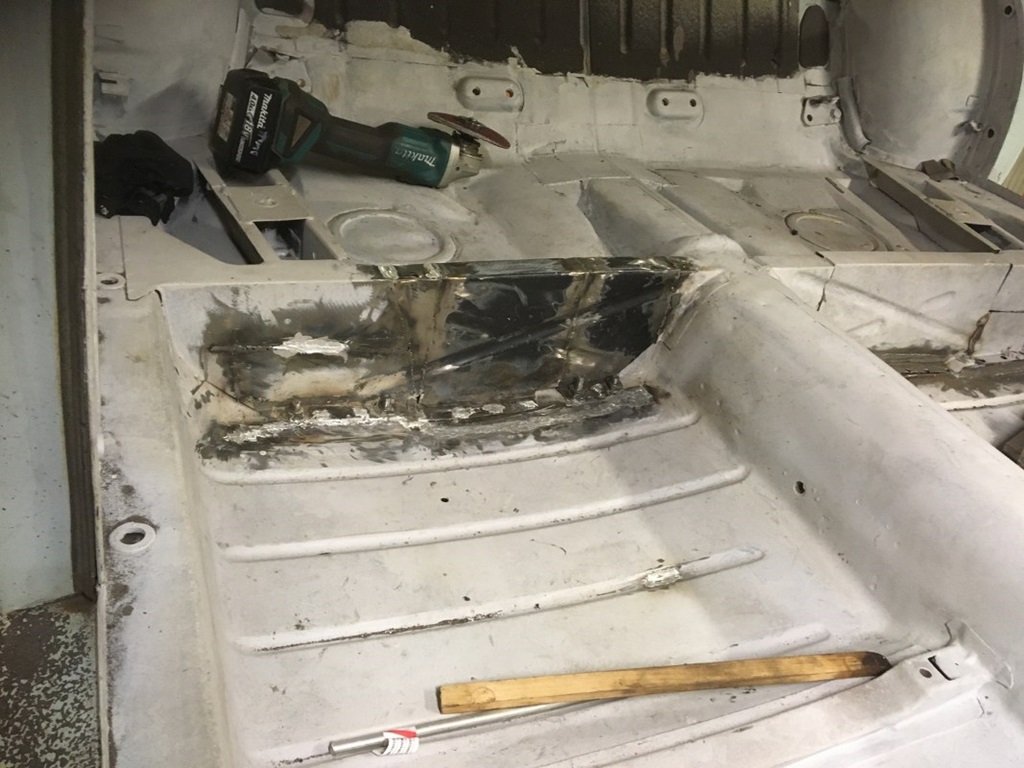
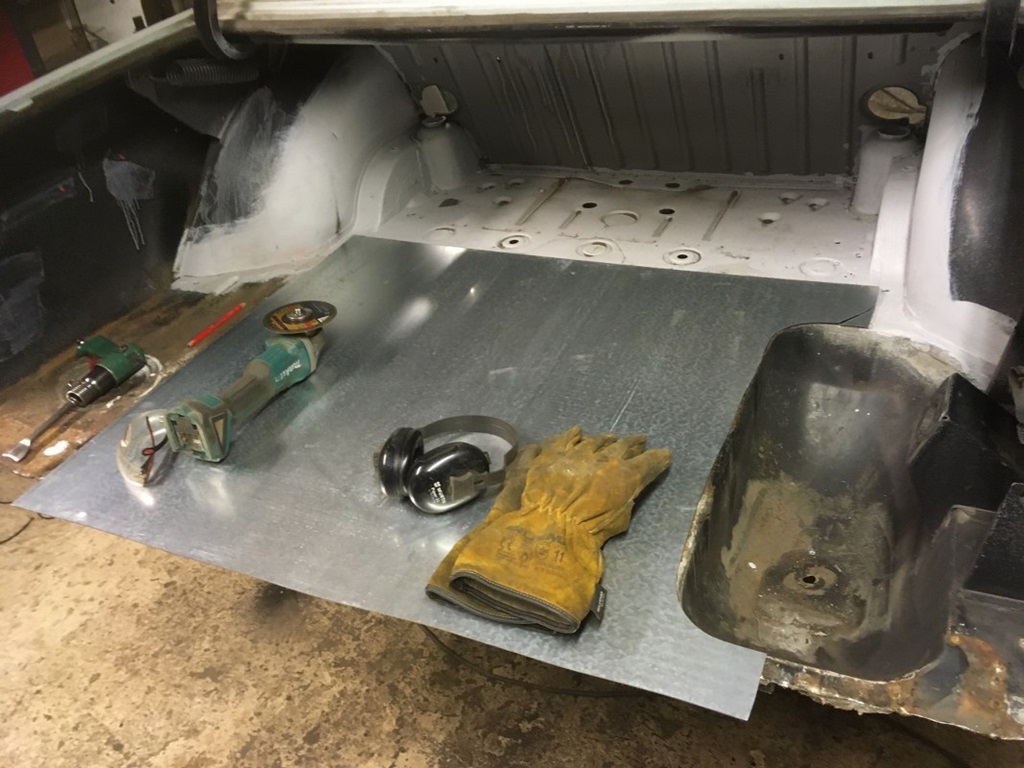
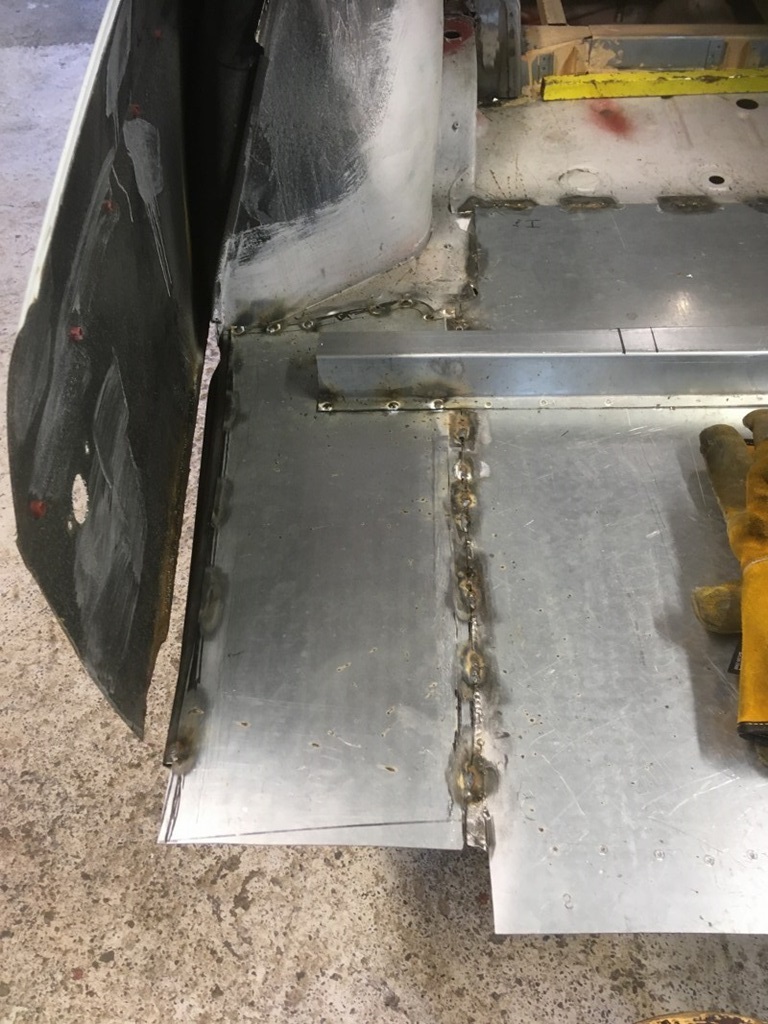
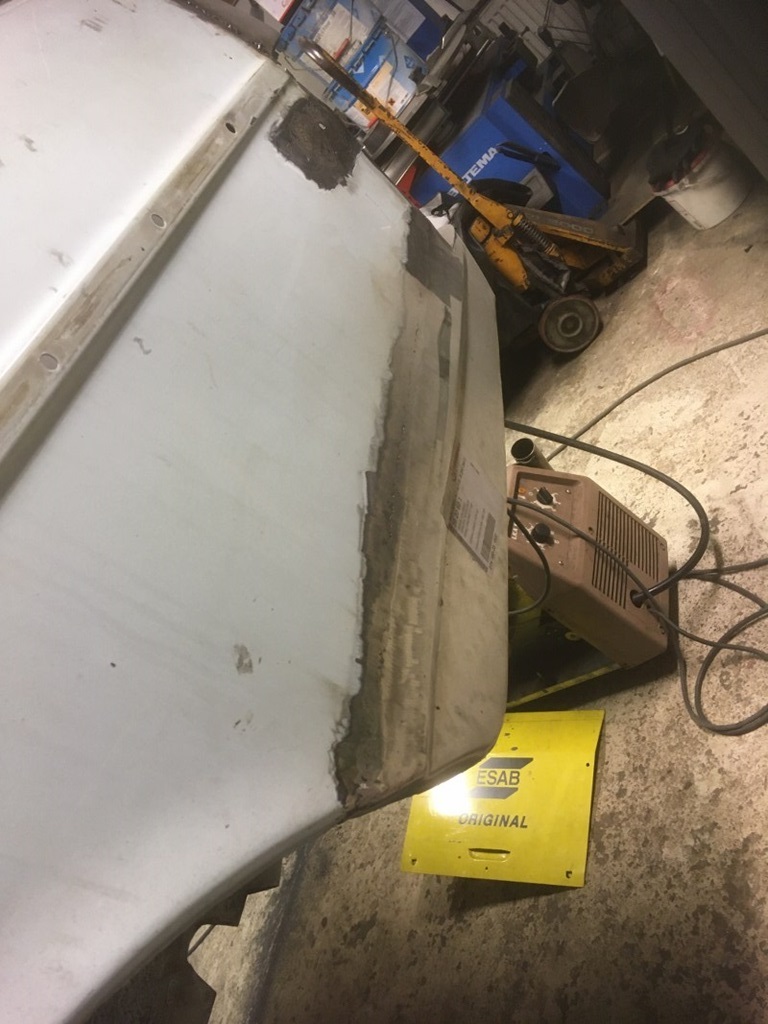
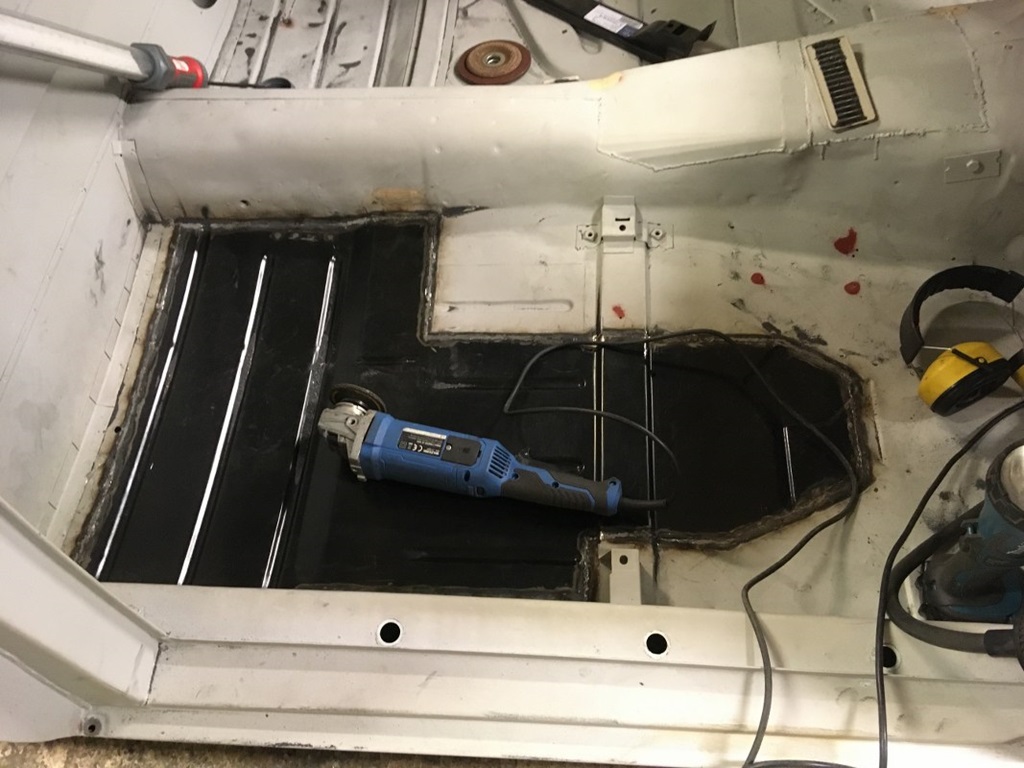
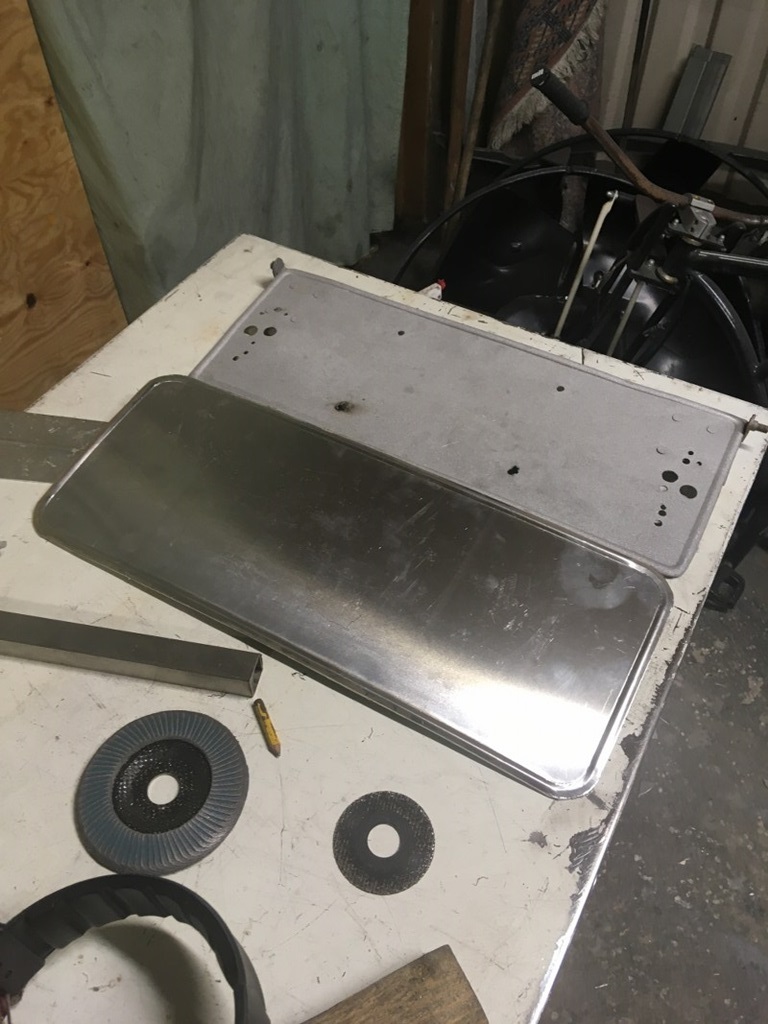
Although the sedan is pretty good regarding rust, some holes were there and Timo starting fixing them. He even made a special tool to get the shape right. So here's some pics of the floor behind the seats using original metal from the pickup's roof.

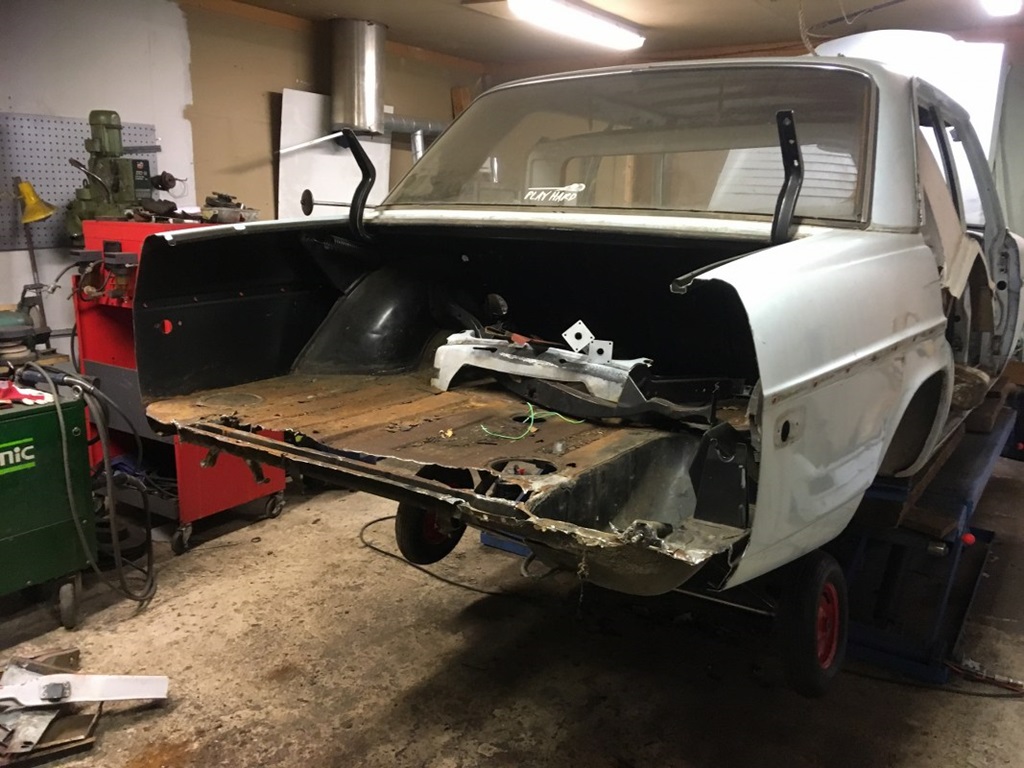
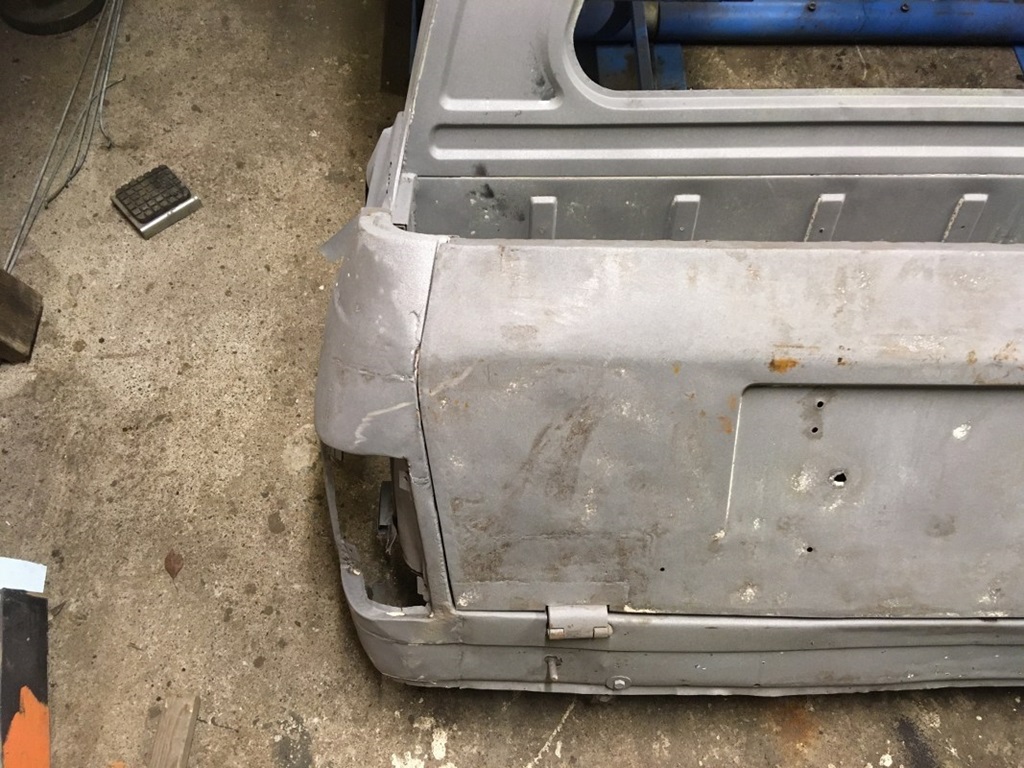
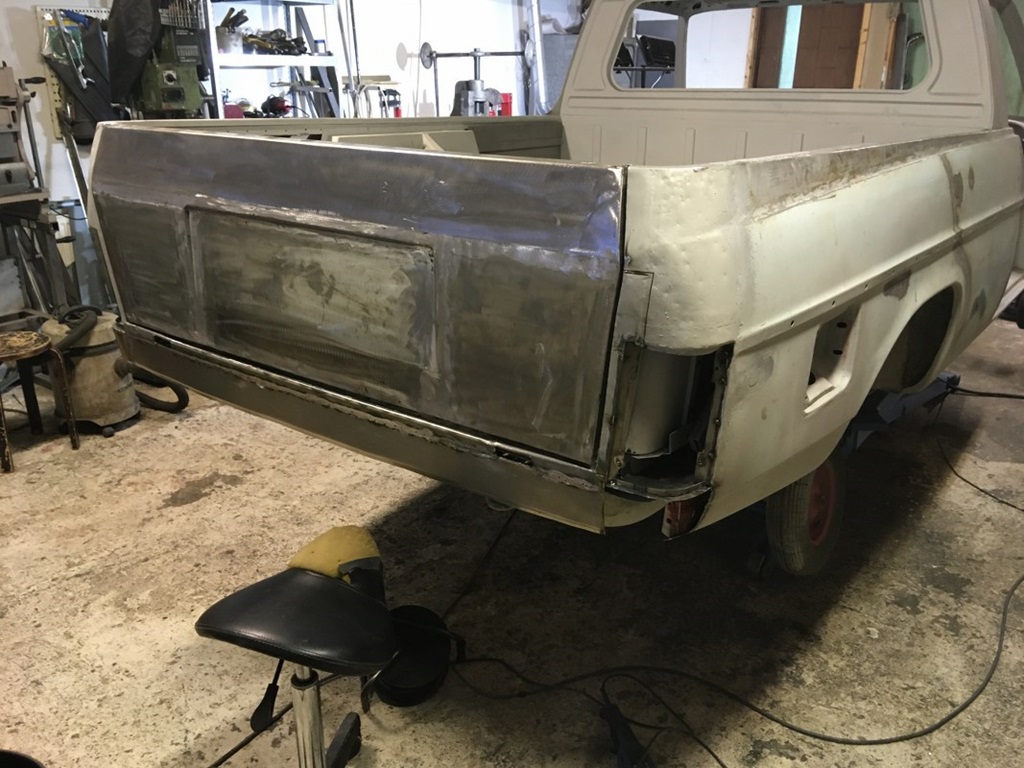
Starting on the rear end ...
10 January 2020
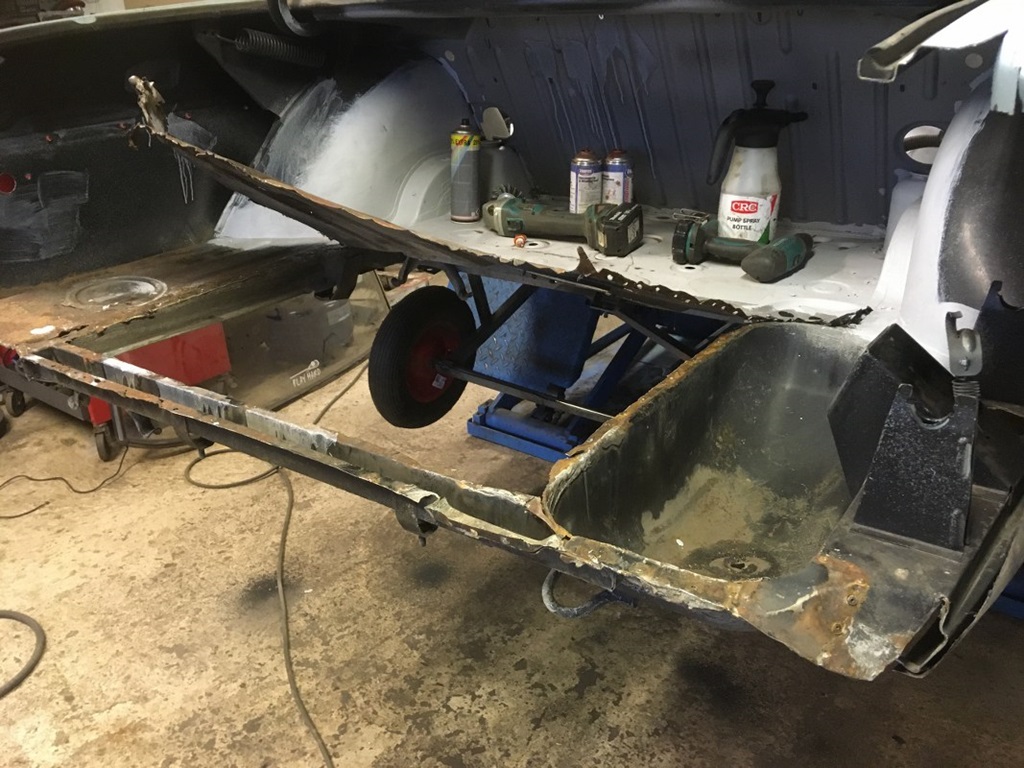
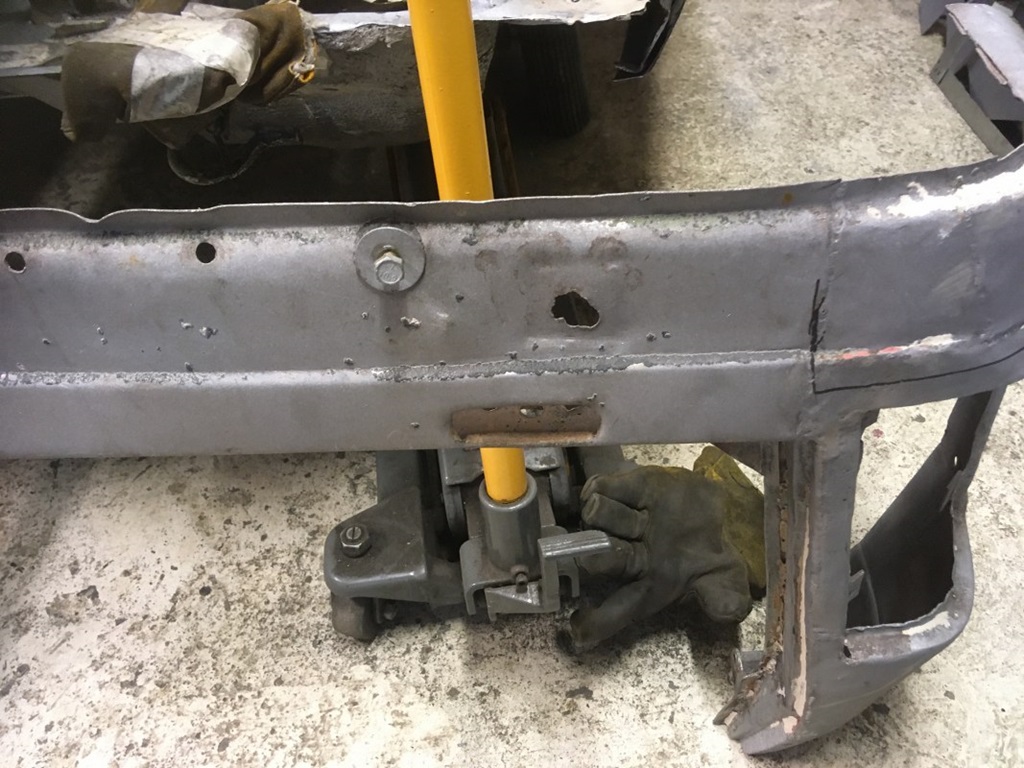
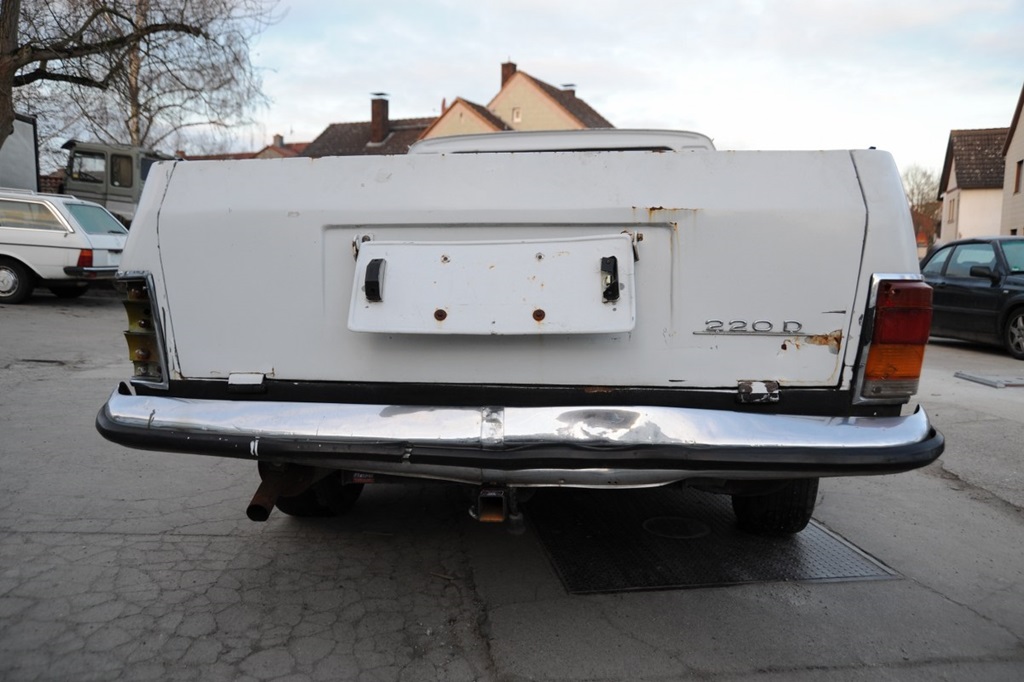
Body works continue … the trunk floor of the sedan is rusty, we knew that. So the bottom of it will be rebuilt from scratch. As the cargo door is very pickup-specific, we will use it. Also the bumper of the Pick-up is much lower than the one from the sedan.
The rusty rear cross bar I could source as NOS, but the green wire will be replaced with an orange one ;-)))
Sedan back from sandblasting ...
The sedan body went to sandblasting. A few more small holes, but all in all not too bad. That the trunk floor was rubbish, we knew. So the rebuild can start from there.
This week the pick-up parts will come back from sandblasting … let's see what's left ;-)
19 January 2020

Pick-Up parts back from sandblasting ...
24 January 2020
The Pick-Up parts came back from sandblasting. Not too good as we expected, but doable. After a chat with Timo it turned out that the back of the passenger wall and the cargo door are more tricky than it looks. Lots and lots of dents and there must have been severe damage to the rear end. Lots and lots of tin used, many many little sheets of metal for repair ... and so on and so forth. Why should it ever get easier? ![]()
Well I'm SOOO lucky to have someone like Timo who takes on such a job. With all the setbacks so far, it feels like the lottery win with him. ![]()
Repairing the rust bucket cont'd ...
22 February 2020
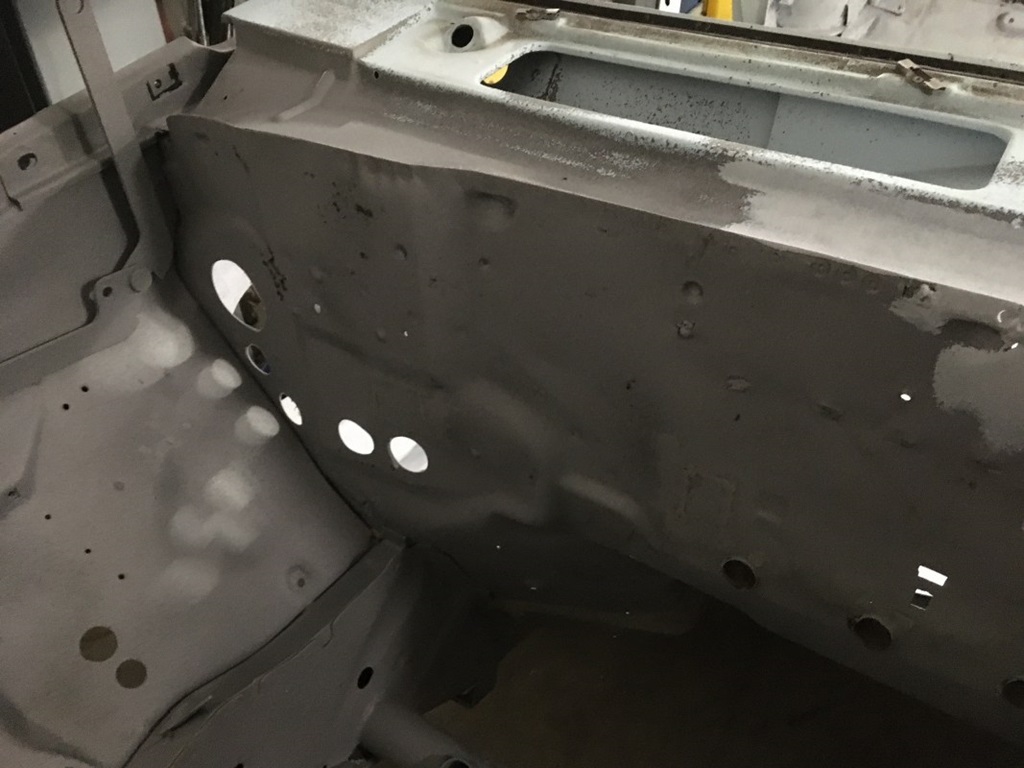
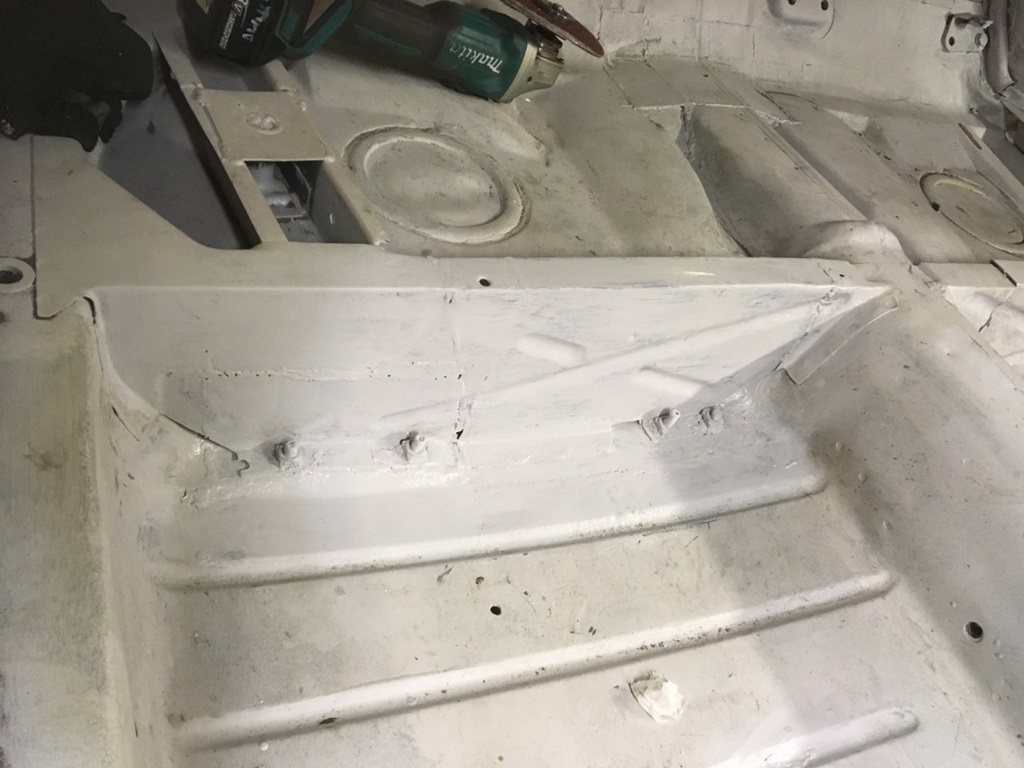
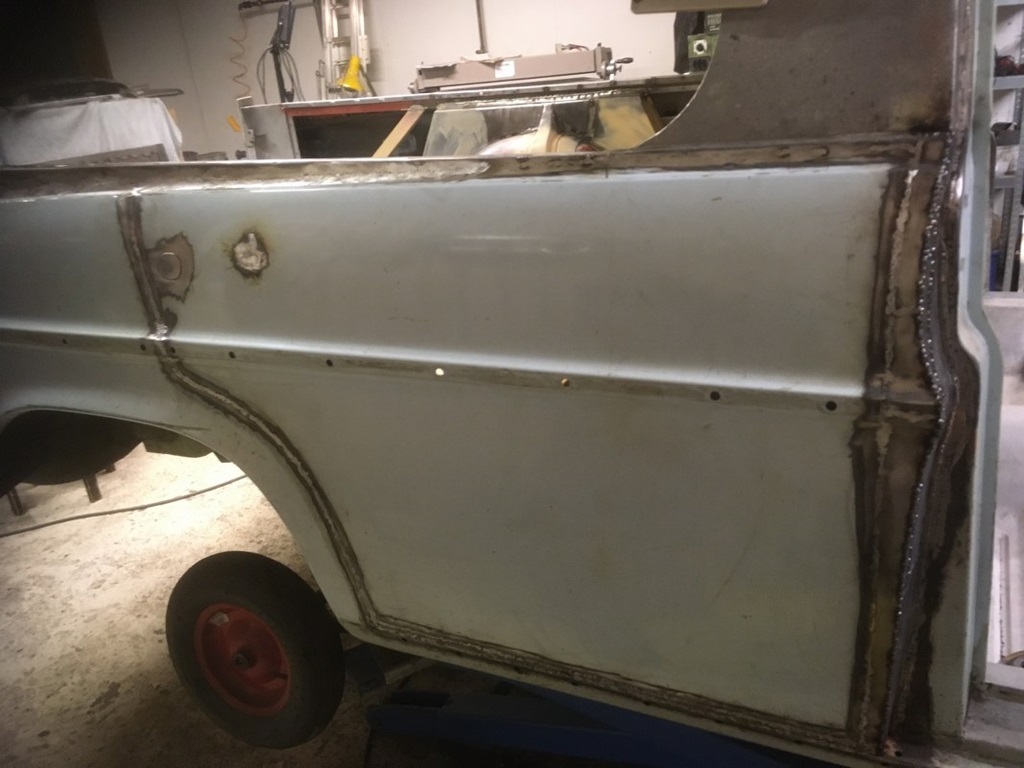
So Timo is still busy repairing the rusty parts of the sedan. Before the (ex-) rear bench, there were some tricky spots to be repaired. As you can see on the photos, he's done a perfect job, also putting the nuts in the correct place again.
The trunk floor was rusty, we knew that. As this will be hidden in the future due to the cargo area, this can be fixed in a more easier way. I could source the rear cross-bar in Holland, so at least that can be used as a reference.
Cargo area support cont'd ...
2 March 2020
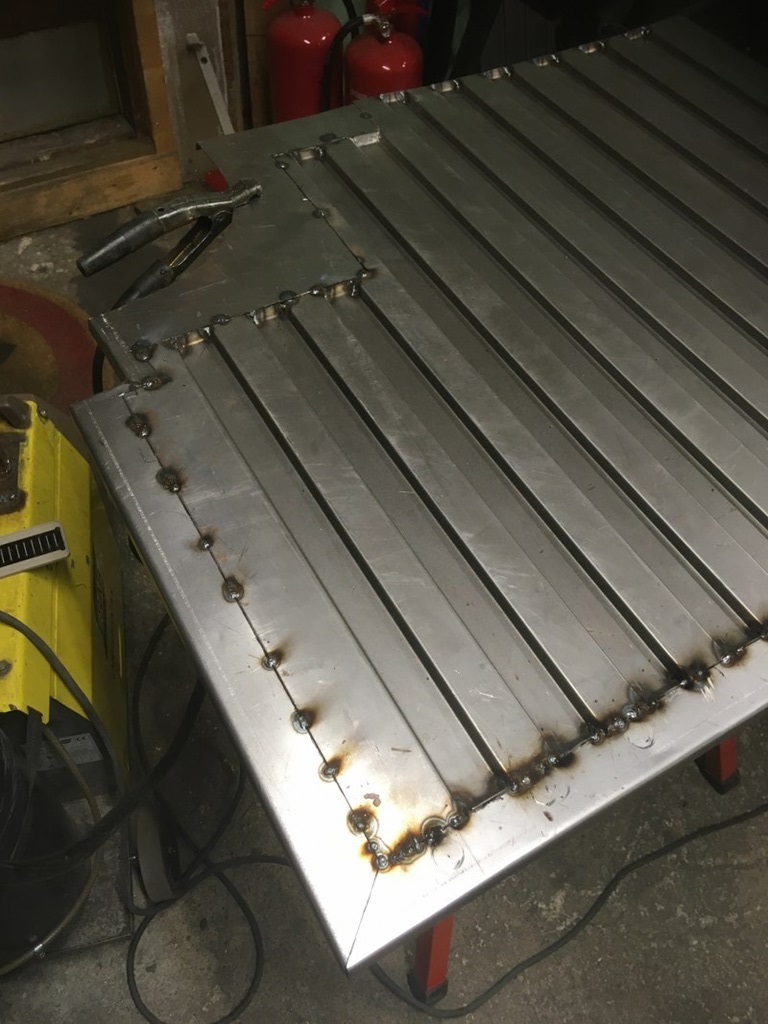
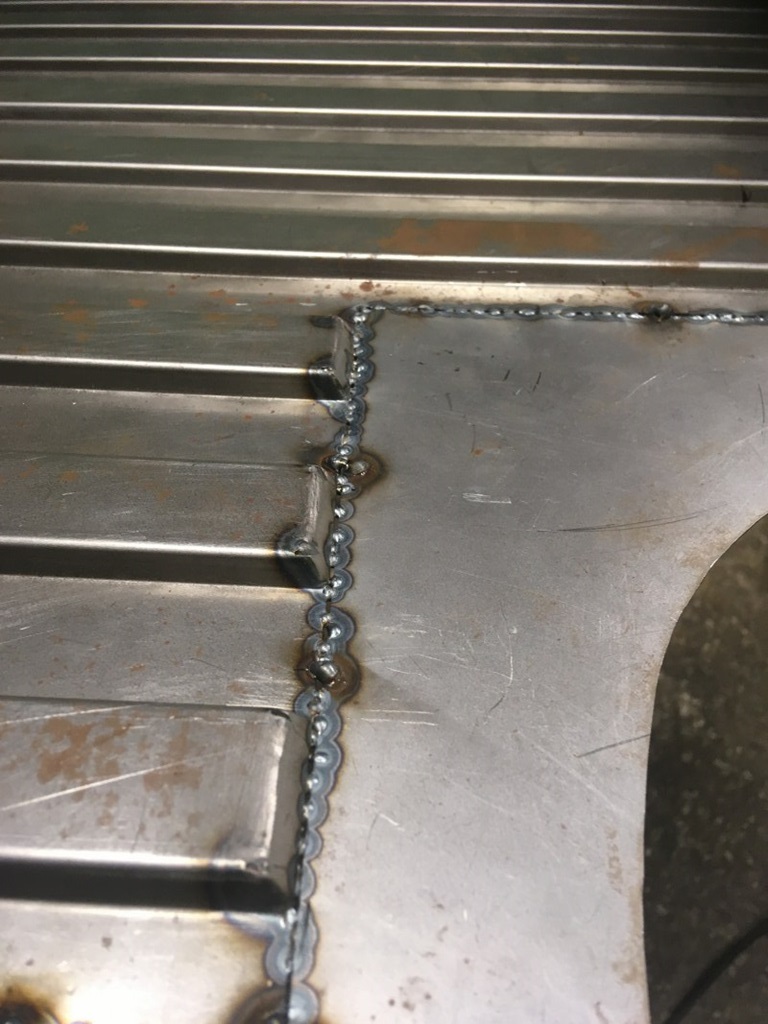
This is the advertising section for the fantastic work of Timo ;-) :
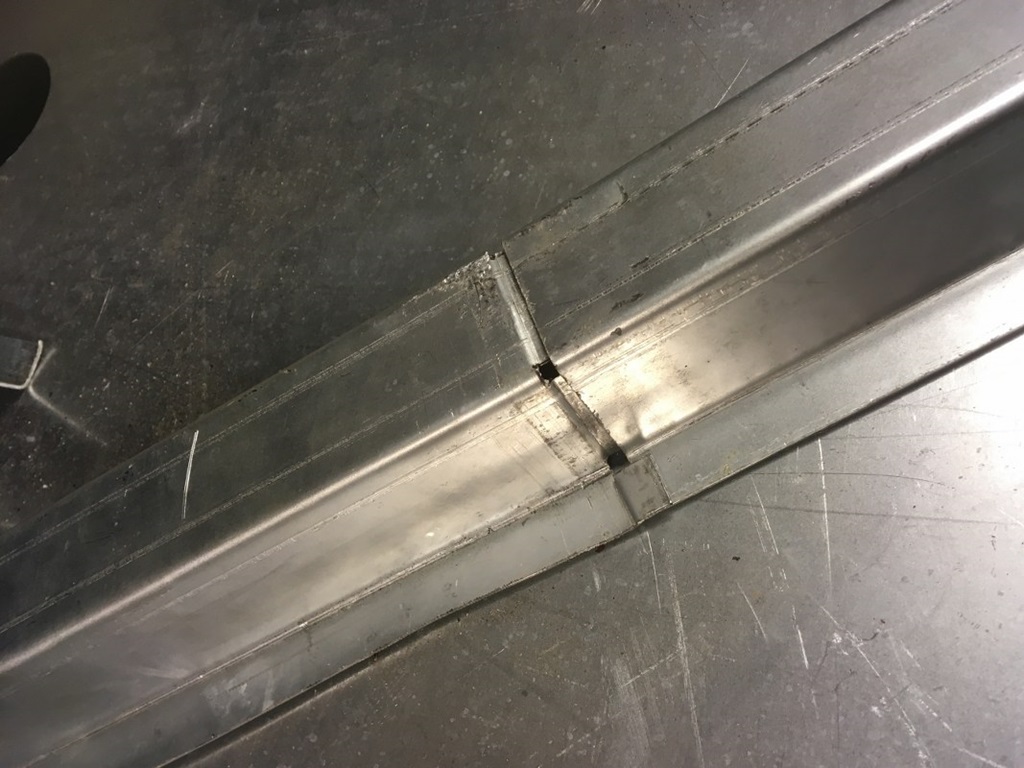
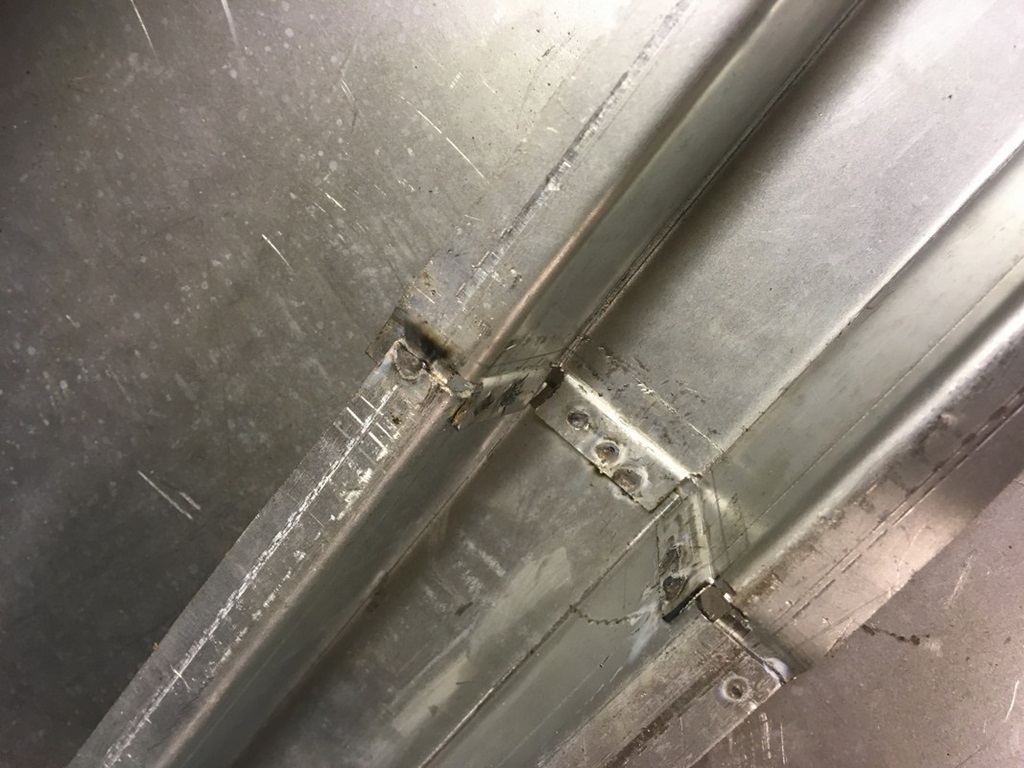
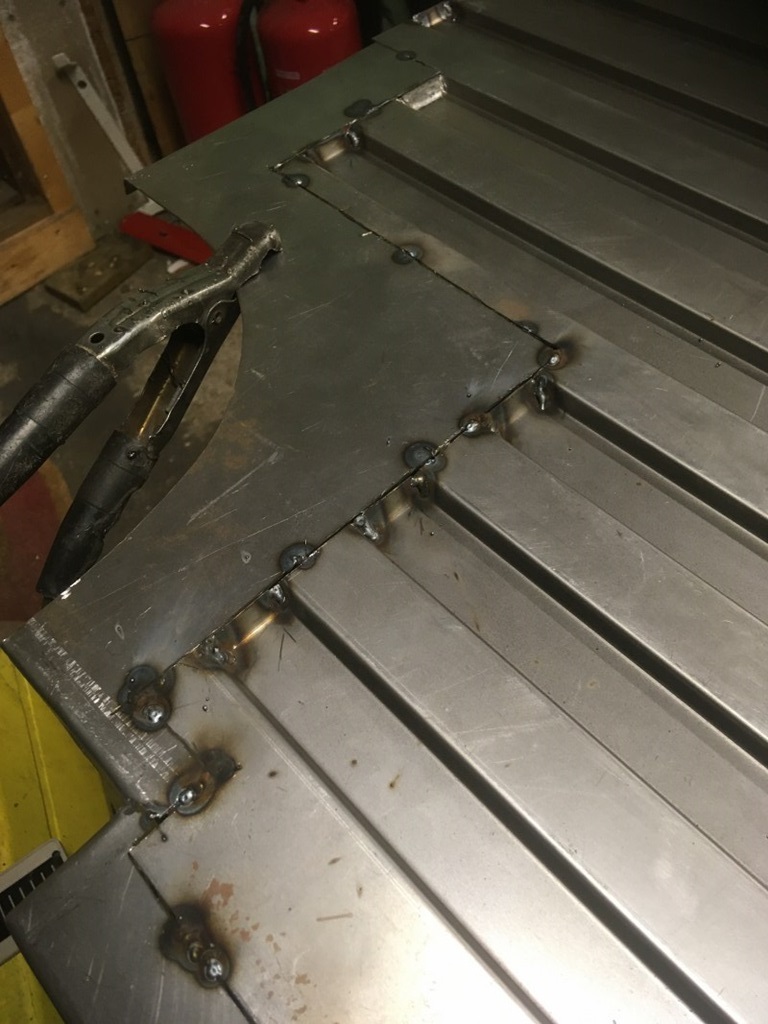
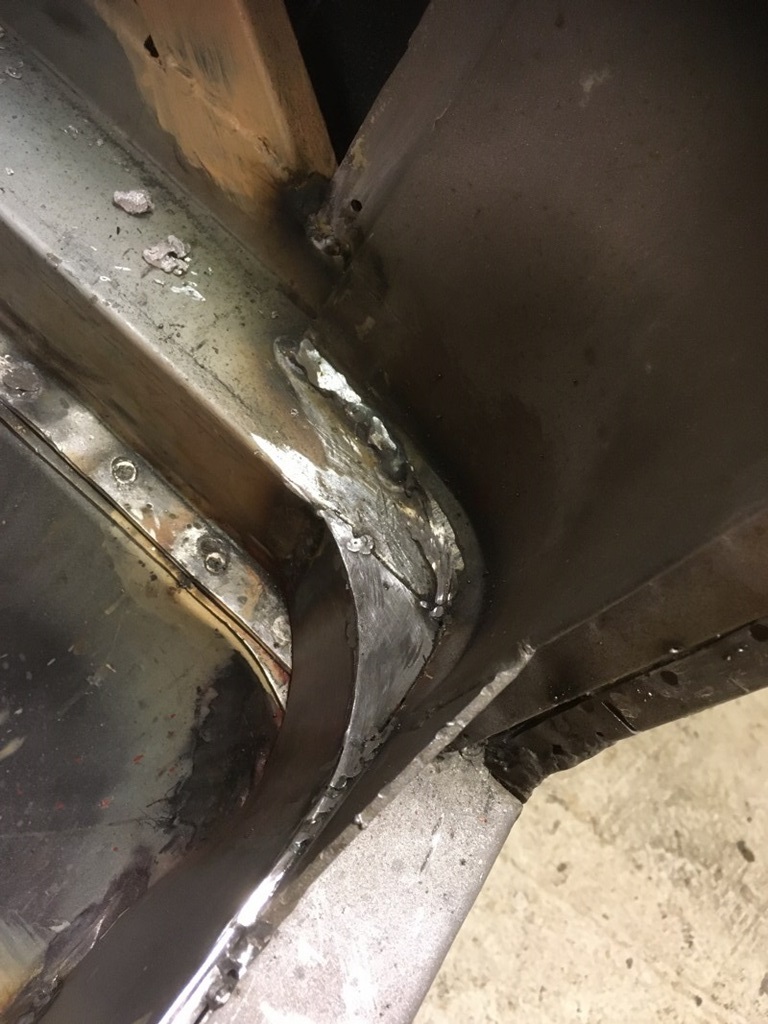
He continued with the cargo area support. Those profiles are self-made, must stronger than the original … and look at the detail, how they are connected. I guess it's finally time to call the body works of this Pick-Up better than original!
Cargo area reinforcement ...
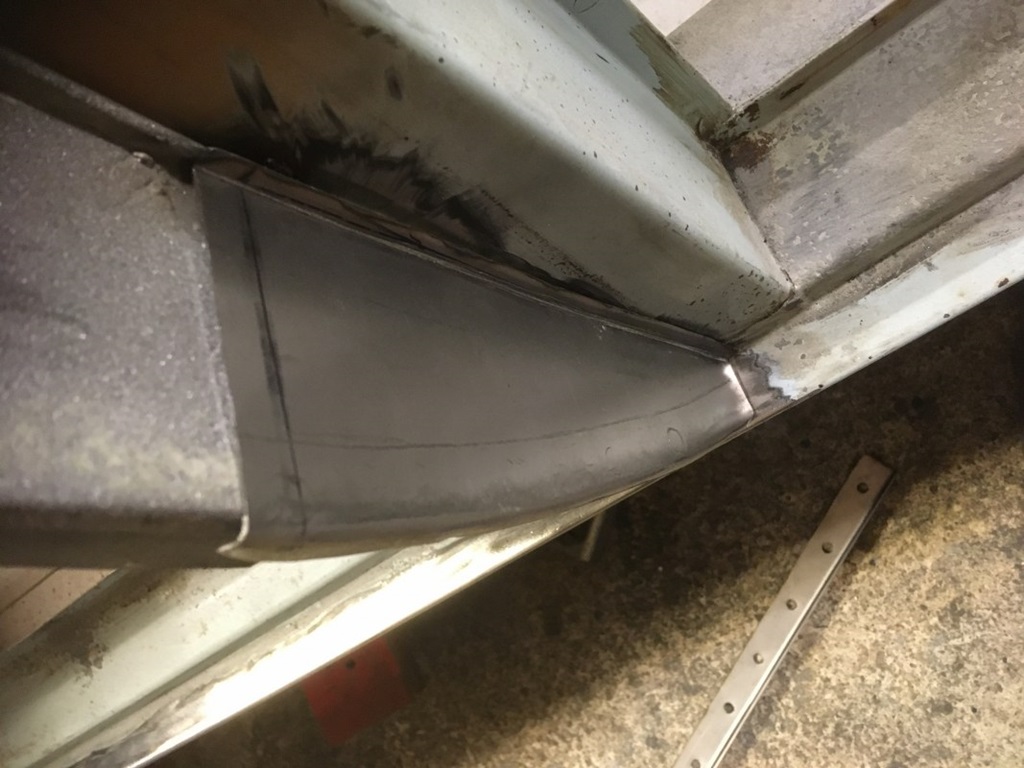
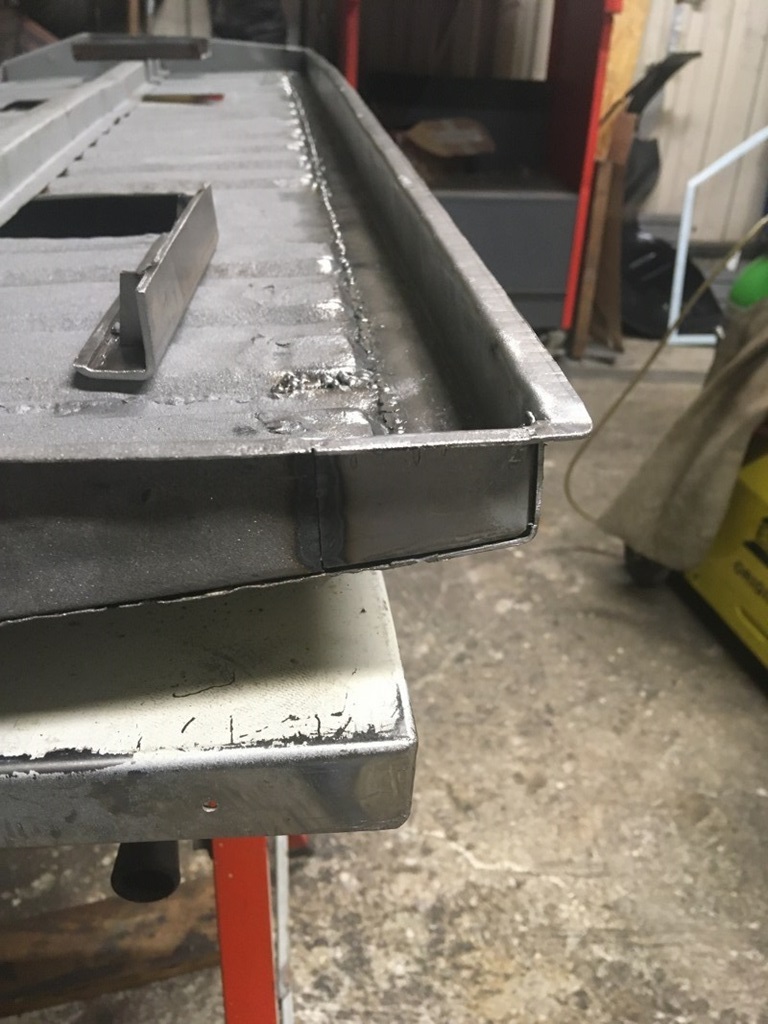
4 March 2020
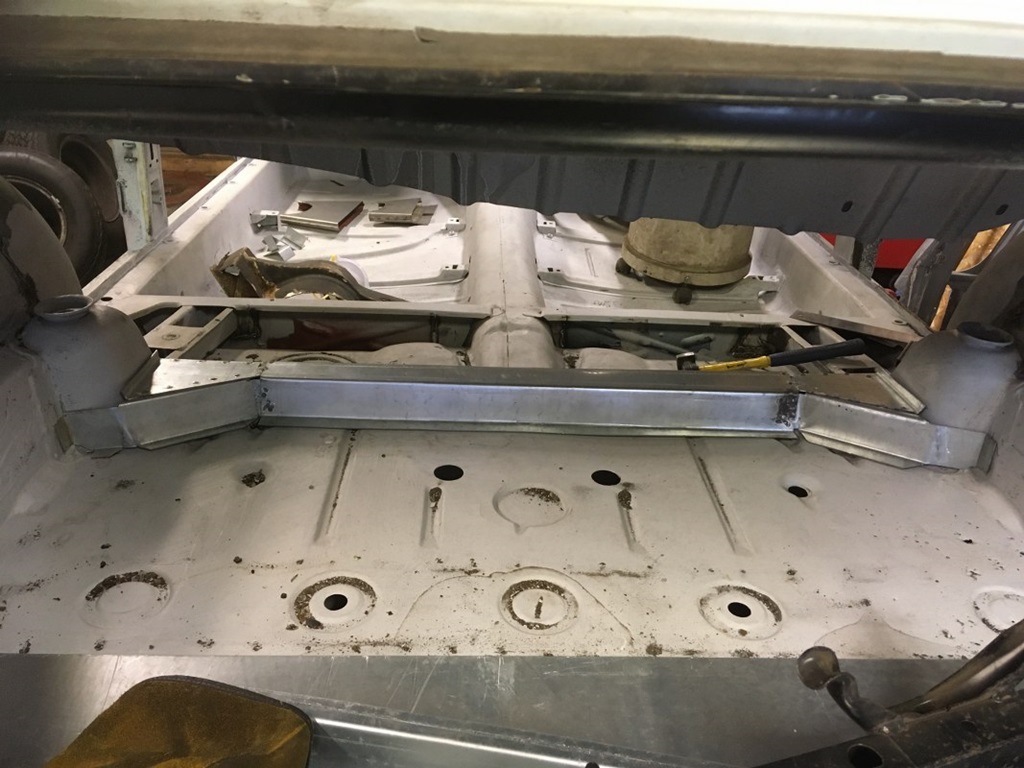
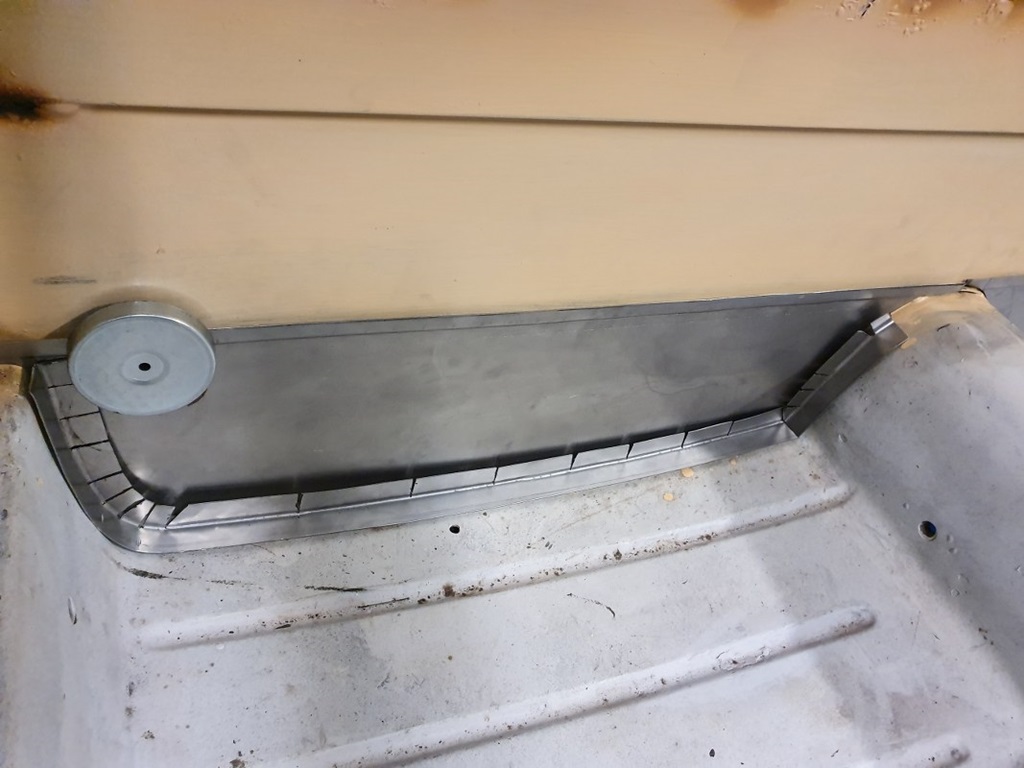
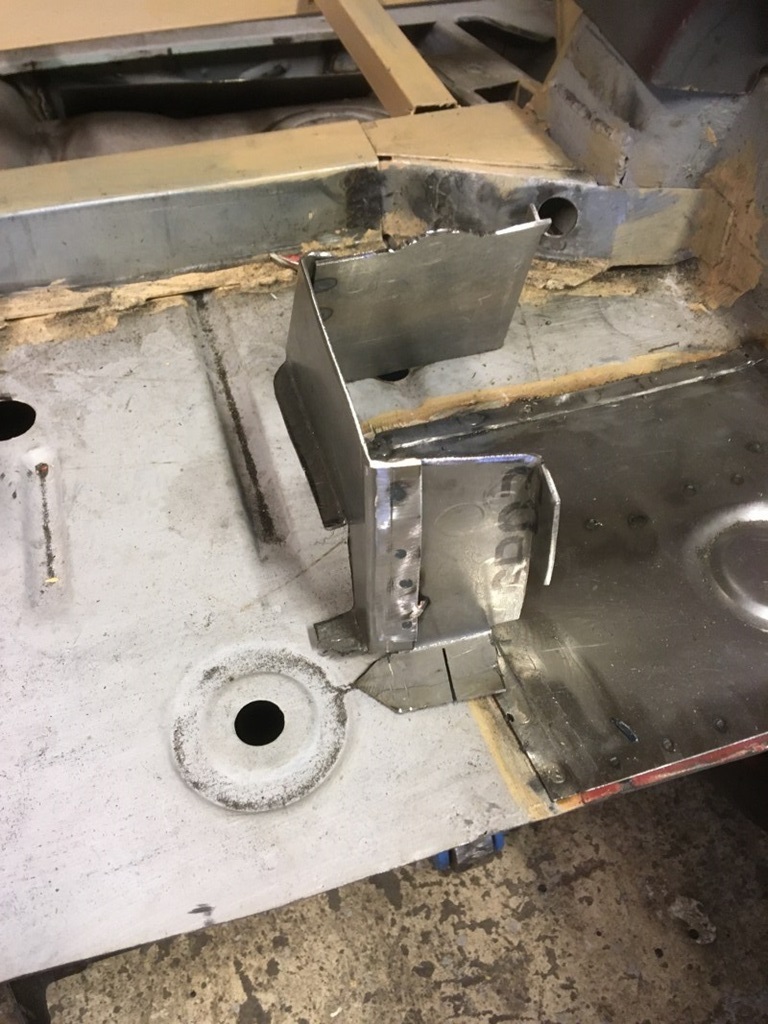
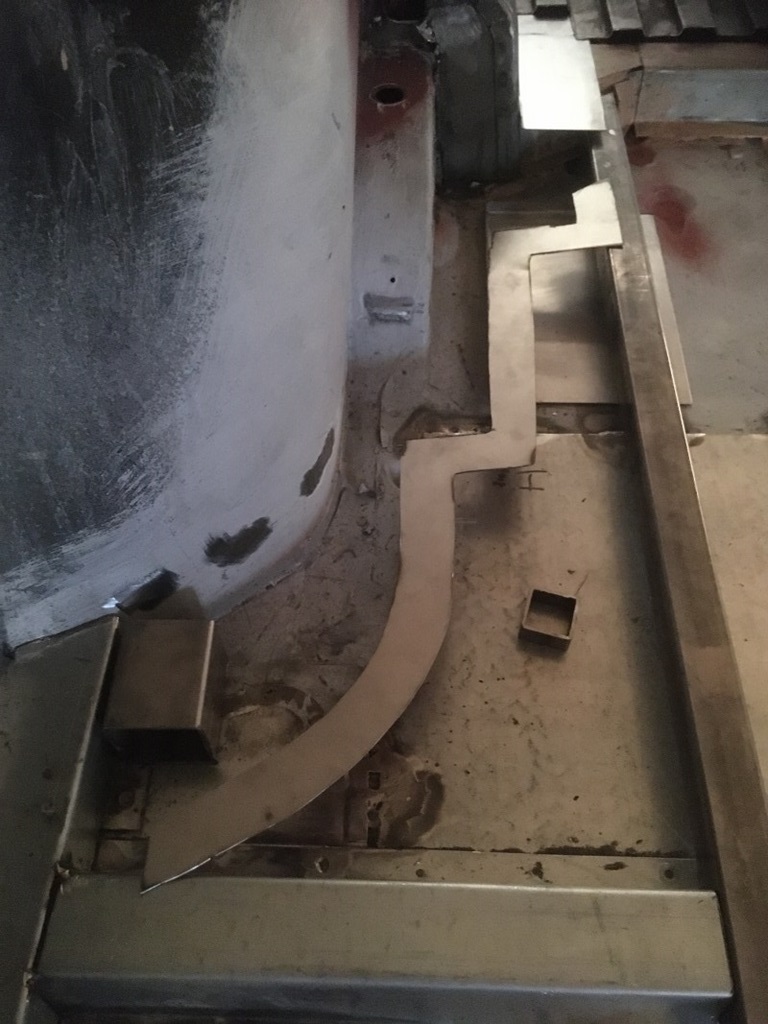
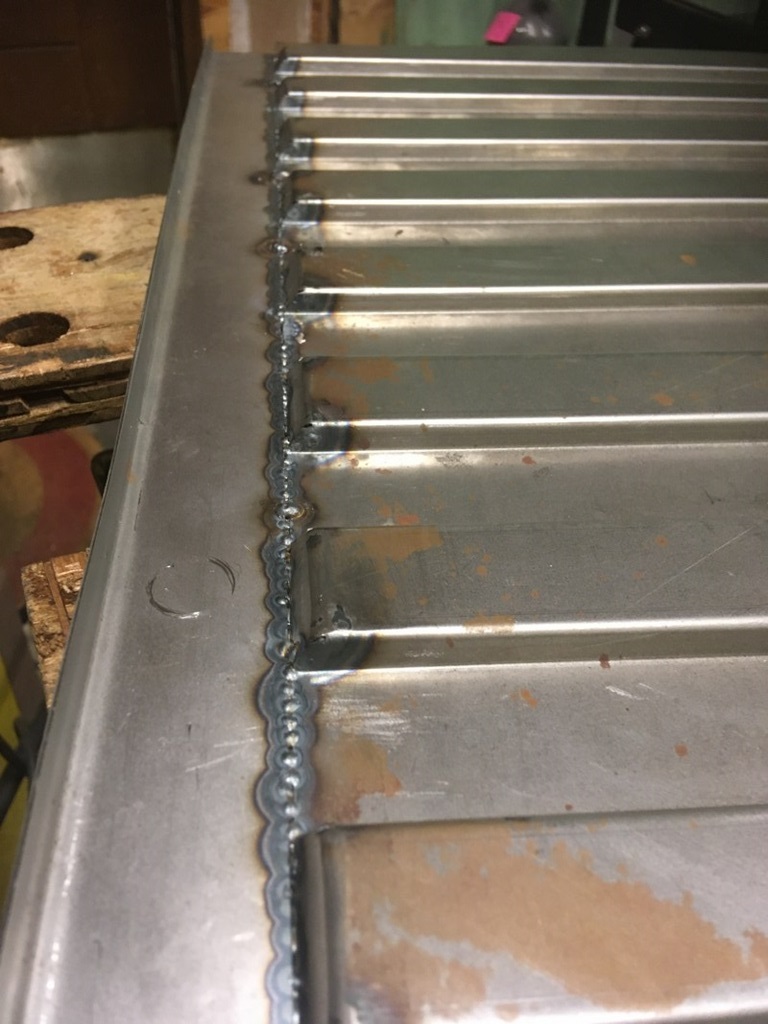
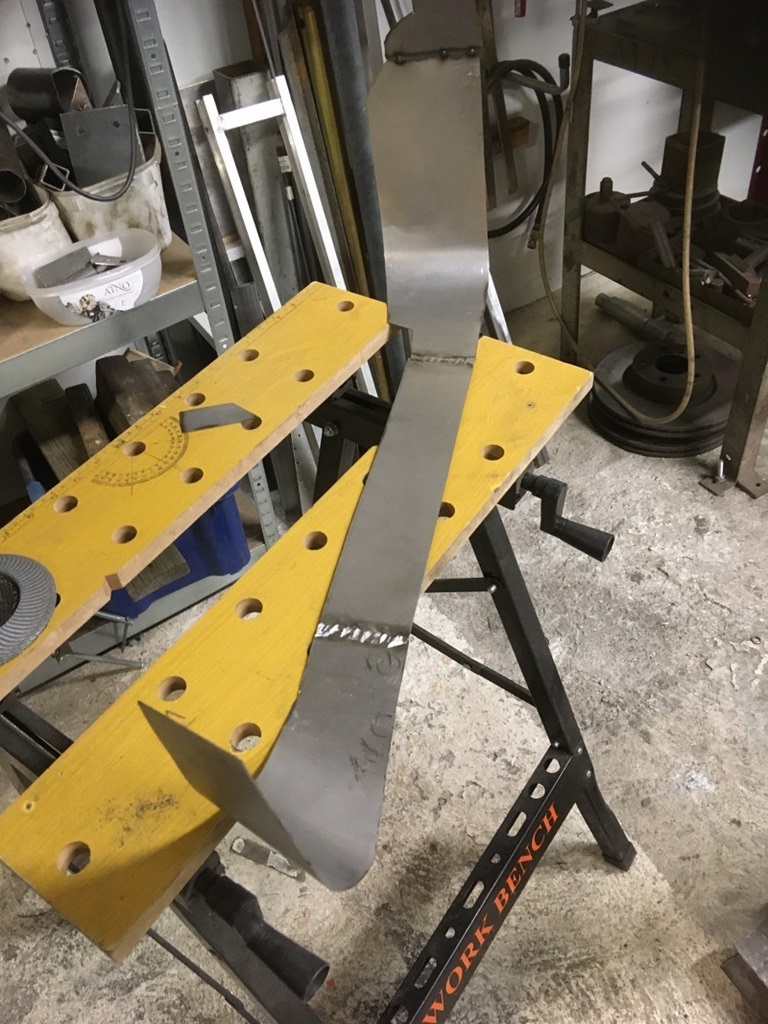
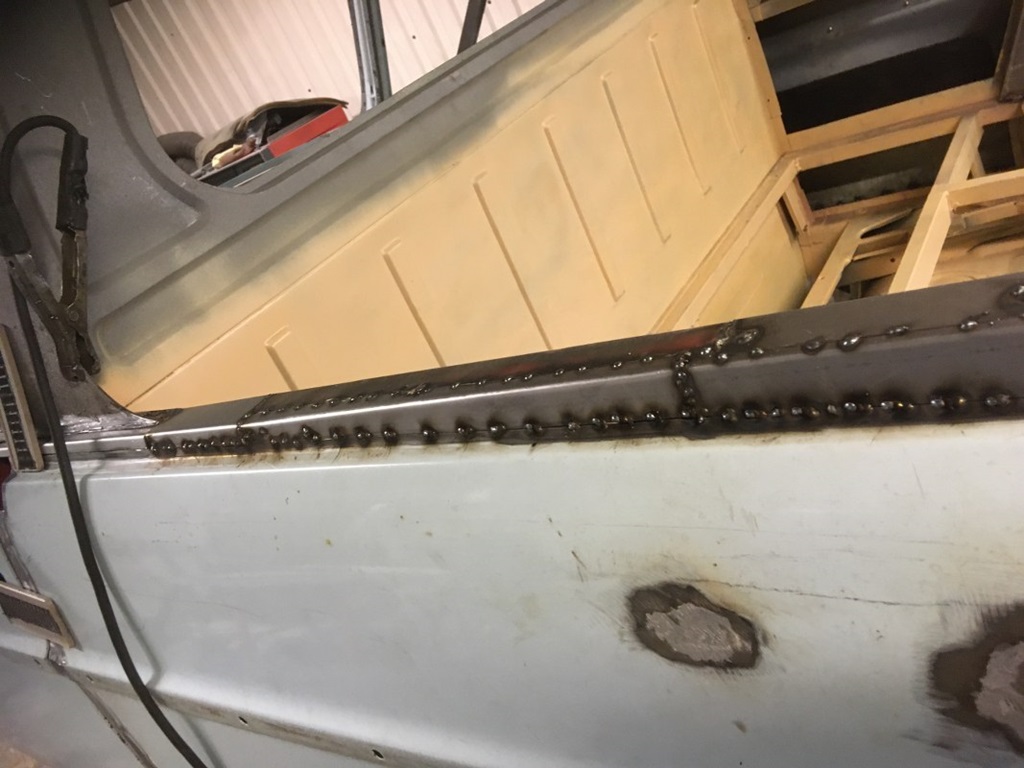
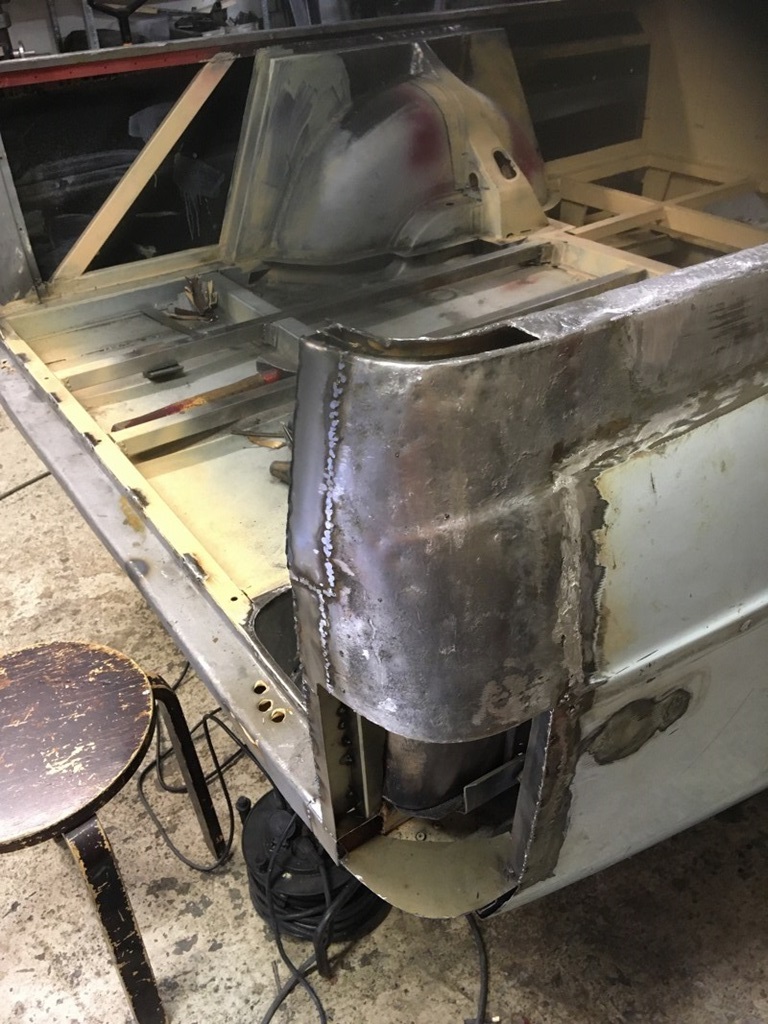
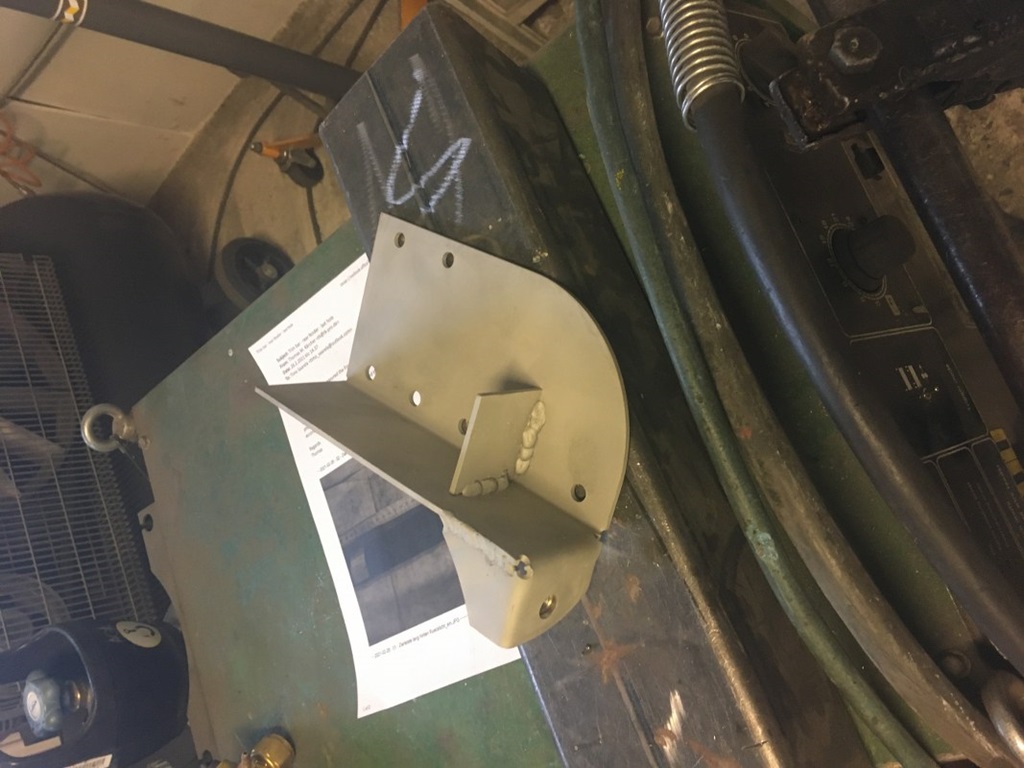
Progress, progress progress! As part of the cargo support structure, Timo designed that great looking part on the photo. Hidden inside will be a 30x50 mm² profile (3mms thick), which will be welded between the shocks. That will increase the body stability enormously … or to quote Timo: "With a pair of extra horses some additional reinforcements could be needed" ;-)

Cargo area continued ...
11 March 2020
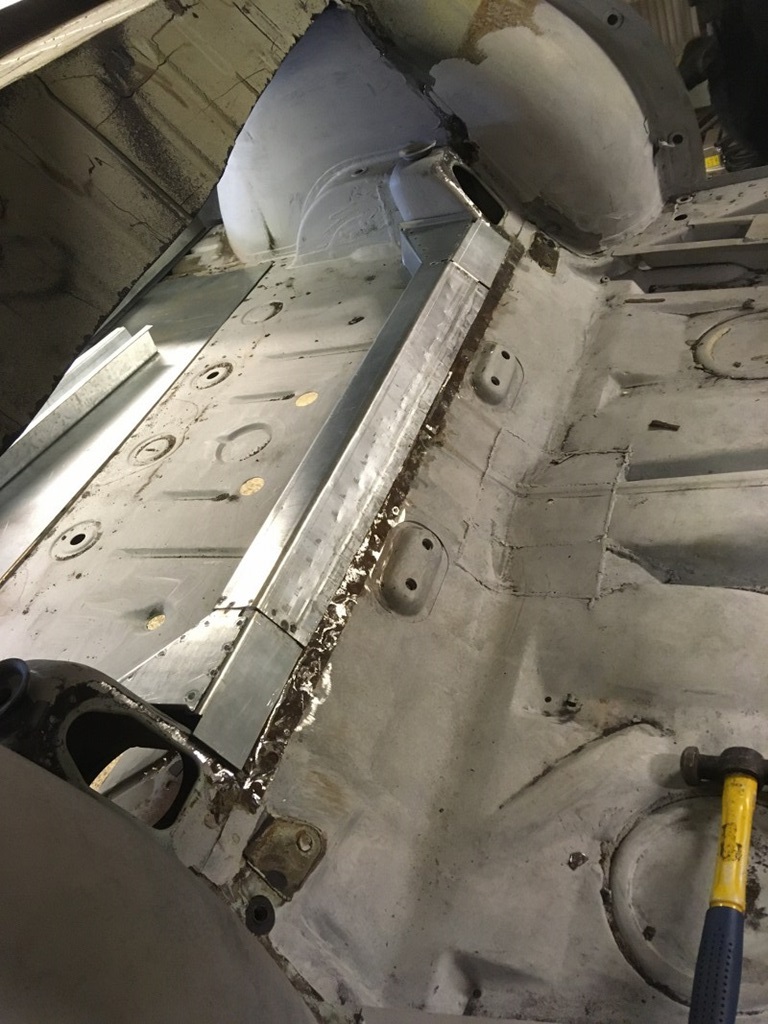
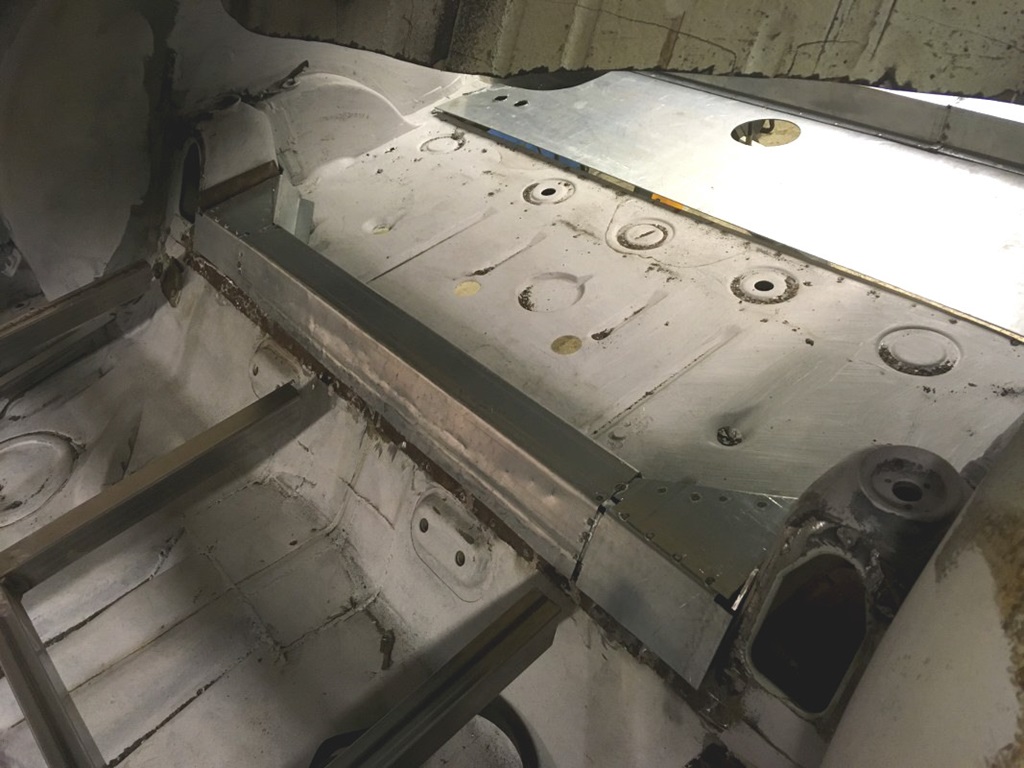
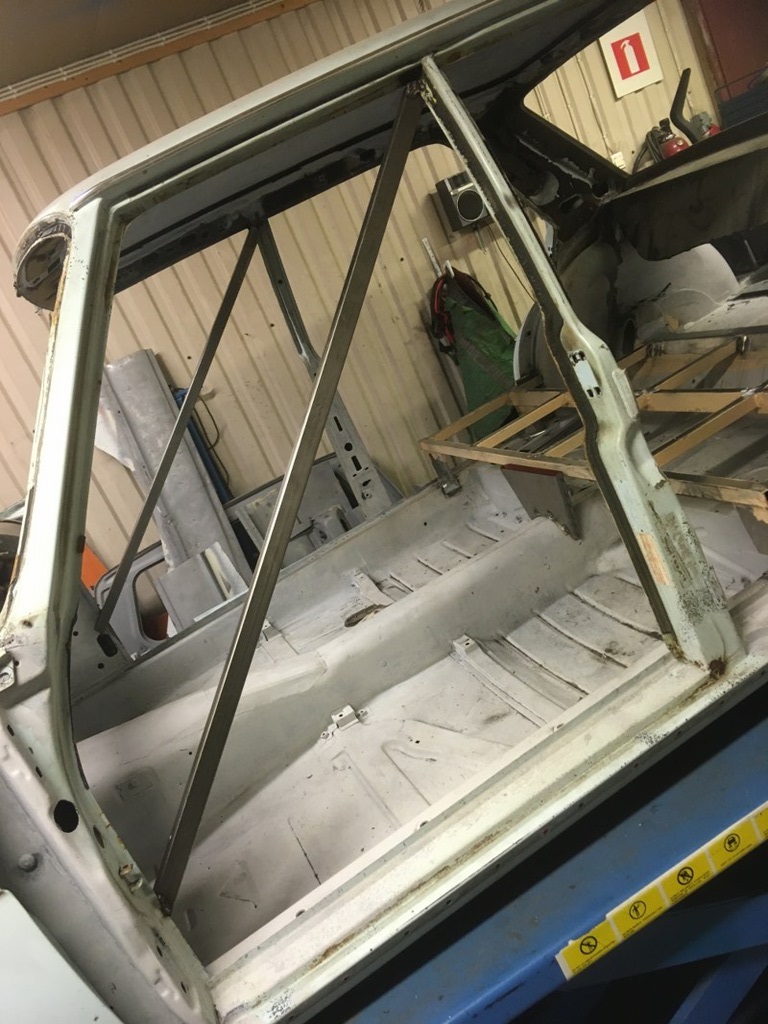
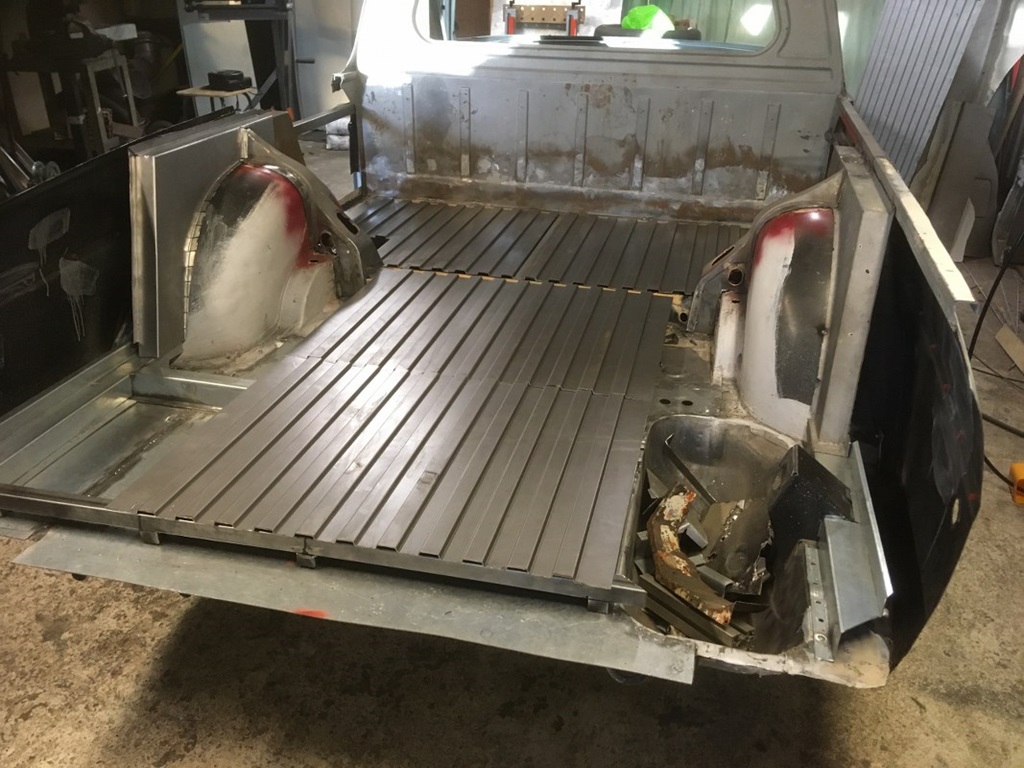
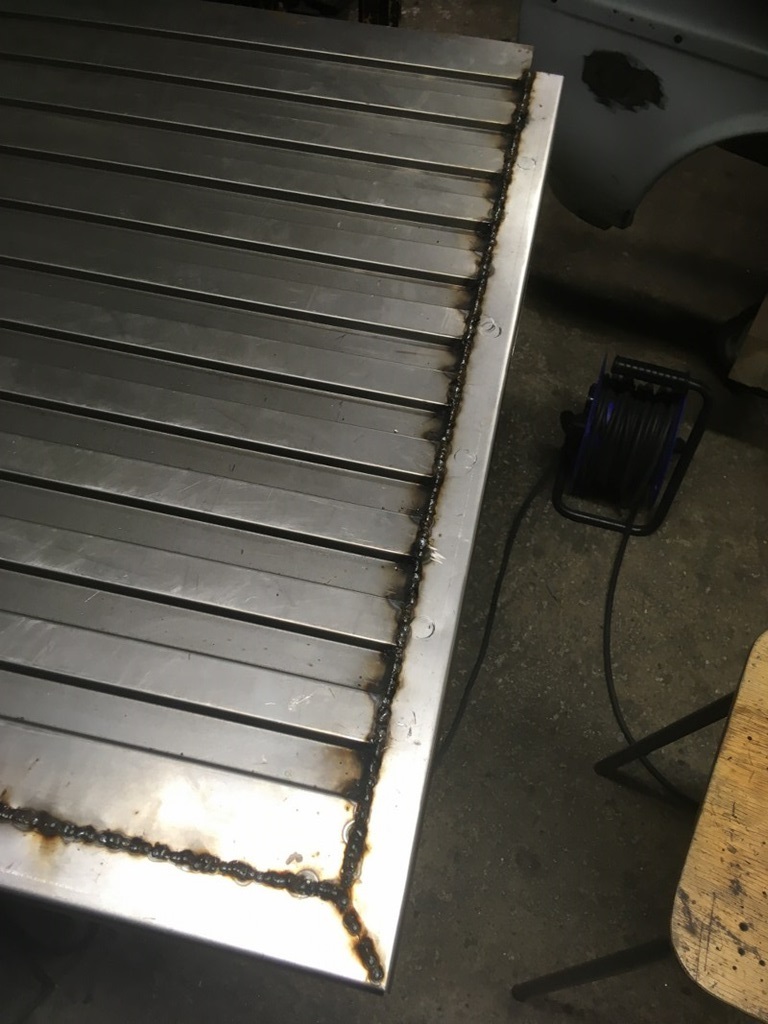
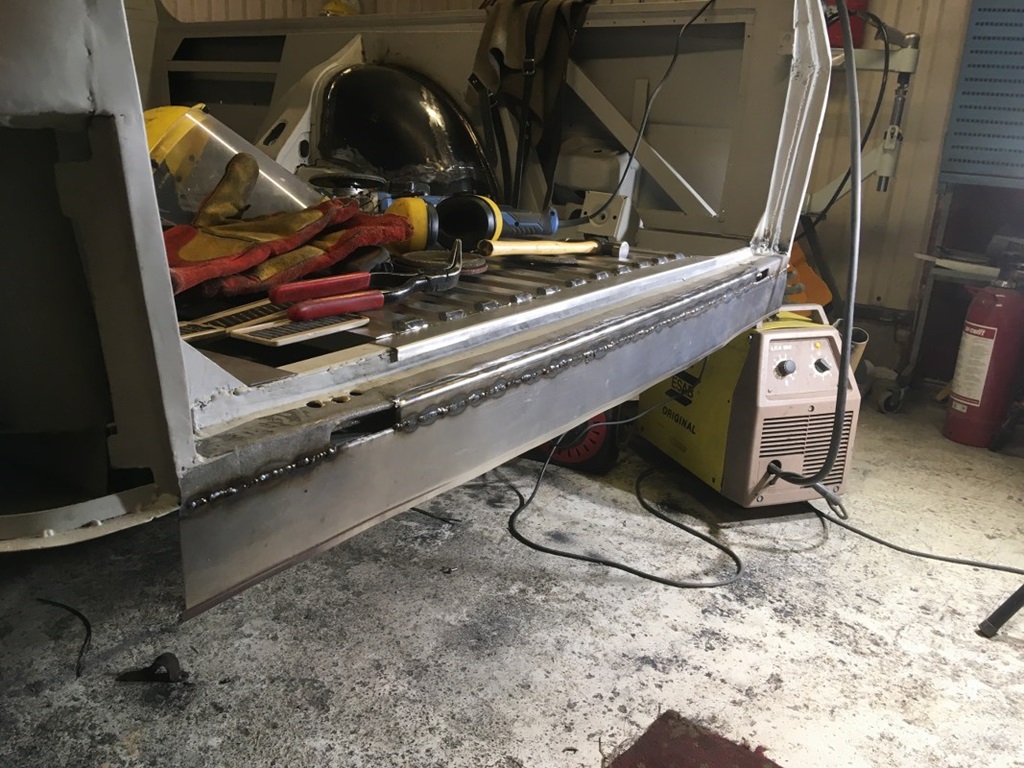
Again more progress on the body works front: The cargo area support takes shape, it looks fantastic and the quality is definitely better than original.
Pick-Up slowly takes shape ...
13 March 2020
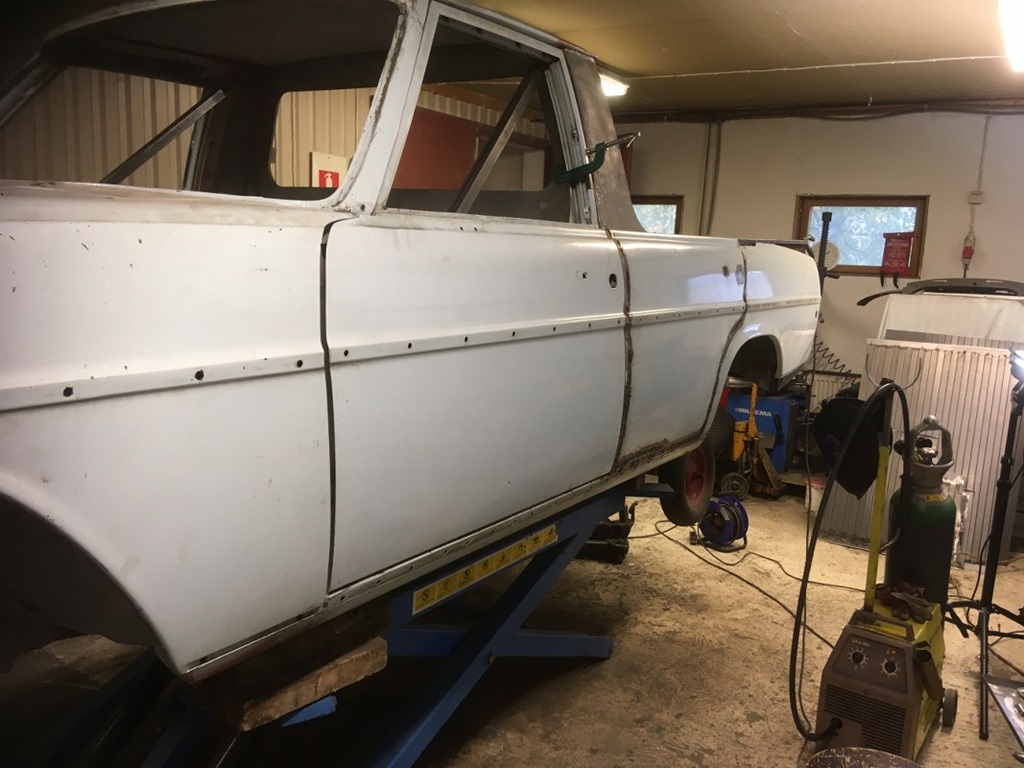
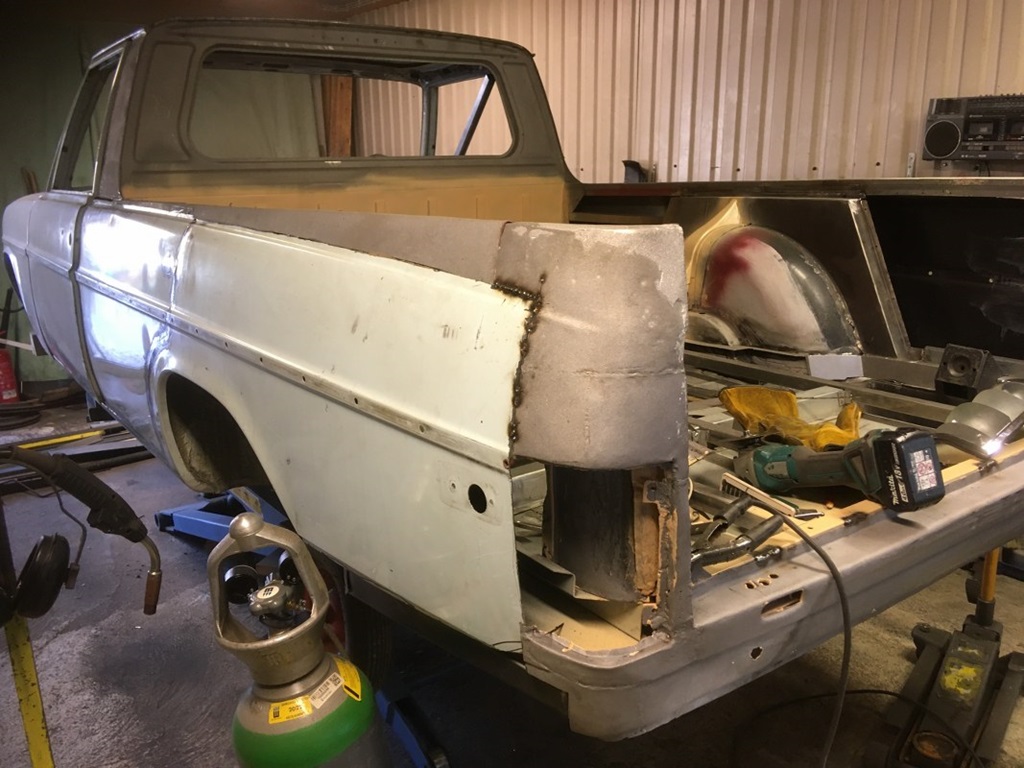
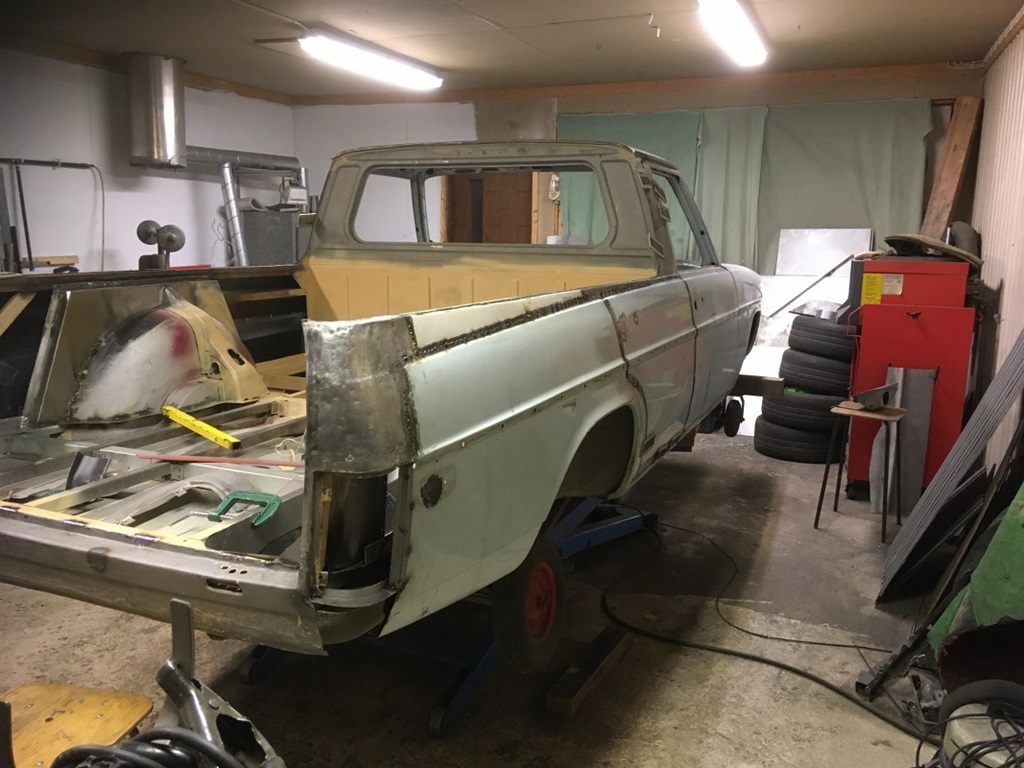
Director's Cut (to quote Timo) ;-)
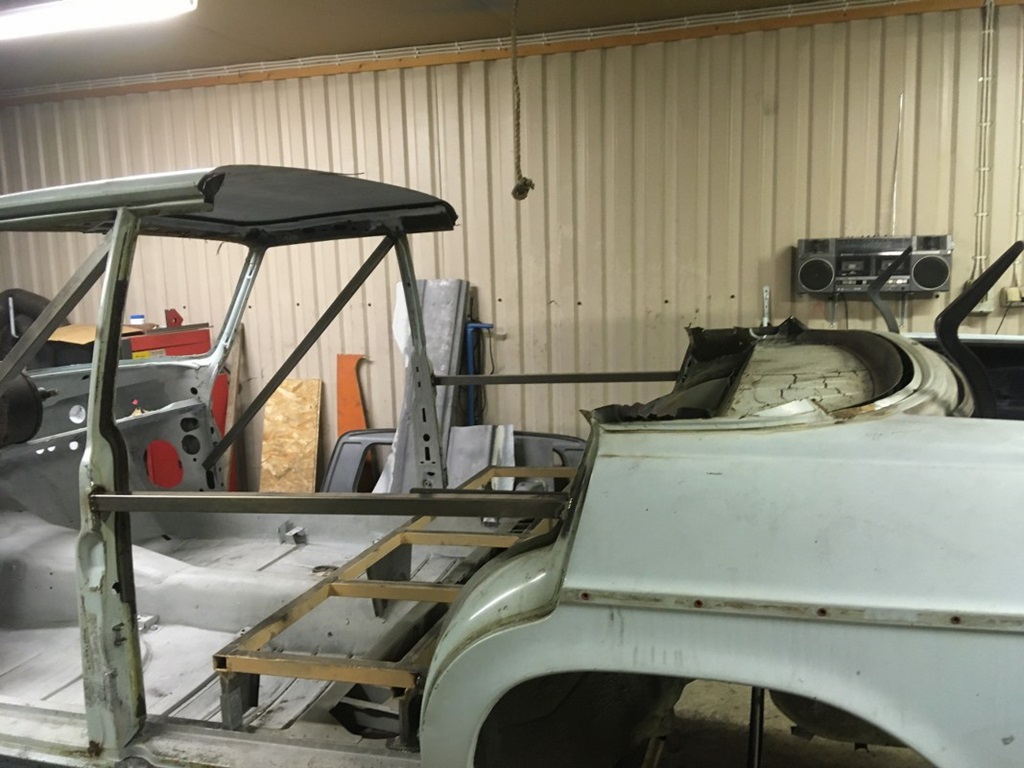
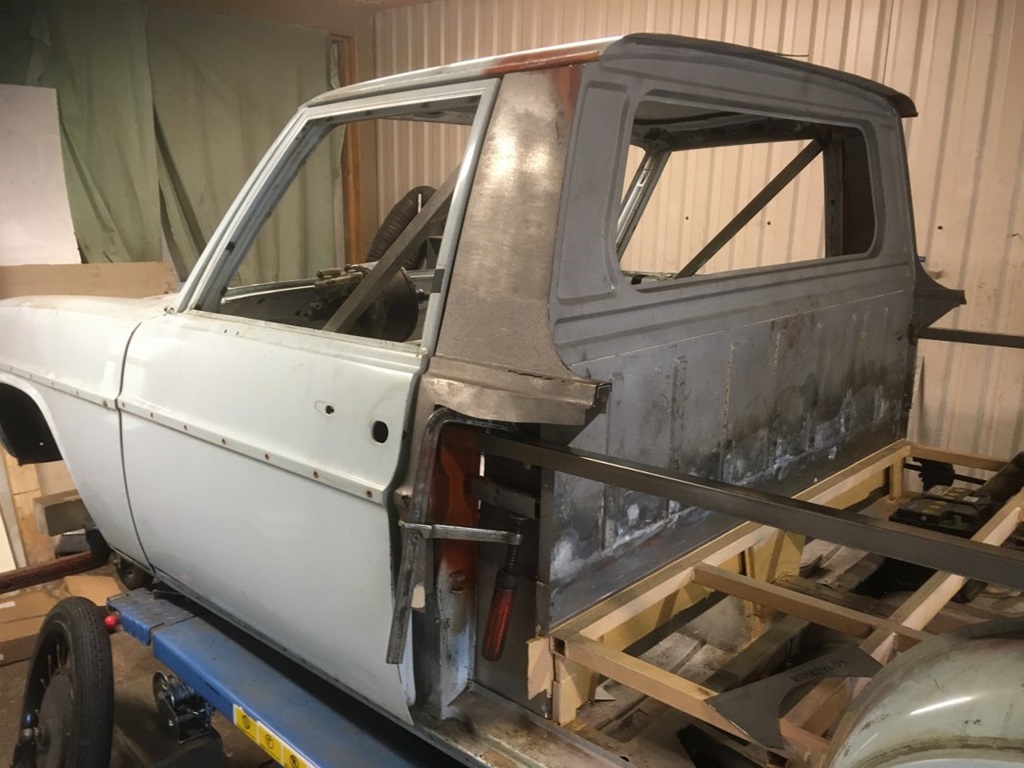
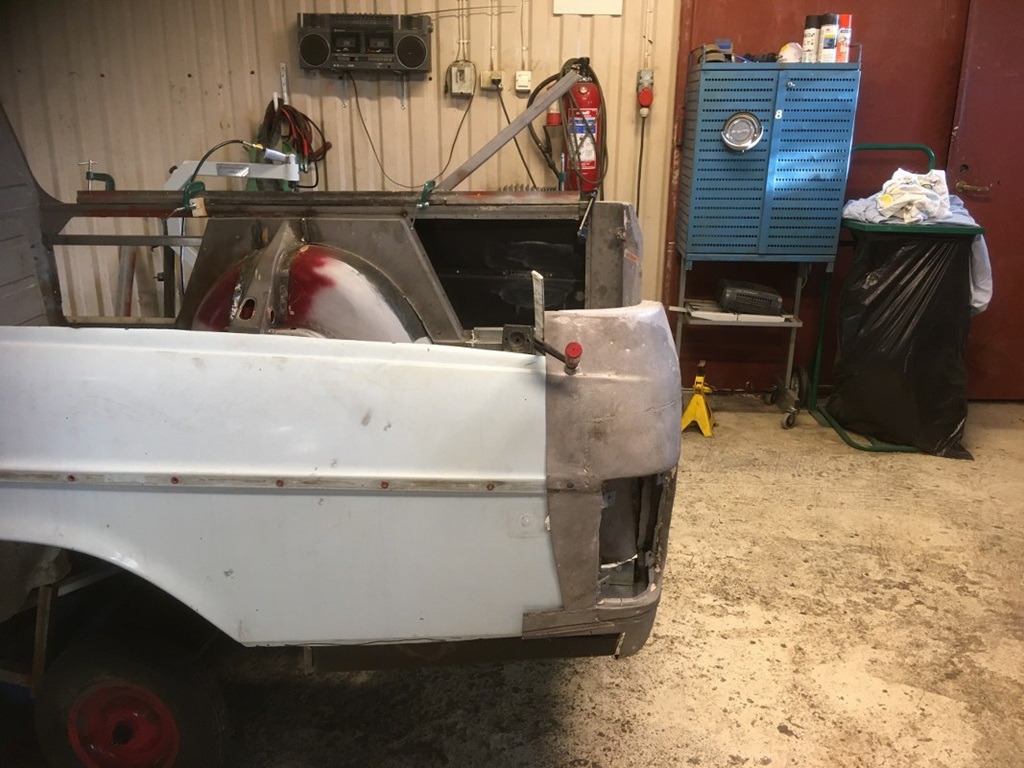
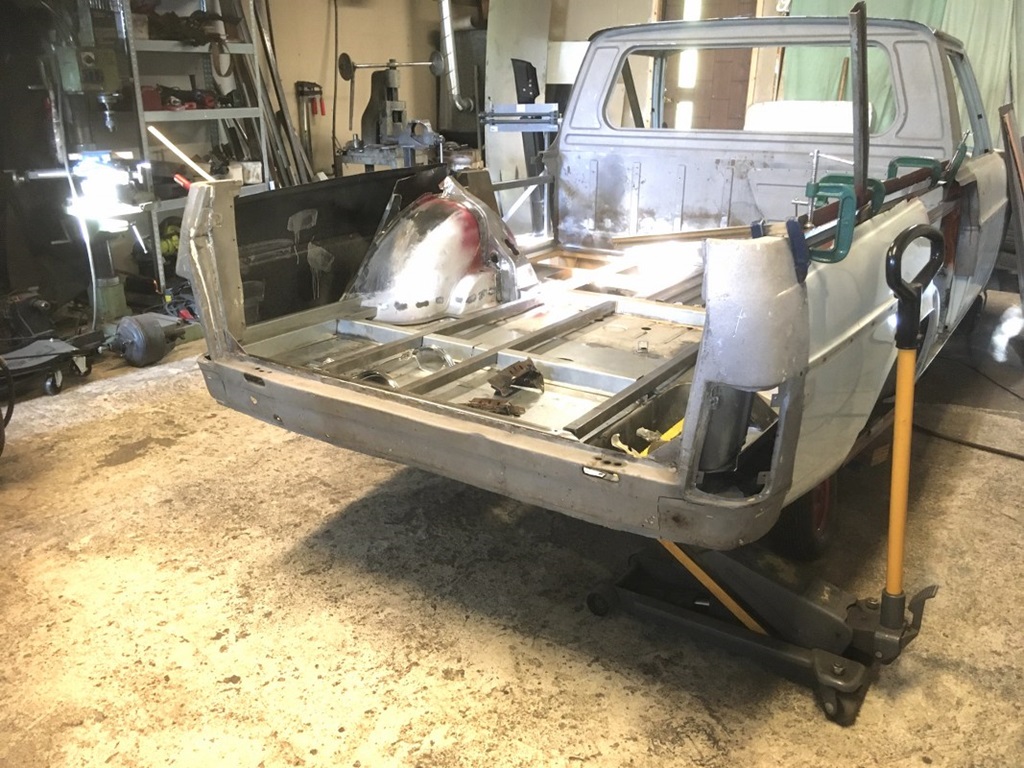
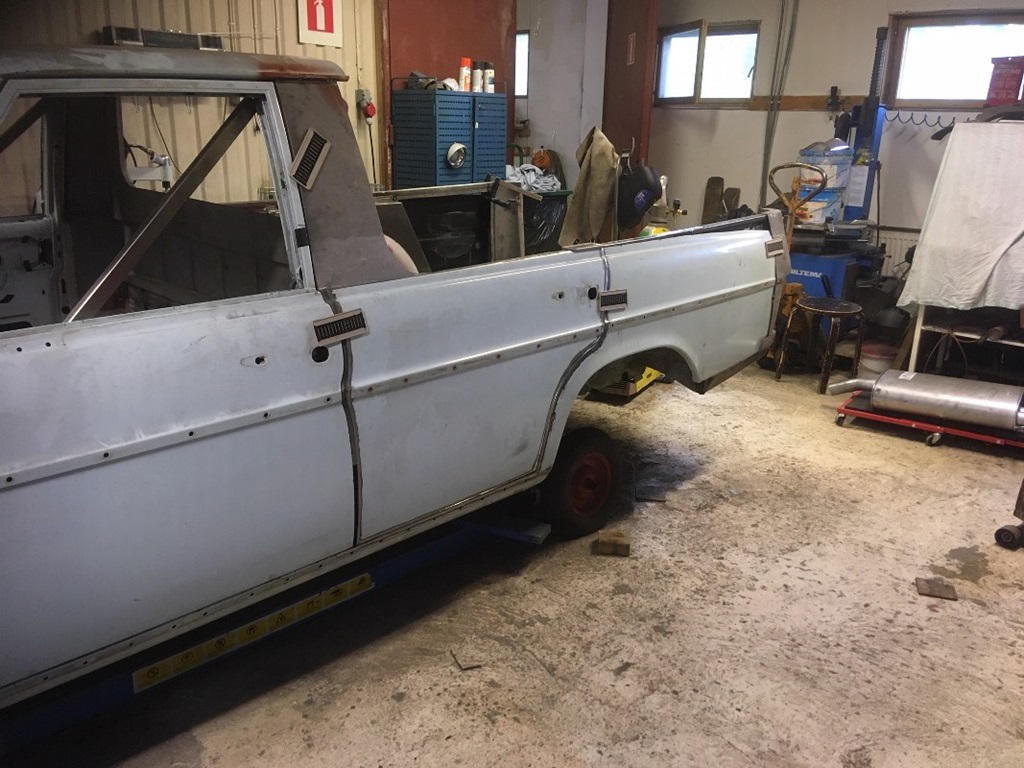
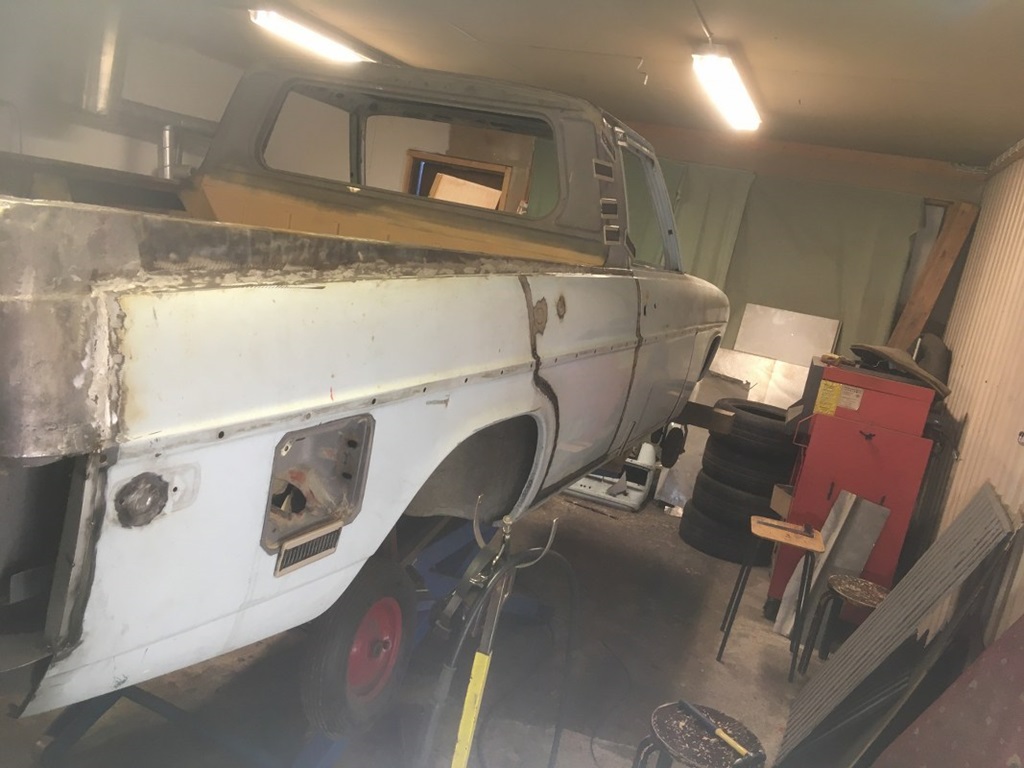
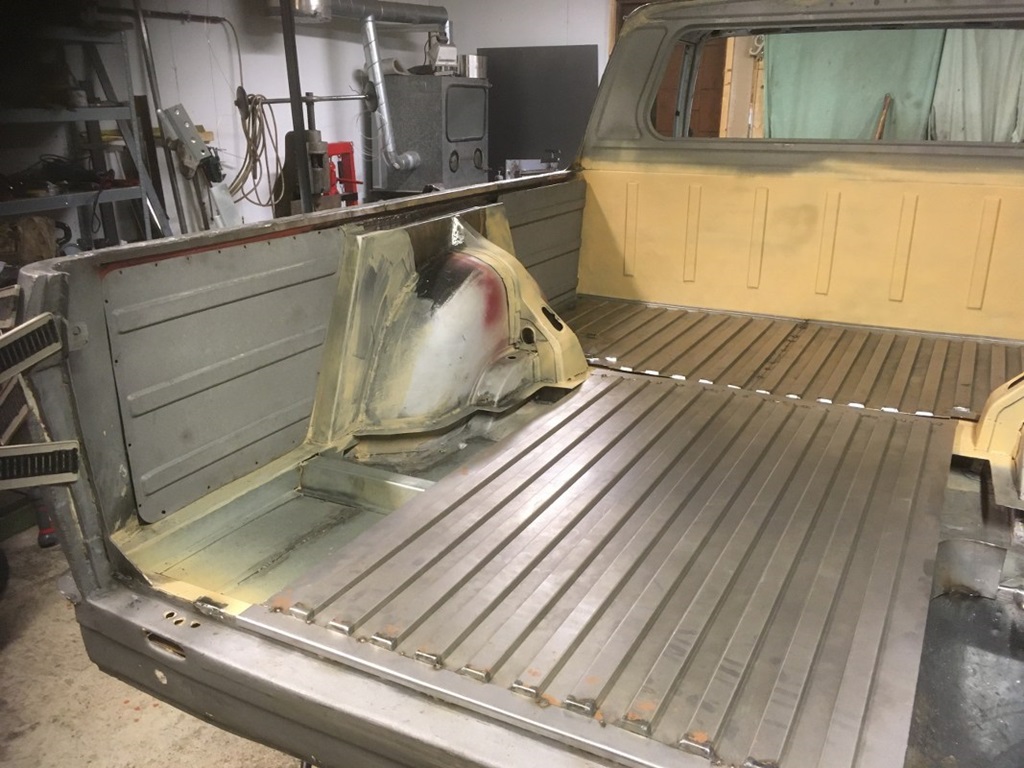
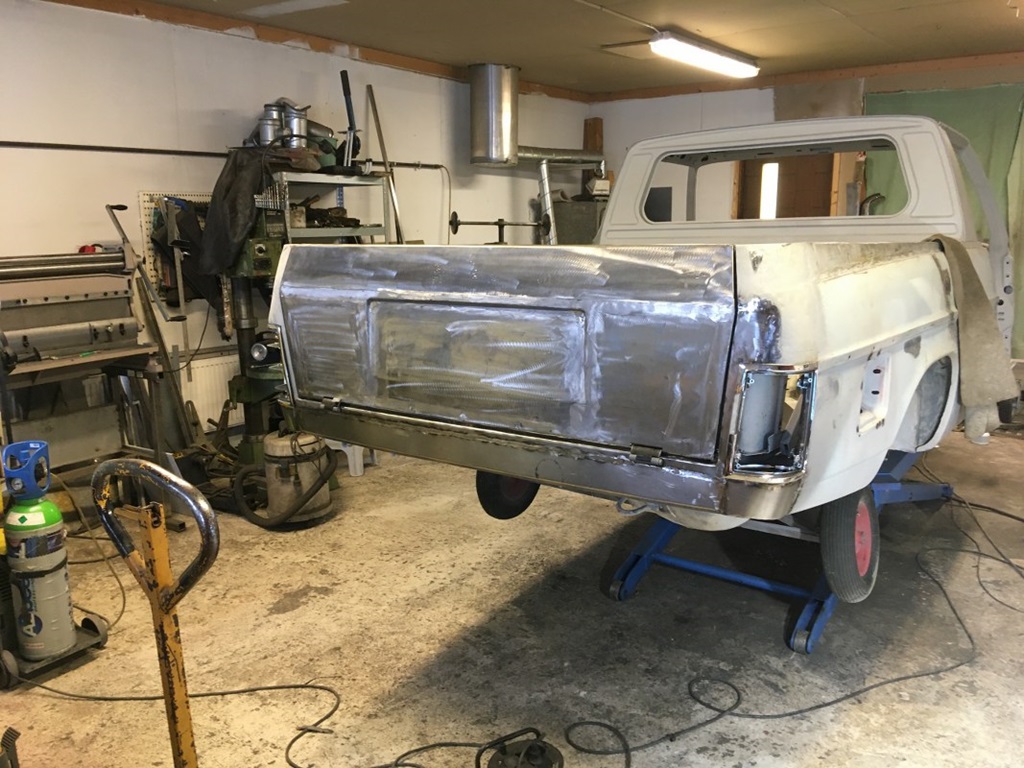
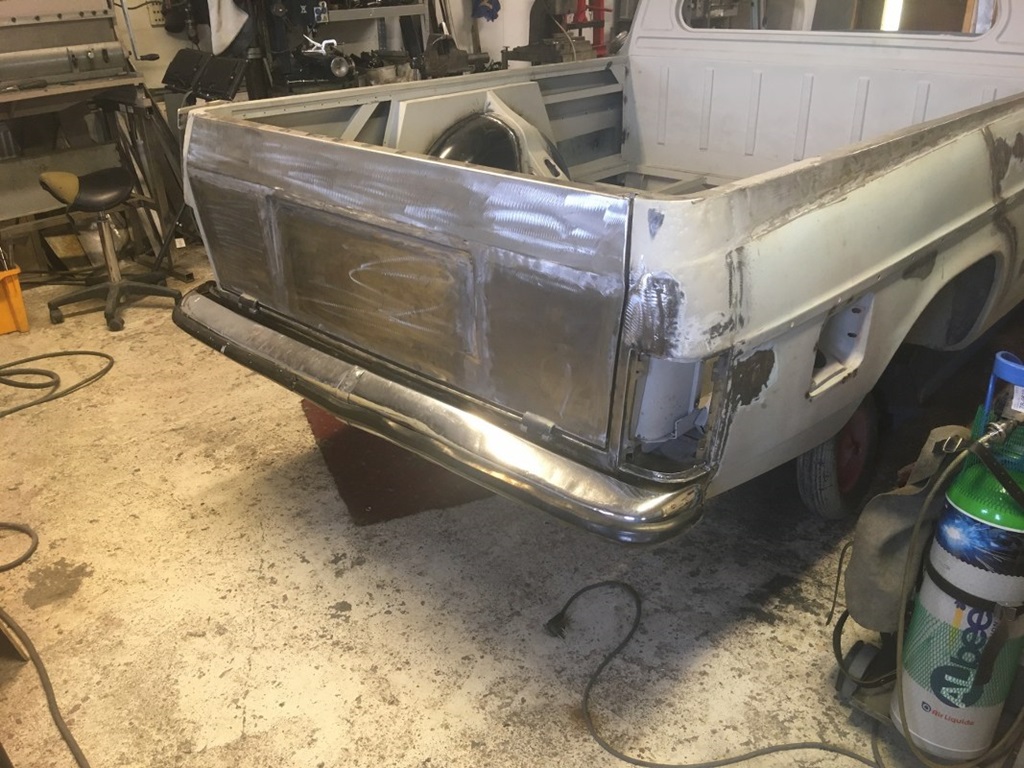
Again fantastic progress from Timo: The Pick-Up (ute) takes shape! Not welded yet, but the roof is taken off, rear passenger wall fits in … just enjoy the pics!
Roof's off and "parts rescue" ...
19 March 2020
Timo could save some original parts from the Pick-Up and had them sandblasted. They were in a reasonble condition, so they can be used.
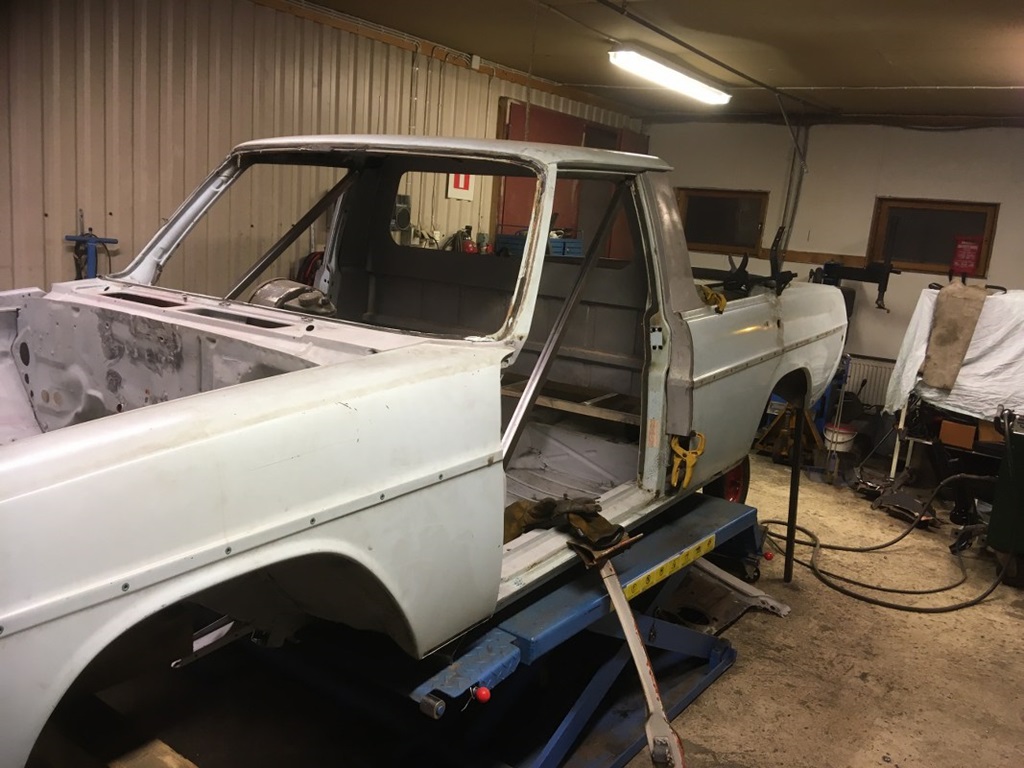
The roof's off now, the car didn't fall into pieces ;-) … so works can continue! Again, but it cannot be mentioned often enough, a great job and I'm very happy, that Timo does it so thoroughly!
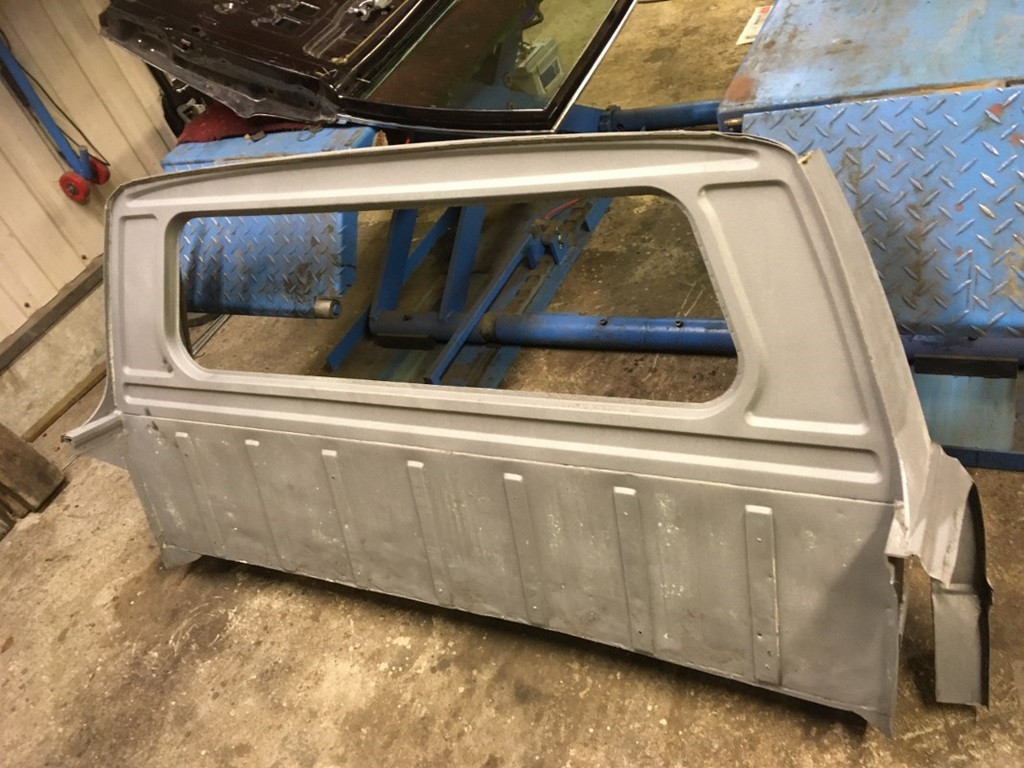
Rear Cabin Wall extended ...
27 March 2020
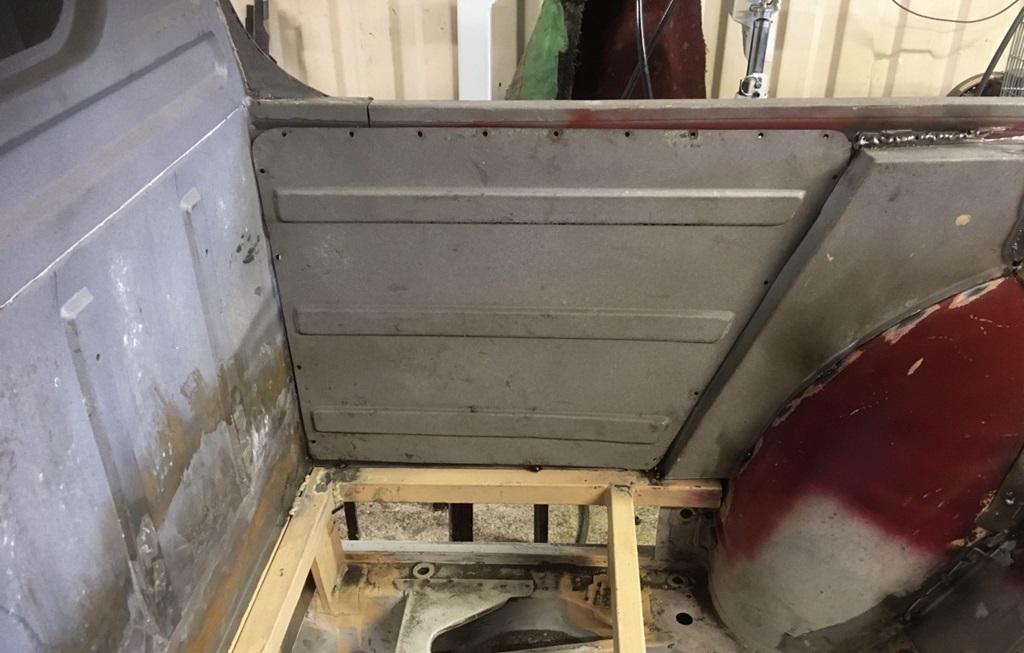
Timo continued his great work with the rear cabin wall. As the bottom 30cms were completely rotten, he made a perfect sheet of metal himself. Fits perfectly and looks great!
Rear Cabin Wall in place ...
9 April 2020
The rear cabin wall is in place now, not welded yet but it looks good. The gap to the doors is perfect and the long, detailed work of Timo pays off now. Or to quote him: "It's like eating an elephant, bit by bit" ;-)
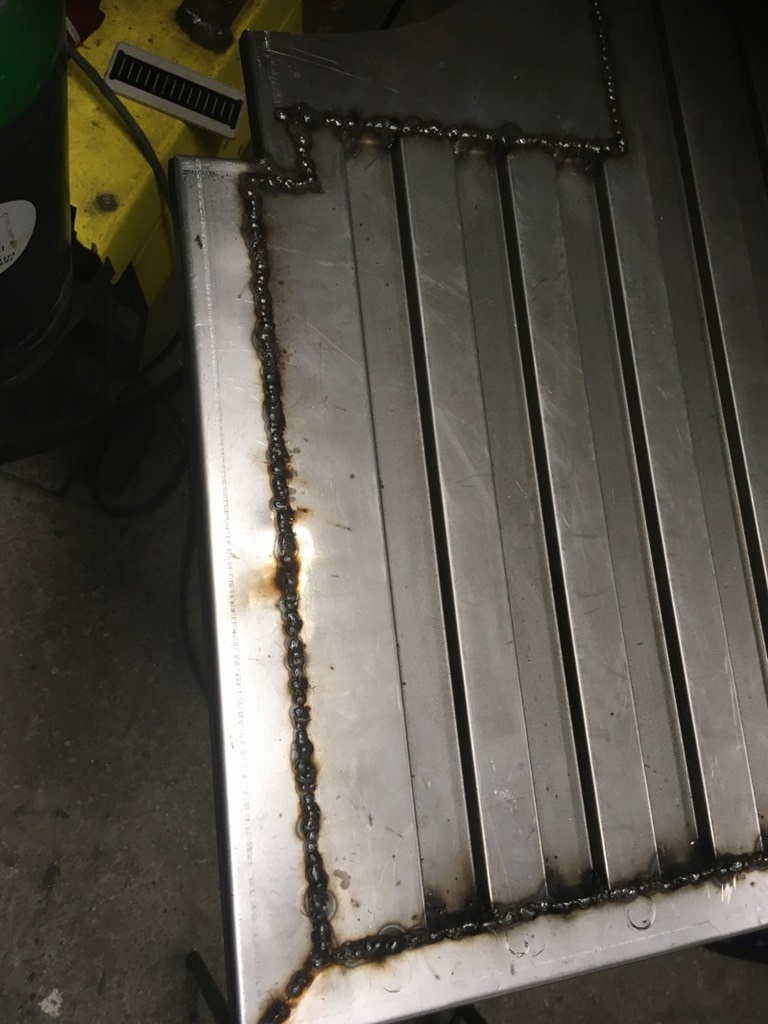
Cargo area cont'd ...
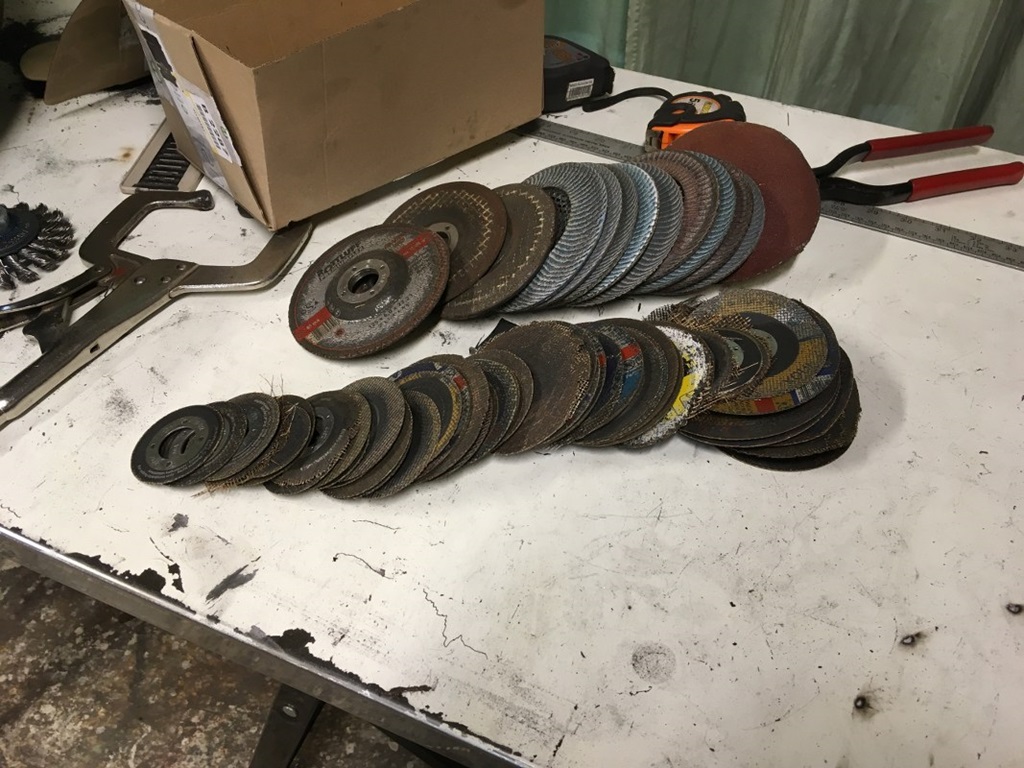
Timo was "productive" over Easter, things take shape. Still only spot-welded, but it is a fantastic progress. He wrote to me, that he used 50 flexi discs, one bottle of welding gas and quite many meters steel profile and sheet metal …
13 April 2020
Rear cabin wall completed ...
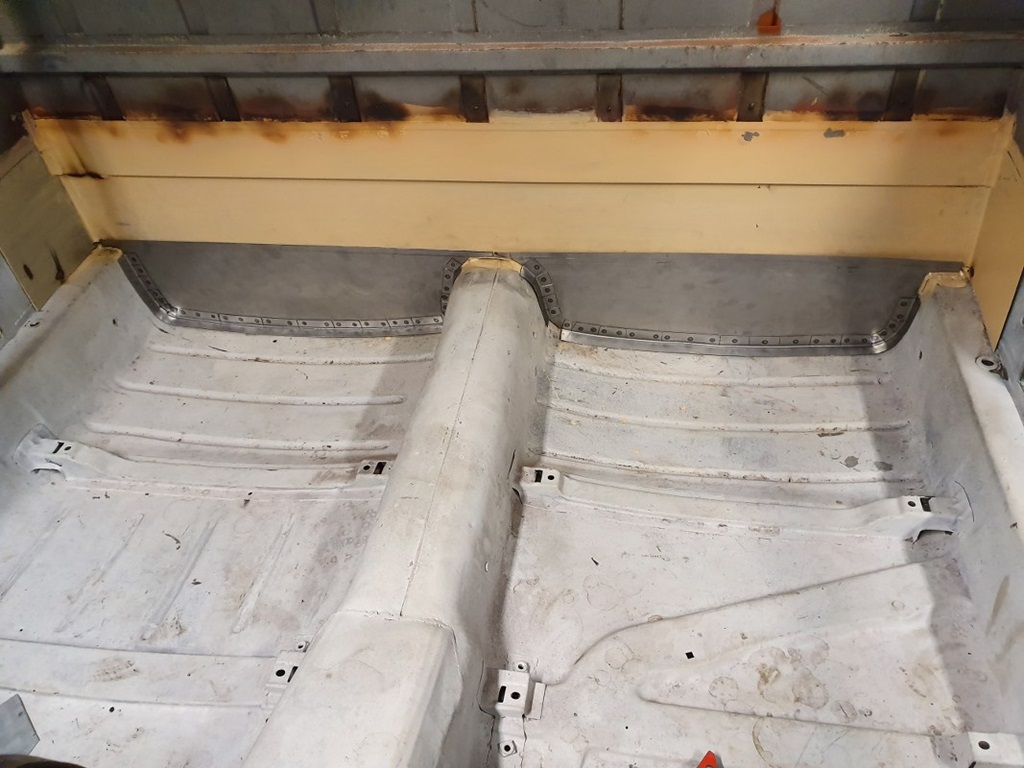
The gap between the rear cabin wall and the car's floor is now "filled up" ... again really nice craftmanship ...
23 April 2020
Cargo floor panels manufactured ...
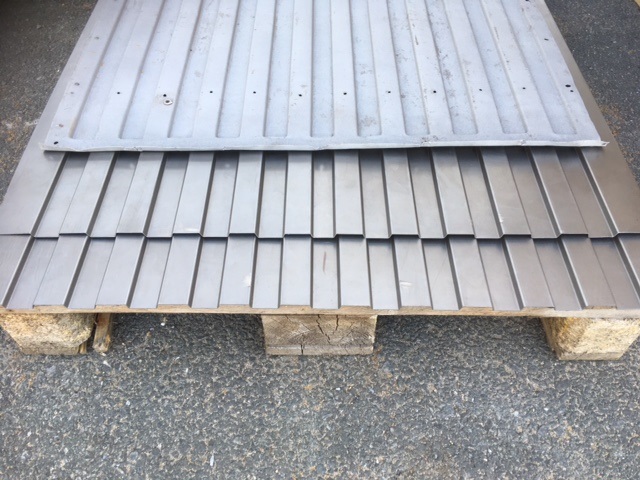
As I tried to get those floor panels manufactured in Germany, I was so shocked about the price quoted. So the original plan was to ask my furniture maker to produce a nice wooden floor for the pick-up. However that would be a great deviation of "original".
But Timo did another great effort: he found a company, that could produce the raw profile panels for the cargo floor ... even at a reasonable price. So this part will also be original ... no need to mention, that the original pick-up panels were rotten too. Thanks for that!
8 May 2020
Cargo area cont'd ...
It turned out to be pretty time-consuming, this cargo area. Lots and lots of smaller pieces that have to be fit perfectly as they will be visible later. Unfortunately many parts of the pick-up are so rotten, that they have to be "re-invented" ... Timo is doing a great job, but - understandingly - takes longer than expected (which is THE ONE constant all over this project!)
11 May 2020
Parts self-made ...
In case anyone still wonders why this project takes time, here some more reasons. Many many parts have to be redone from scratch as the Pick-Up parts are useless. In the last 30 days roughly 150 hours went into that. I think this is fantastic work from Timo and it will make this Pick-Up a high-end car!
26 May 2020
Cargo area cont'd ...
More and more panels are finished by Timo, the rear end is taking shape. Quote Timo:
Just made some calculations. 😊
- over 100 pcs small and large made from steel sheet and tube.
- 10 new/used MB parts, most of them had to fixed some way
- I guess some 30-50 pcs parts be made...
No words to be added ...
2 June 2020
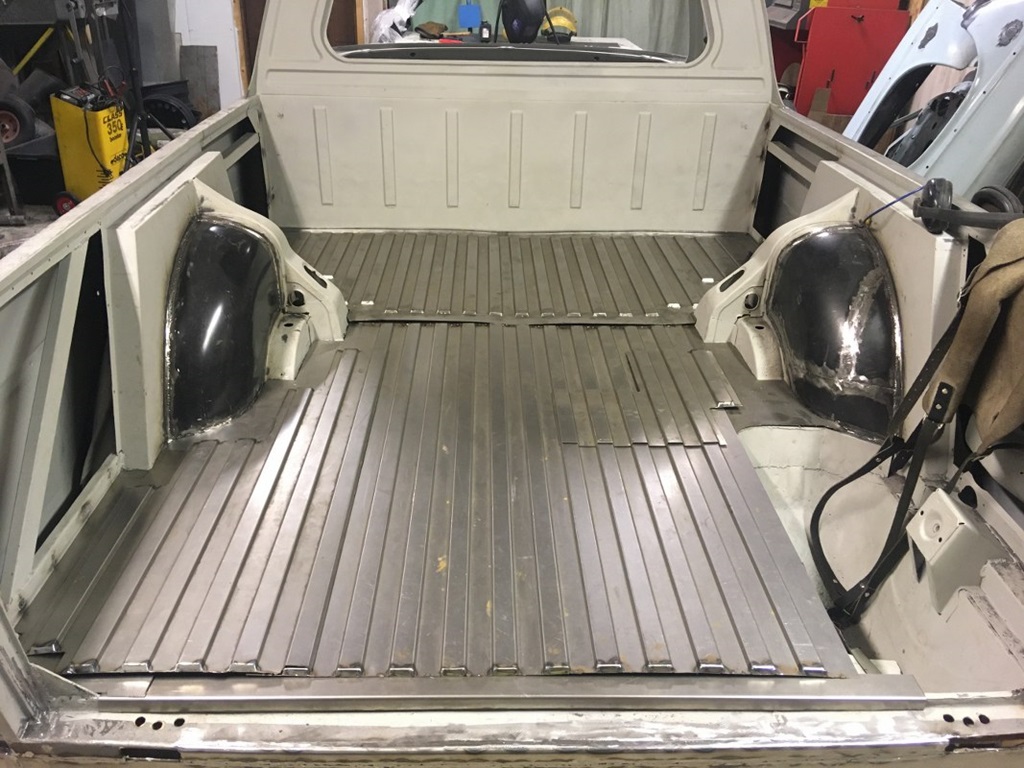
Cargo area takes shape ...
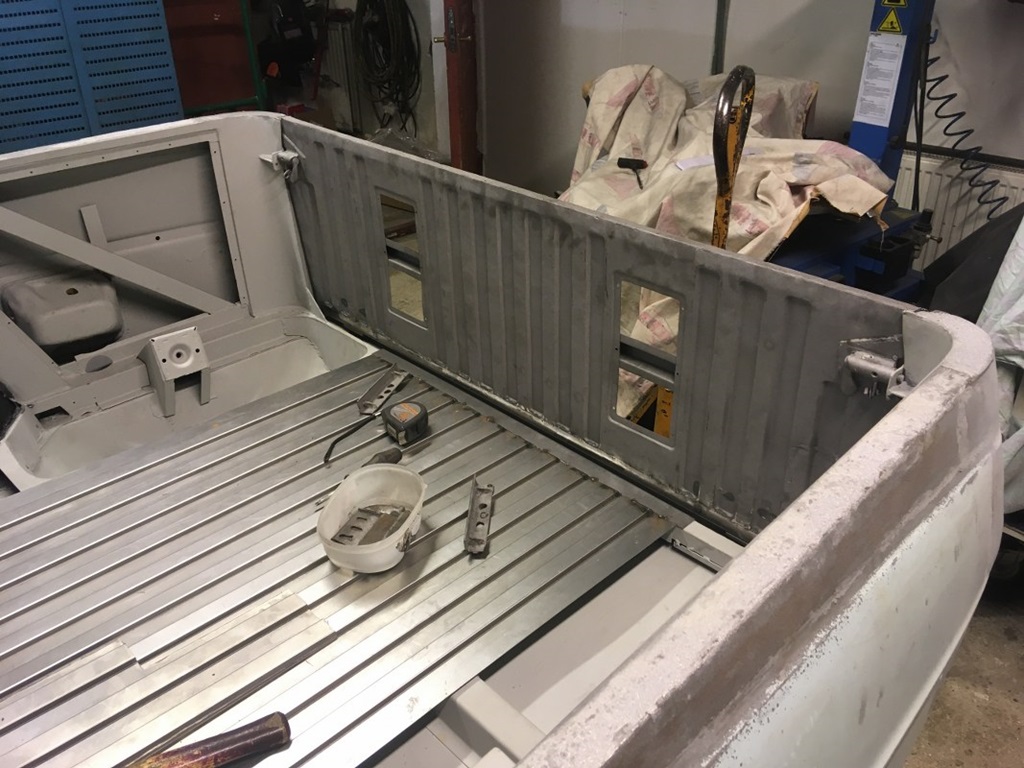
12 June 2020
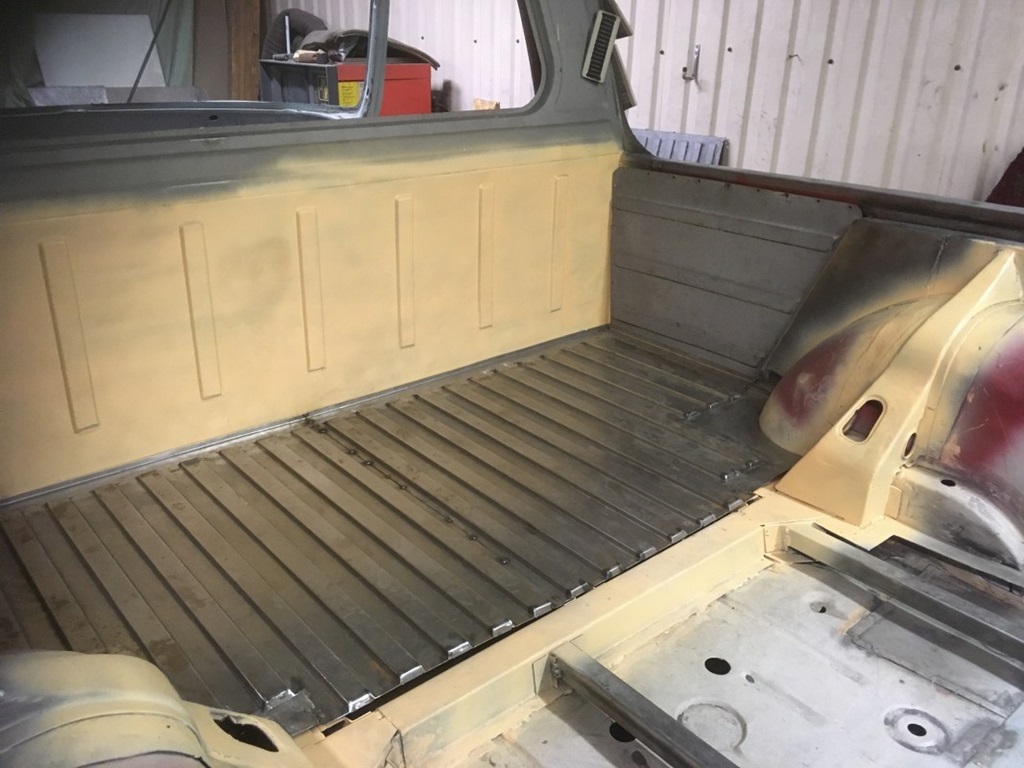
Timo is working hard on rebuilding the cargo area and it is taking shape! Those fantastic cargo floor panels, especially manufactured from a local company, are cut to size now. They're not fixed or finished, but it gives me a really good picture of how it will look like. Thanks again to Timo for this fantastic work!
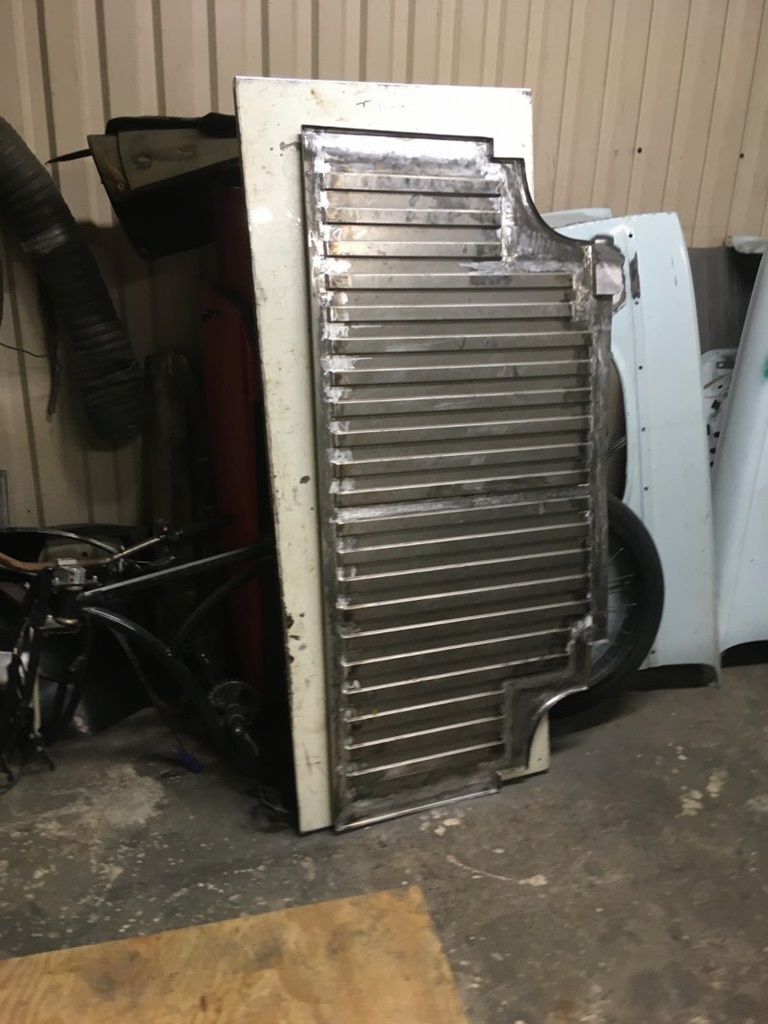
Cargo area / Cargo door ...
2 July 2020
I guess we're now > 130 single metal sheets made from scratch by hand. The cargo door will be - more or less - rebuilt completely new too, see the pics. It's just put up there for design purposes. Timo is putting a huge effort into this, nobody - I guess including him - would have imagined the amount of work for this transition.
Cargo area cont'd ...
12 July 2020
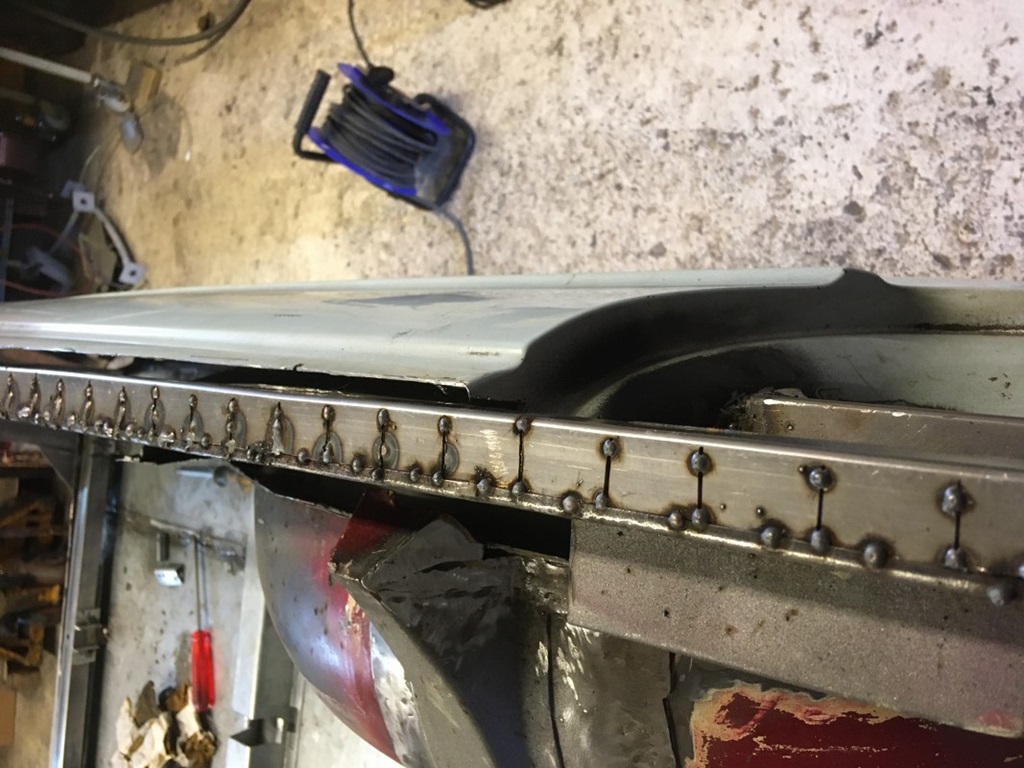
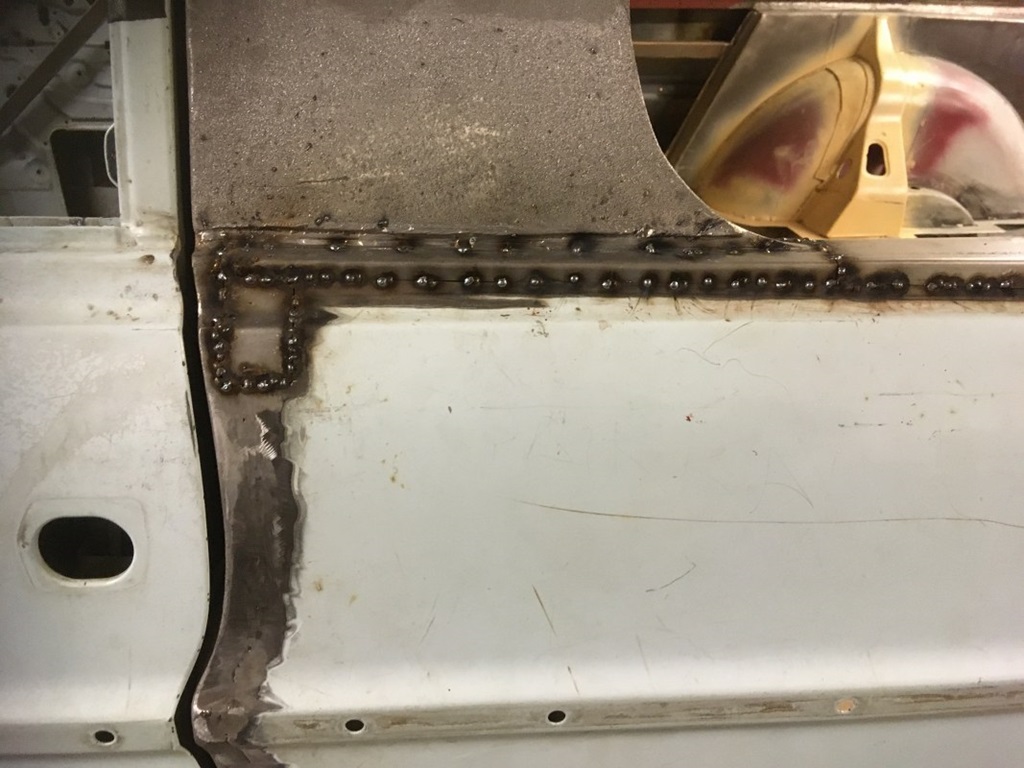
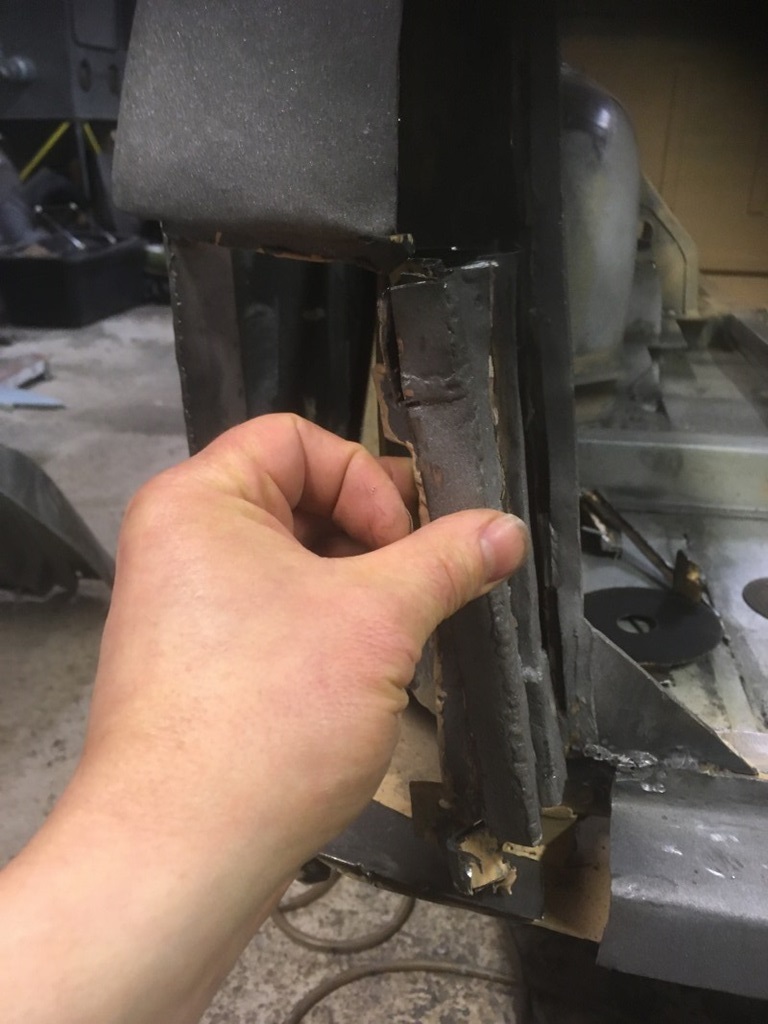
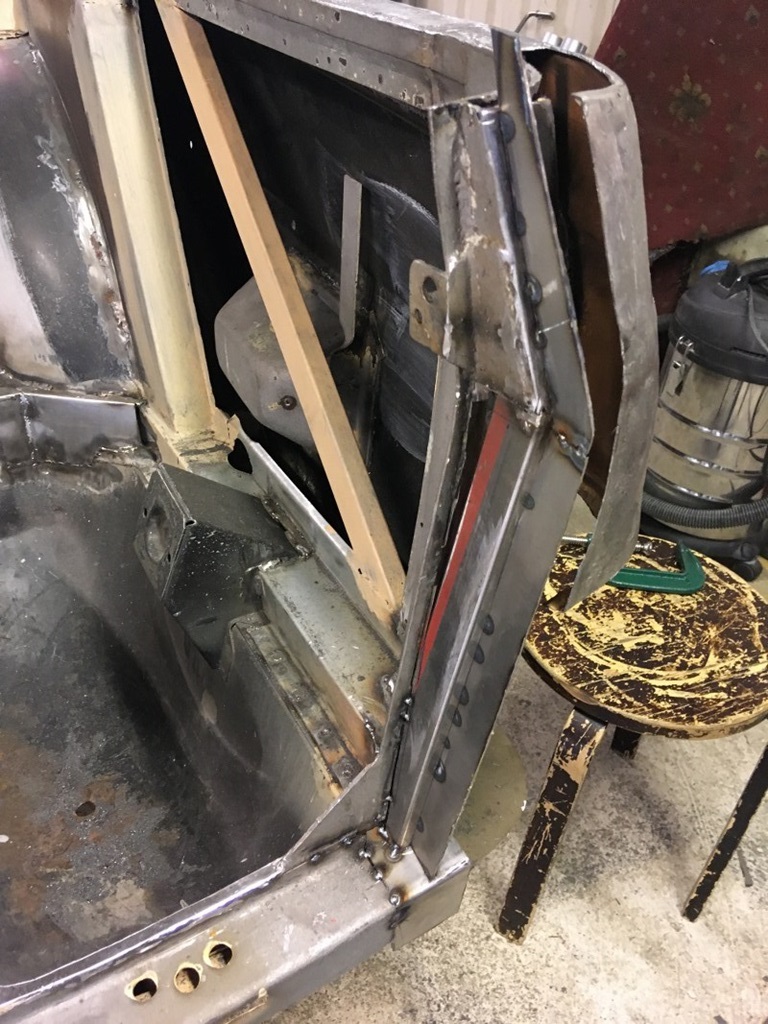
To give you another impression of the massive amount of work that has to be done: The original reinforcements in the rear fenders were so rotten and bent, that they had to be redone. Of course not straight, but it has to follow the car's shape. To quote Timo (to me that's magic):
"This is done to bent the profile the correct way. The profile should be following the sideline of the car, which is straight till rear wheels then it bents inward quite strongly. After changing few bits (one meter) of the profile it was too straight. So welding a dot will shrink the surrounding metal some tenths of a millimeter... so this is the way to bent the beam controlled way. If you check it closely the dots are mainly on the inside of the profile also the amount is changing along it."
B-pillar / Rear doors ...
19 July 2020
Timo continues on the b-pillar and the rear doors. As the original pick-up sheets were so bad, we use the rear door sheets. Of course additional sheets have to be handmade to fill the gaps. Also the bottom of the b-pillar is a challenge (original too rotten again), so more sheets have to be made. At the moment the estimate is > 200 sheets to be made.
Another "proof" for an original car ...
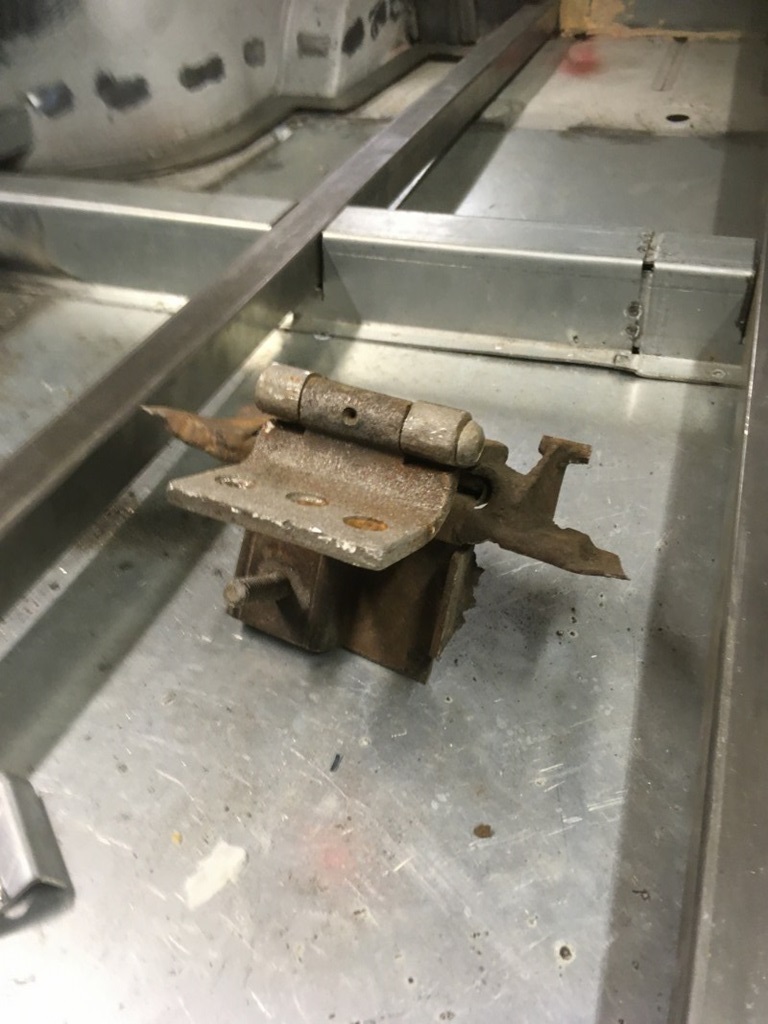
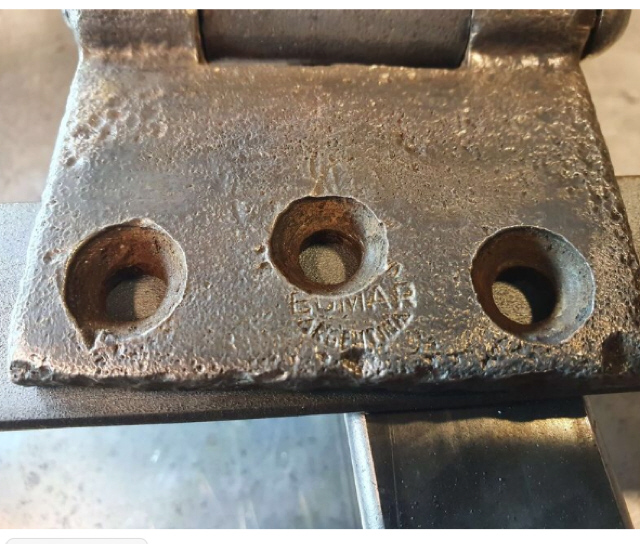
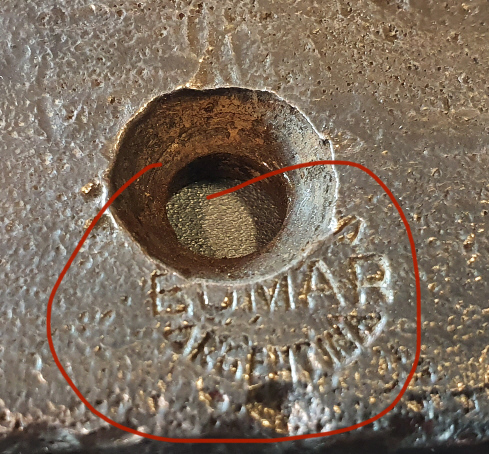
23 July 2020
Timo sent me two pics today from "hand-restored" original cargo door hinges from the Argentine Pick-Up ... even those elements were produced locally. Absolutely amazing ... another "original part that could be saved.
Taking shape ...
29 July 2020
Lots and lots of details have been done so far ... it's just difficult to see all those details. But as the rear fender reinforcement is now properly in place, Timo continued with the outside of the rear doors ... still held by magnets, but you get the picture. Can't wait to have the car back ;-)
Hours just for the license plate holder ...
22 August 2020
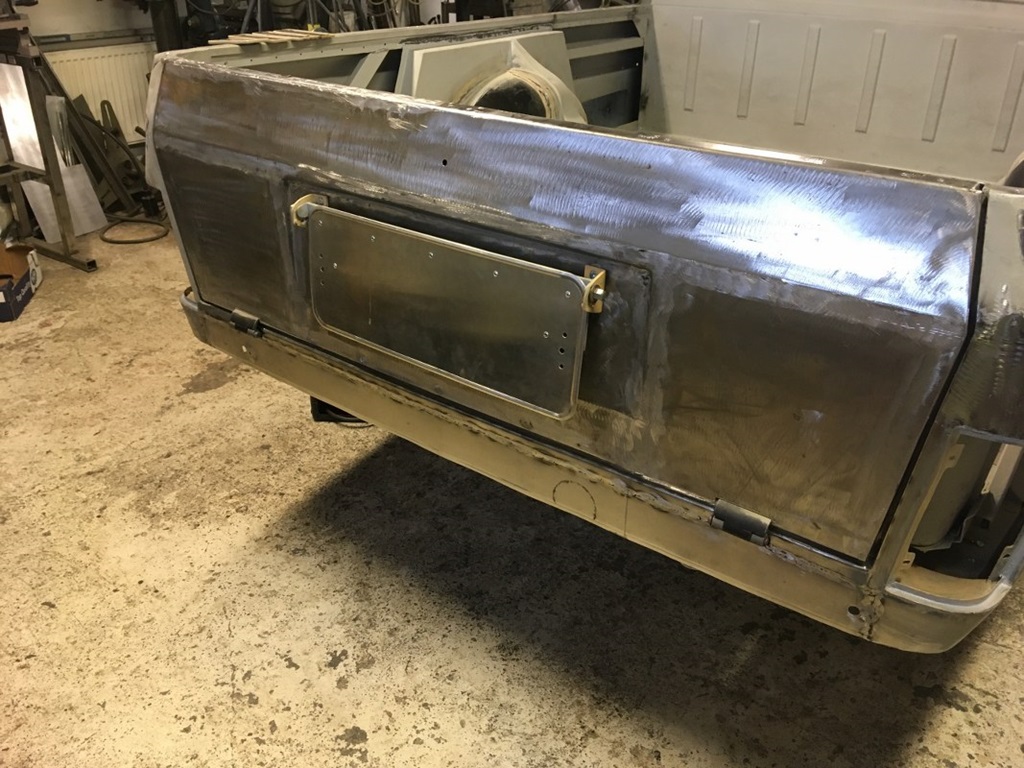
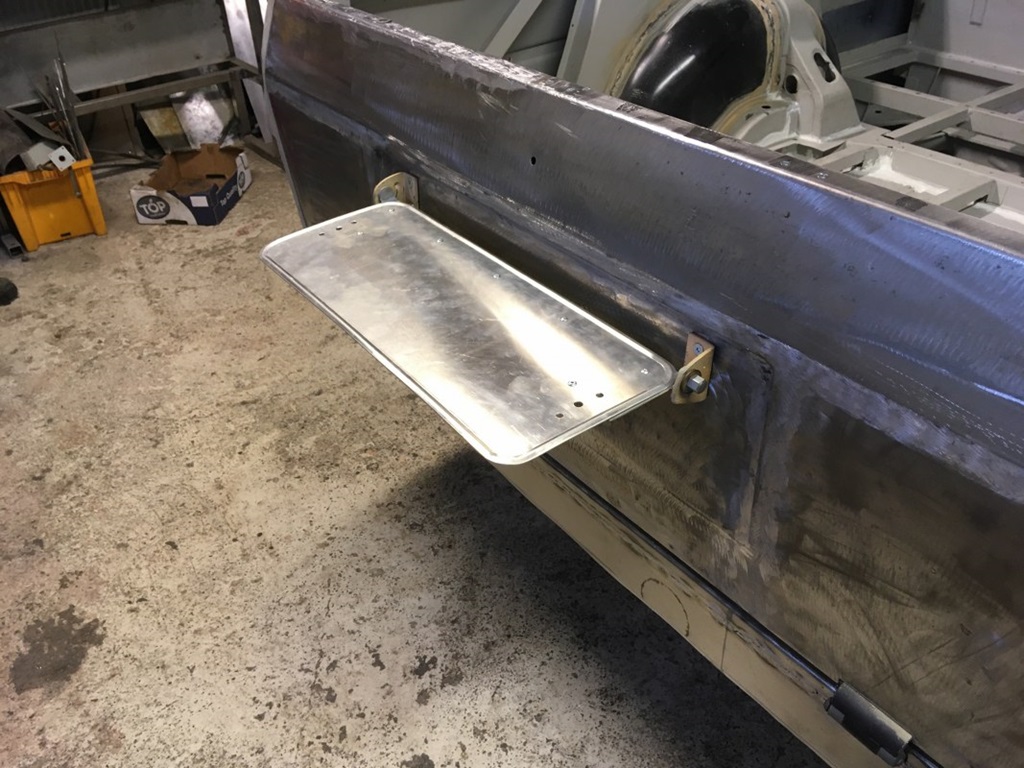
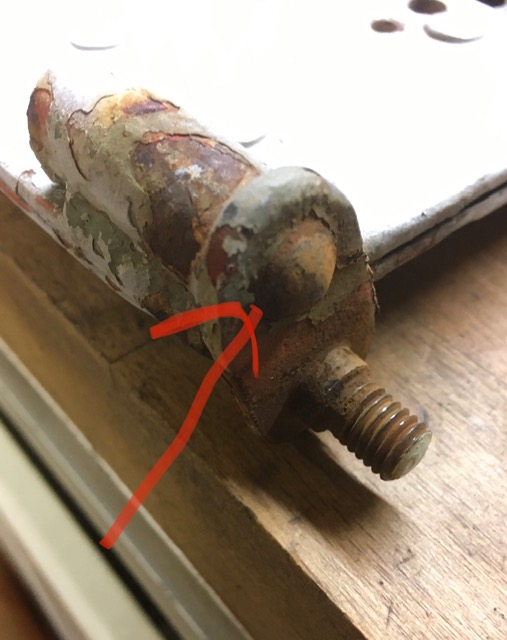
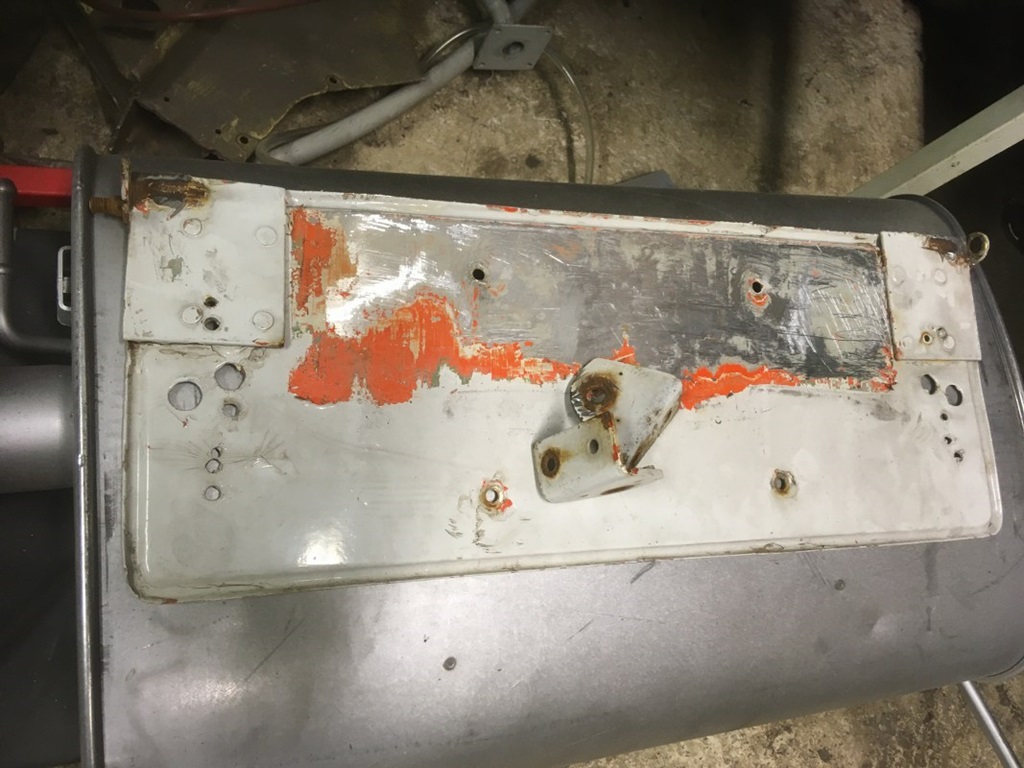
Here's just another example why all this is complicated and takes a lot of hours. The license plate holder on the cargo door should be rebuilt properly as it is one key element of the design. However it is in bad condition (no surprise) and not that easy to rebuild. When the cargo door is closed it should be fixed upright and when you open the cargo door it should fold down, so it can be seen too.
The mechanism is totally rusted and fucked up. There's a spring bolt, that fixes the license plate holder in those two positions ... Timo will rebuild it to the original ... estimated hours: 15 (!).
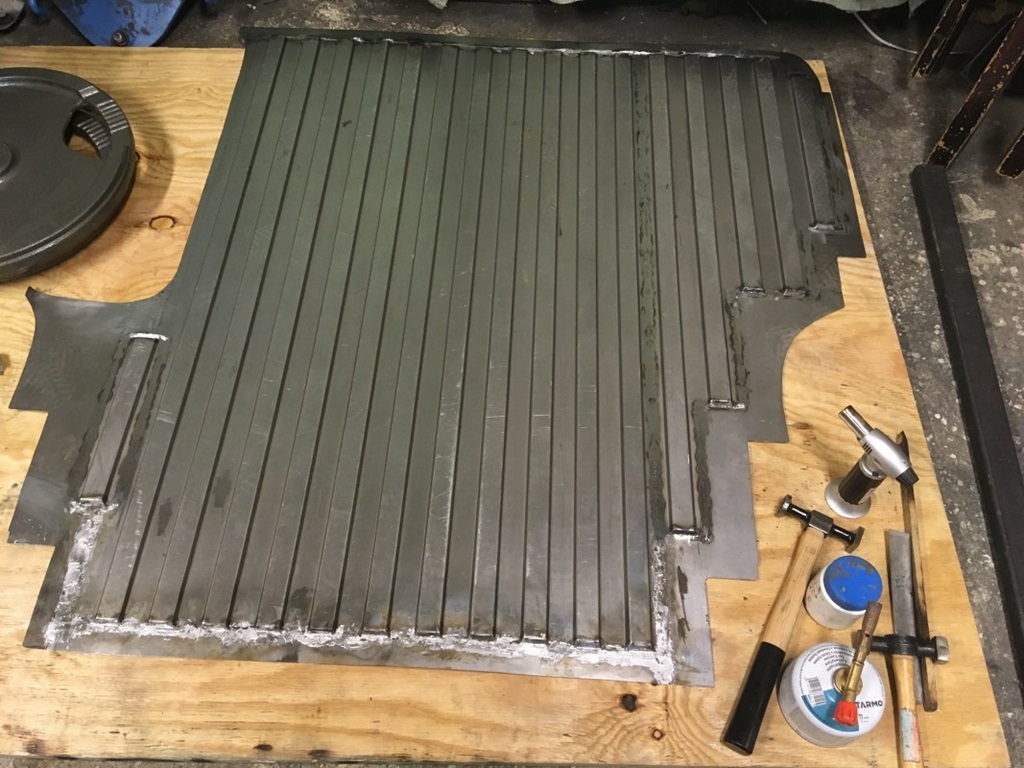
Cargo floor panels cont'd ...
3 September 2020
Still a lot of effort and hours on the body works. Here's some examples of the cargo floor panels. It wasn't just having the profiles done ... it has to fit the cargo area and the ends should look like original. Imho great work and I'm looking forward to the finished panels.
Rear area cont'd ...
26 September 2020
Timo is making a lot of fantastic progress these days. The rear doors are welded in (looks great) and he's working on the cargo door frame. He found out, that just on one side, there's about 2kgs of lead on top ... needs to be removed. The other side is done "free-hand", so it doesn't fit at all (compared to the rear lights). So more stuff has to be done from scratch.

Rear area cont'd II ...
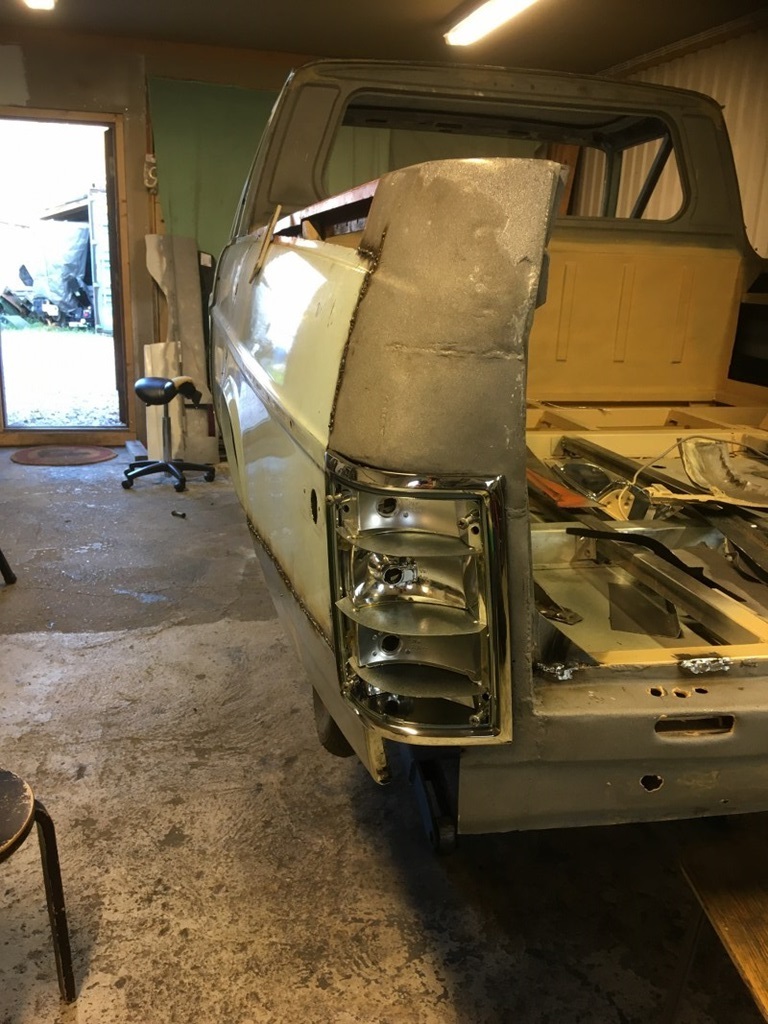
3 October 2020
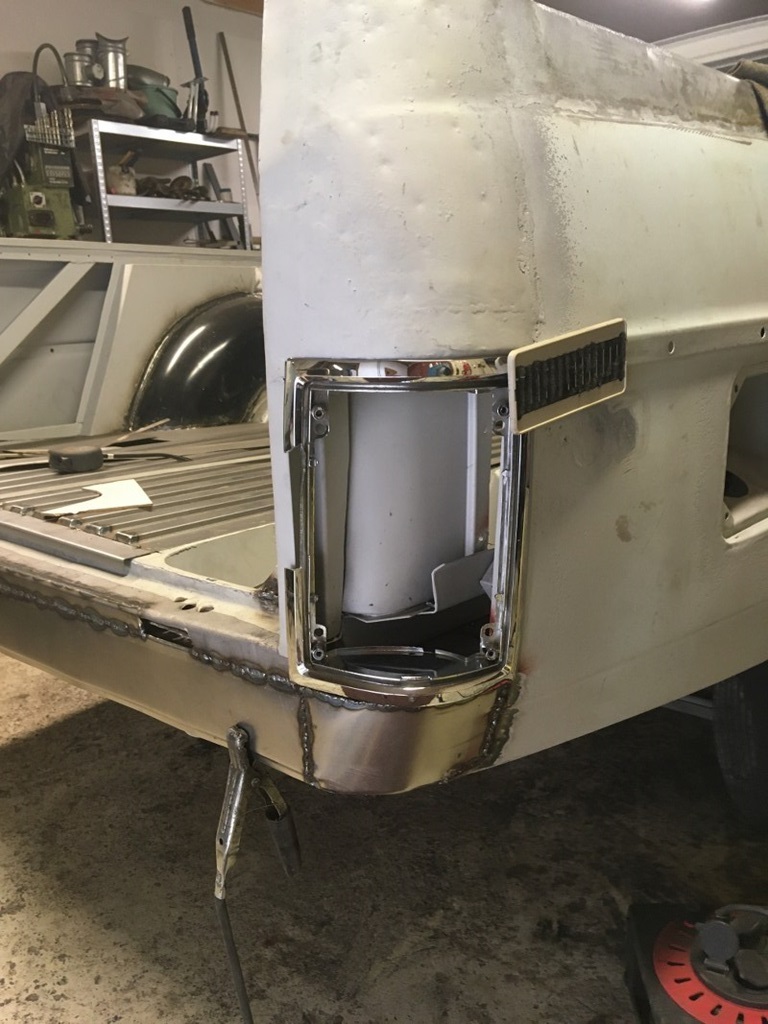
Lot of progress last week; the rear area takes shape. Lots and lots of hand-made little sheets to fit the rear lights perfectly into the orginal cargo door frame.
Rear area cont'd III ...
6 October 2020
Rear area cont'd IV ...
15 October 2020
A detail: Spare wheel compartment ...
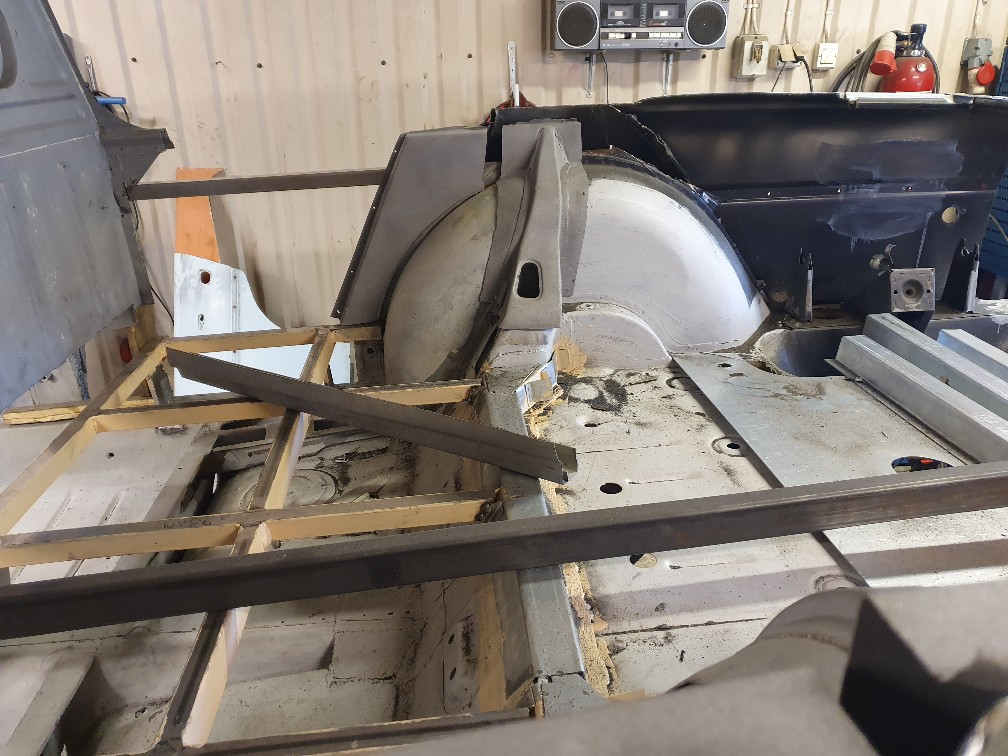
21 October 2020
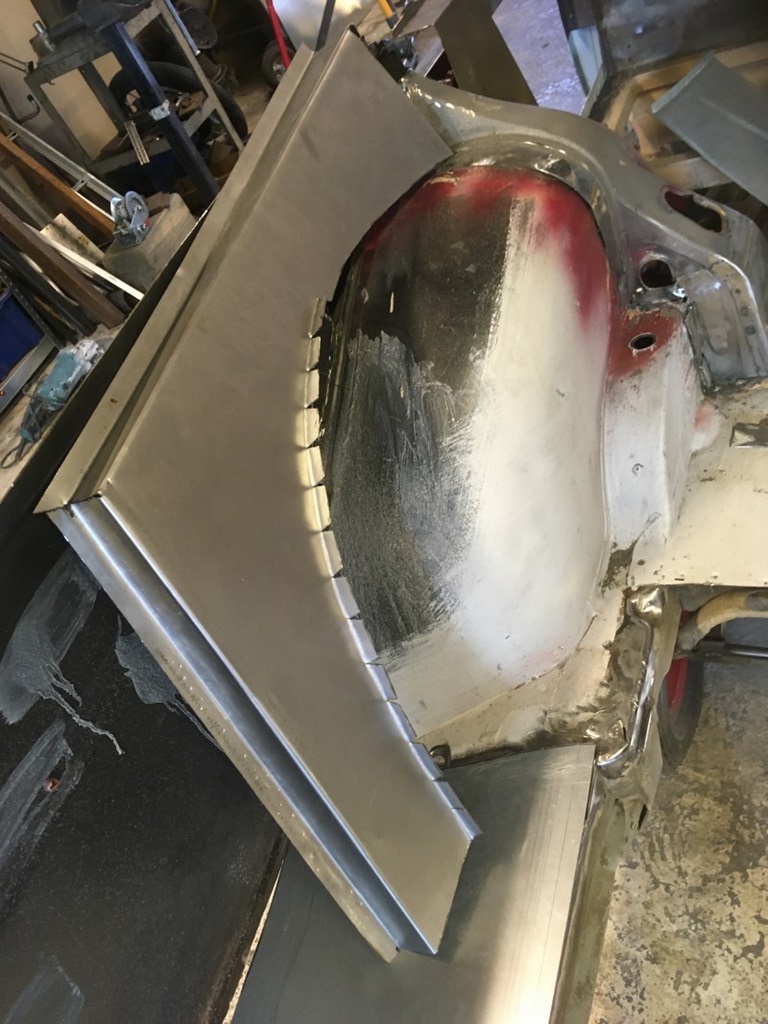
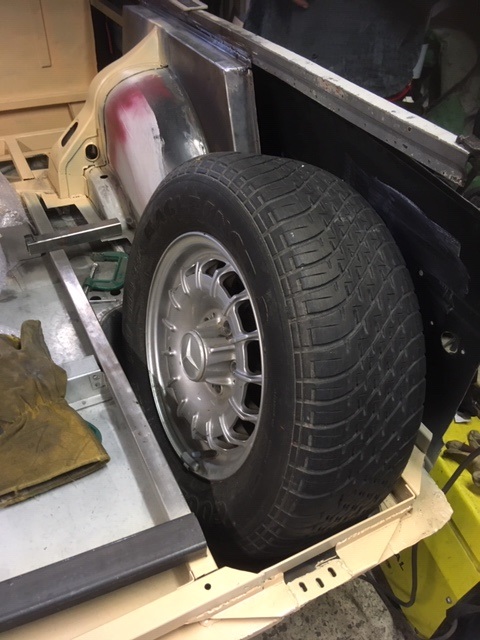
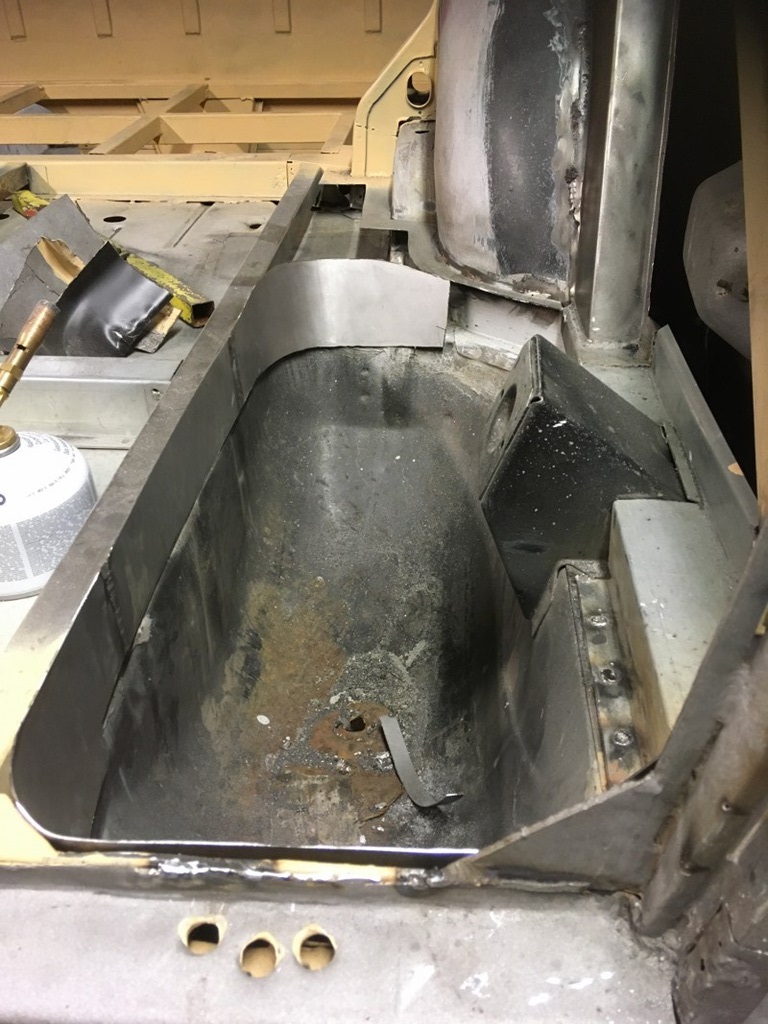
To give you another impression, what amazing amount of work is involved here ... the spare wheel compartment. One thinks, well that's there in the sedan too ... well yes and no. Here's just one of more than 200 examples of hand-made sheets of metal to fit nicely in the spare wheel compartment. Of course the cargo area is a bit higher, so this had to be done from scratch too ... the original being completely rotten.
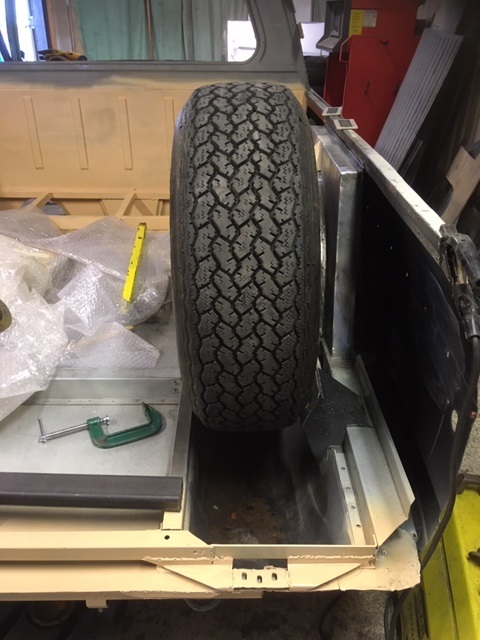
Another episode: the spare wheel compartment was designed for wheels 185/15 ... as you see on the photos, the 205/15 just about fit, but already with 215/15 I would have a problem ... just lucky this time ;-)
Left side finished ...
24 October 2020
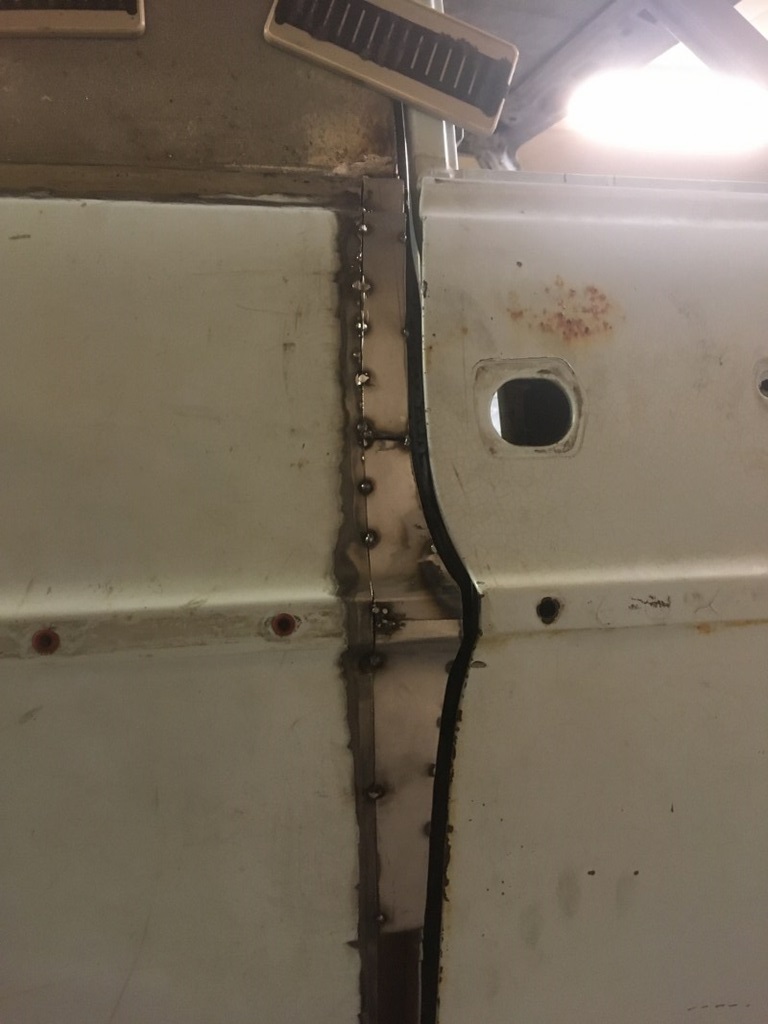
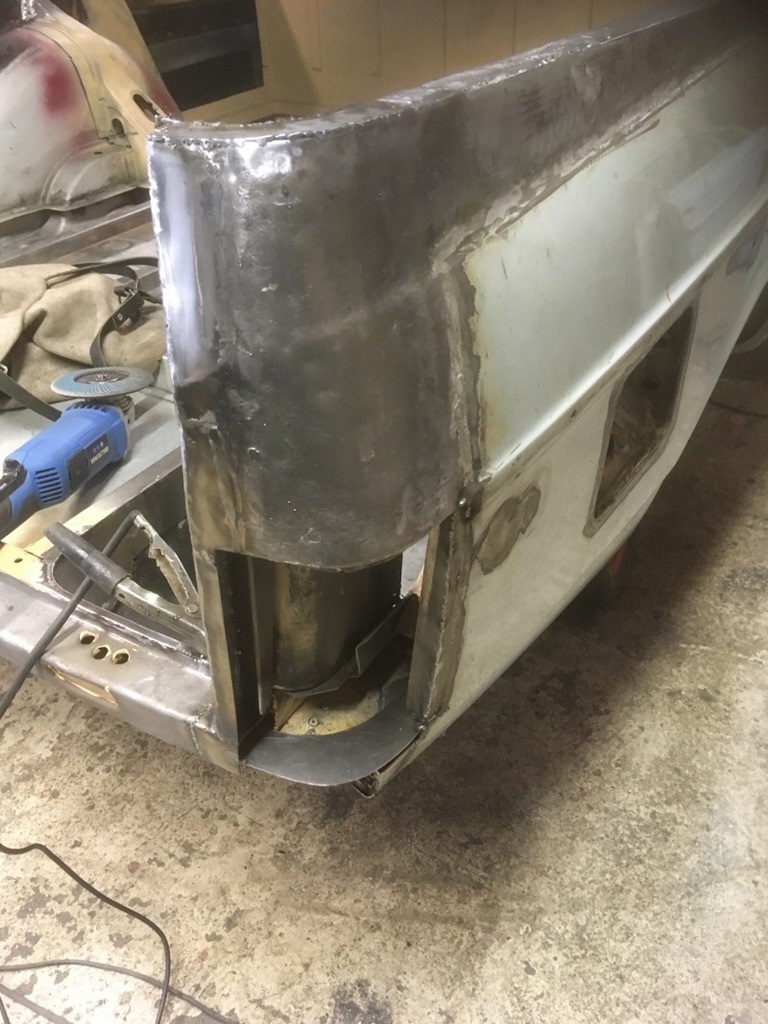
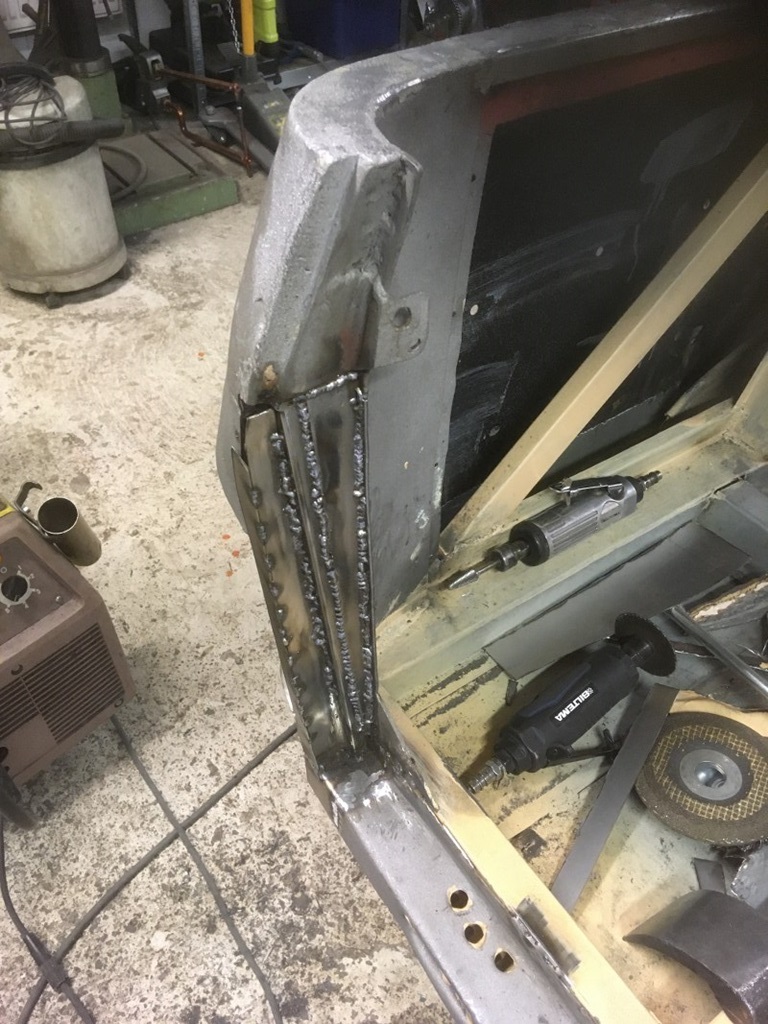
The left side of the Pick-Up is finished now; as you can see on the photos, the adaptation to the B-pillar was pretty tricky too. To quote Timo:
Just finished the left side wing’s top panels fittings.”Only” 20 new panel parts in that area. I guess we are now somewhere 250-300 pcs.
It will look fantastic, this car ... as Willi said in the guest book: better than new!
Right fender continued ...
9 November 2020
The right rear side of the car is taking shape. Timo redid the B-pillar gap to the door ... was not according to his standards ;-)
The original fuel flap from the Pick-Up is integrated into the sedan's fender ... slowly everything comes together.
Right fender continued II ...
14 November 2020
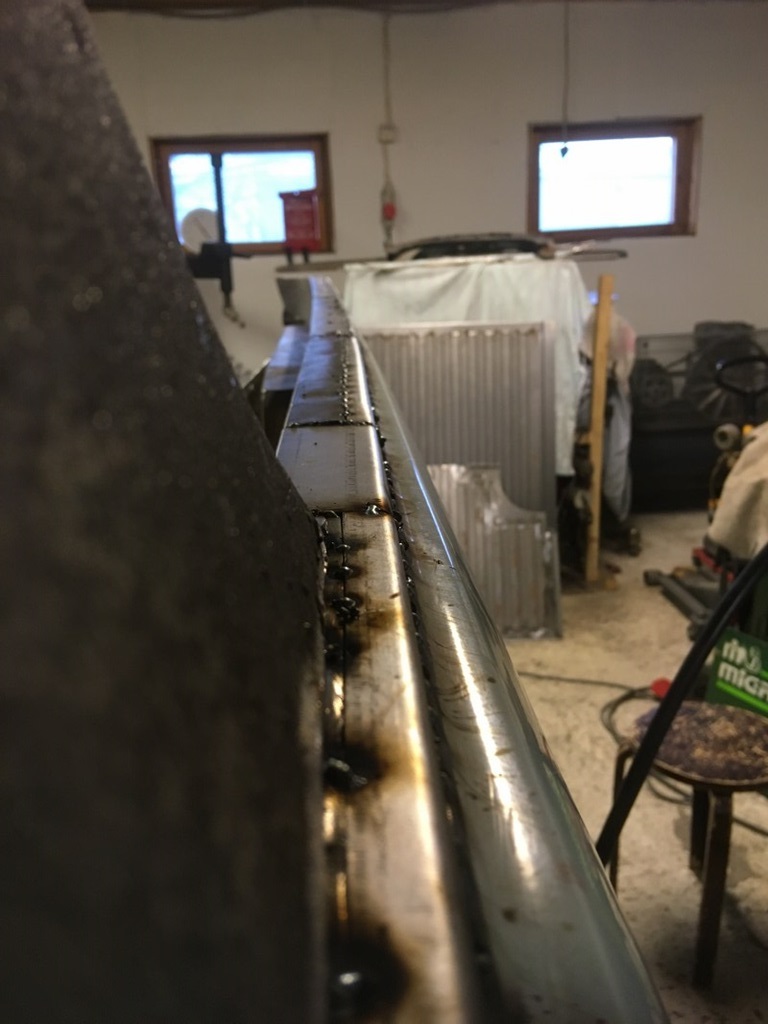
The right side of the rear fender is now nearly done. It looks so easy, but it is a huge amount of work.
More hand-made sheets of metal as well as a lot of careful welding.
One little detail here: the original Pick-Up had so many accidents everywhere, especially in the back. When trying to integrate the fuel flap opening into the sedan fender, it turned out that this part is bent differently to the original fender. So even that part had to be adapted carefully, so it could be put in there. Manufacture ... in the literal sense of the word!

Many hours to finish welding ...
18 November 2020
I myself was a bit "surprised" about the progress ... it seemed slow. But it's hours and hours to grind the weldings, fill it with tin, grind it again ... and so on and so forth. Main goal now is to get the body to sandblasting again, especially for the undercarriage.
After that, the last bits can be tackled:
- Cargo door
- Rivets and fastening of the cargo floor panels
- Replacing a sheet metal in the "front spoiler" (dent)
- Inserting a brand new sheet metal where the rear bumper goes
- ... and a few other parts ;-)

Details details details ...
24 November 2020
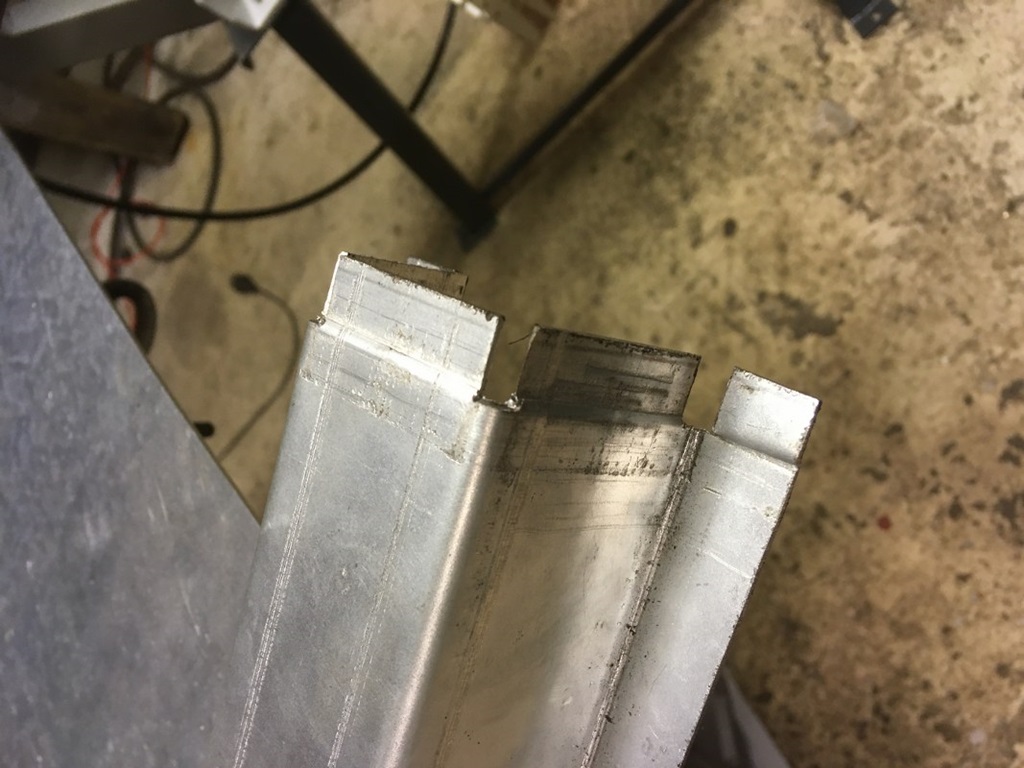
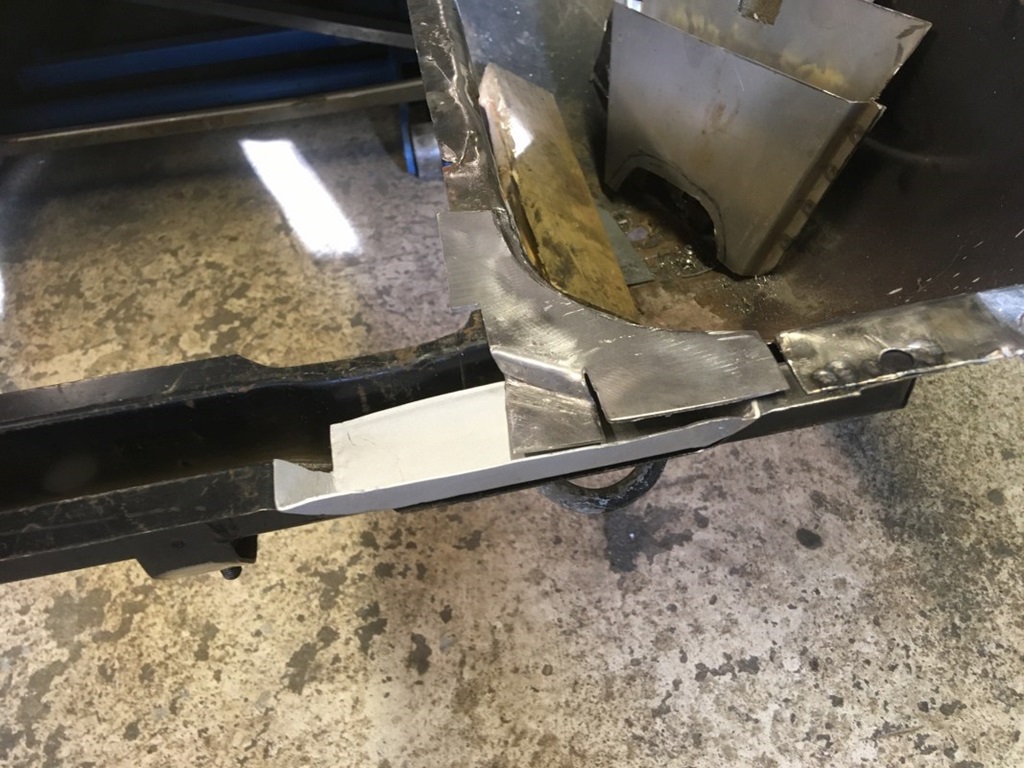
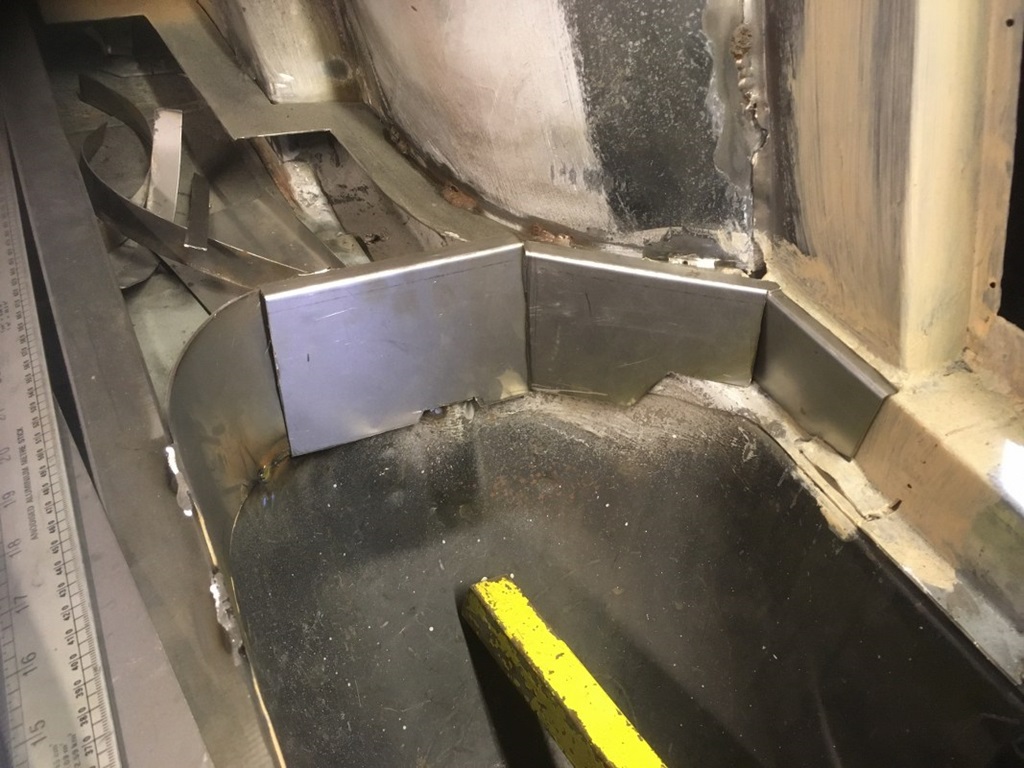
More and more details come to a close ... here the spare wheel area. Looks all so easy, but there's many bits and pieces to be done, welded and finished. Just compare the photo with the three metal pieces with the "original" in the next section ...
Cargo Covers provisionally in place ...
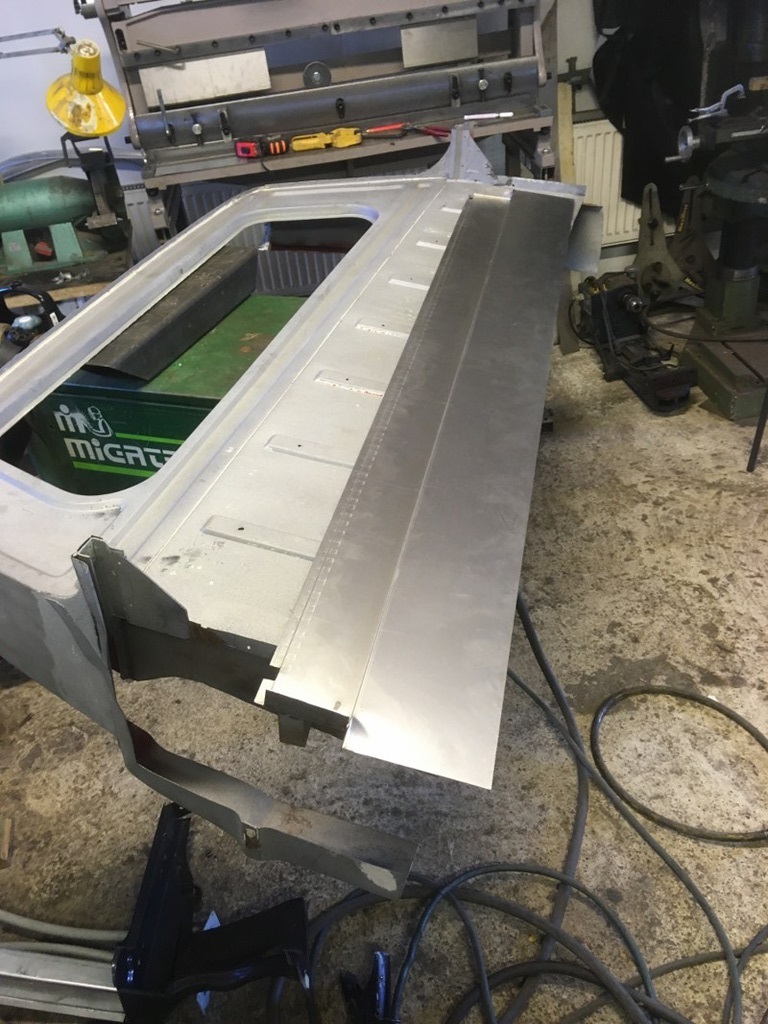
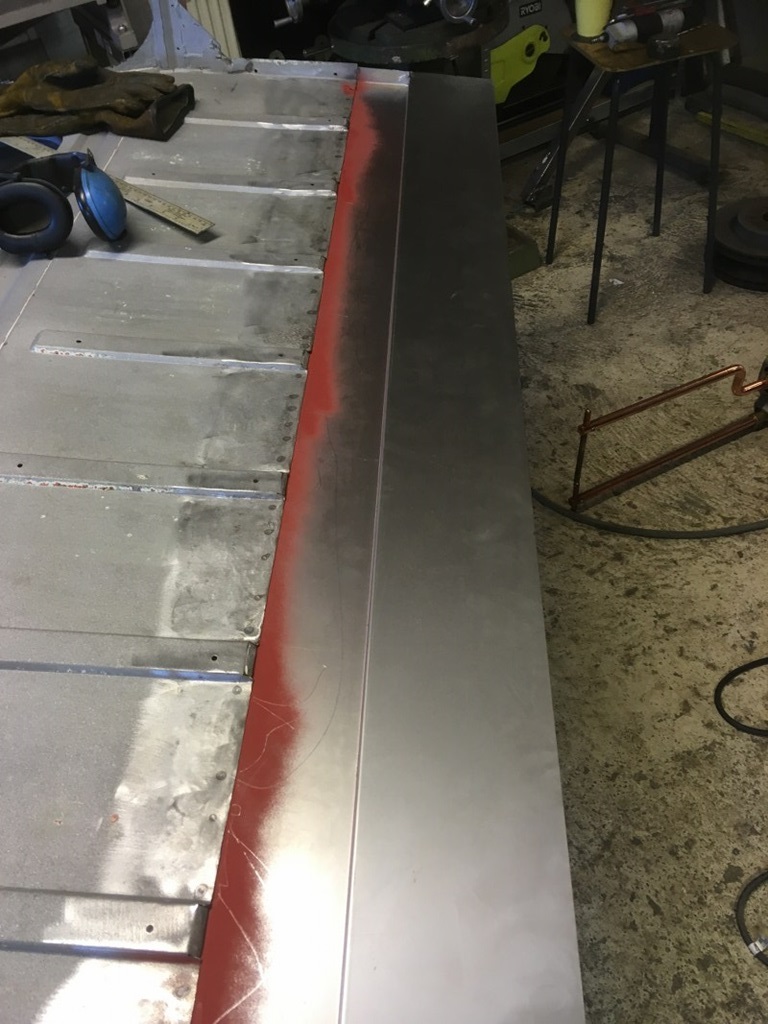
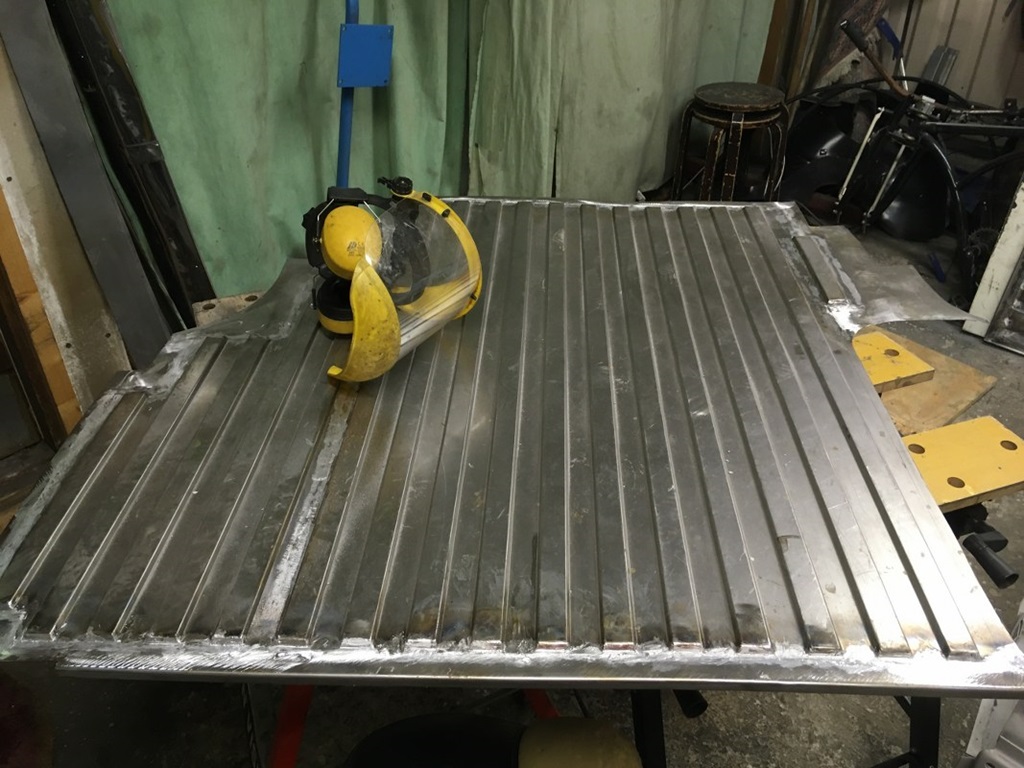
25 November 2020
The cargo covers are in place provisionally ... imho it looks very good. The vertical ones on the side are still the original ones, the bottom ones are new. All hand-made according to the originals, even the profile ends have the original 45° angle.
Contrary to the original (tapping screws) those cargo covers will be fixed with proper screws and thread rivets, so it is easier - and longer lasting - to remove. Especially as the battery will be underneath those covers. Another detail, that requires skill and time.
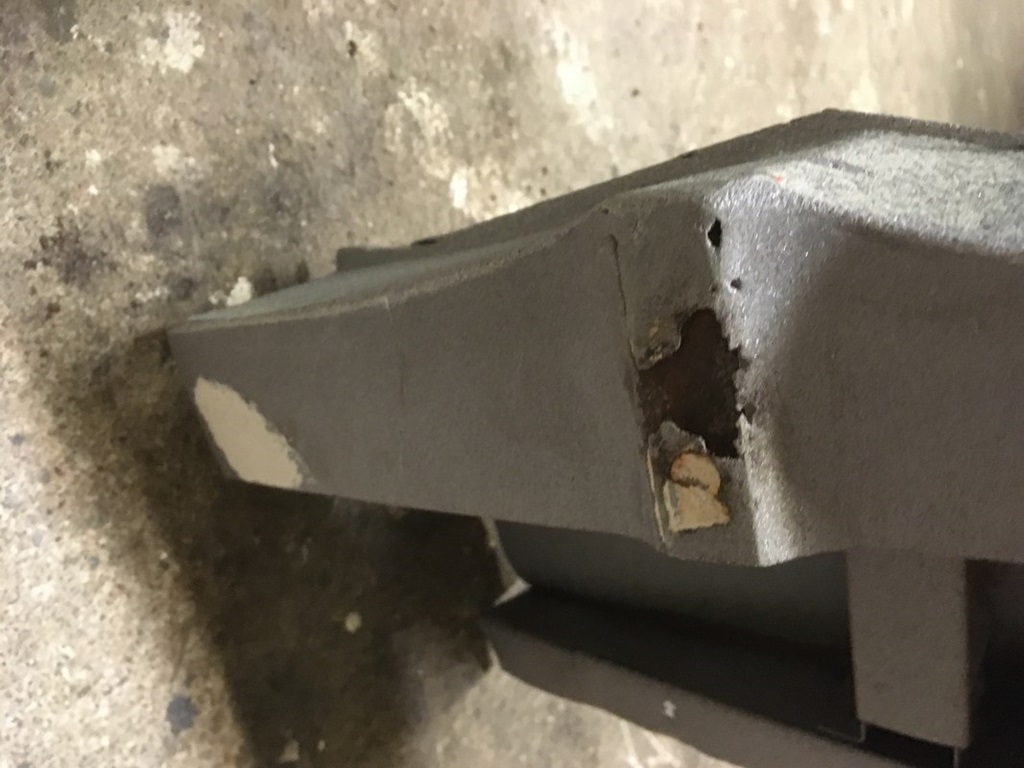
More desaster ...
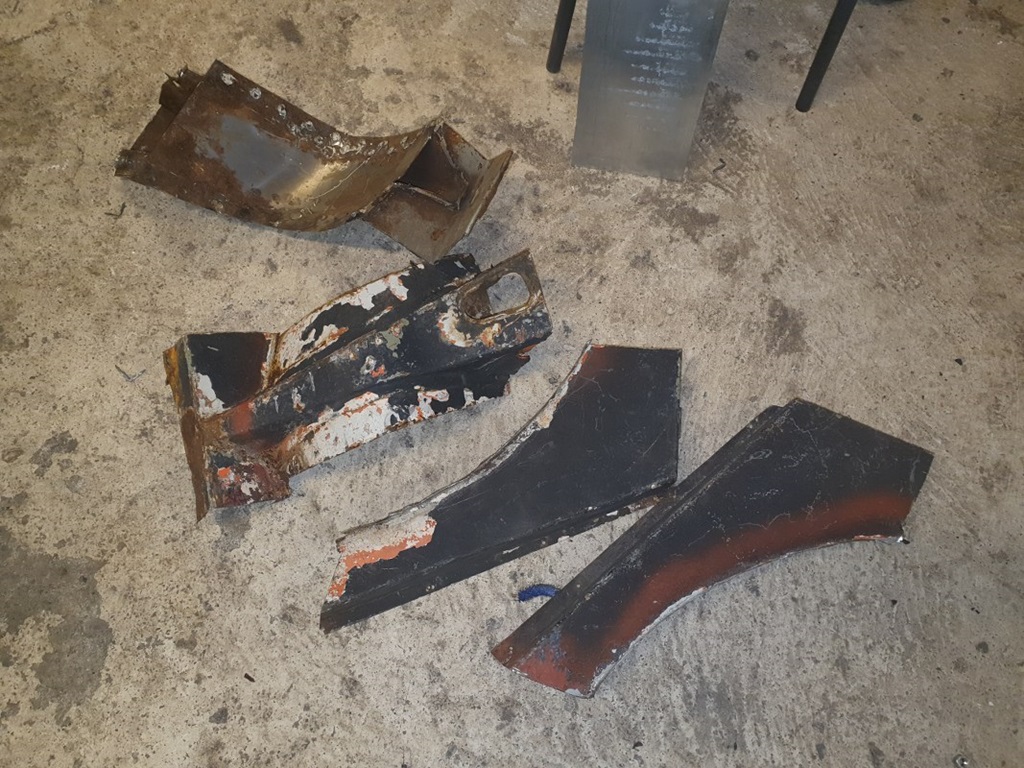
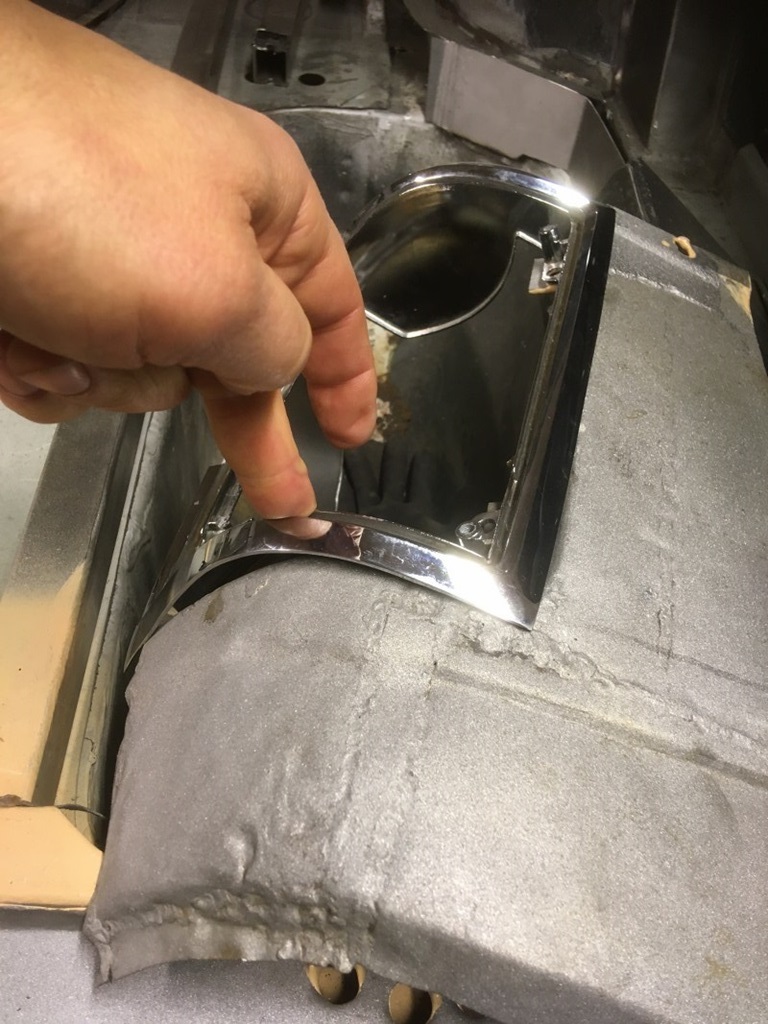
3 December 2020
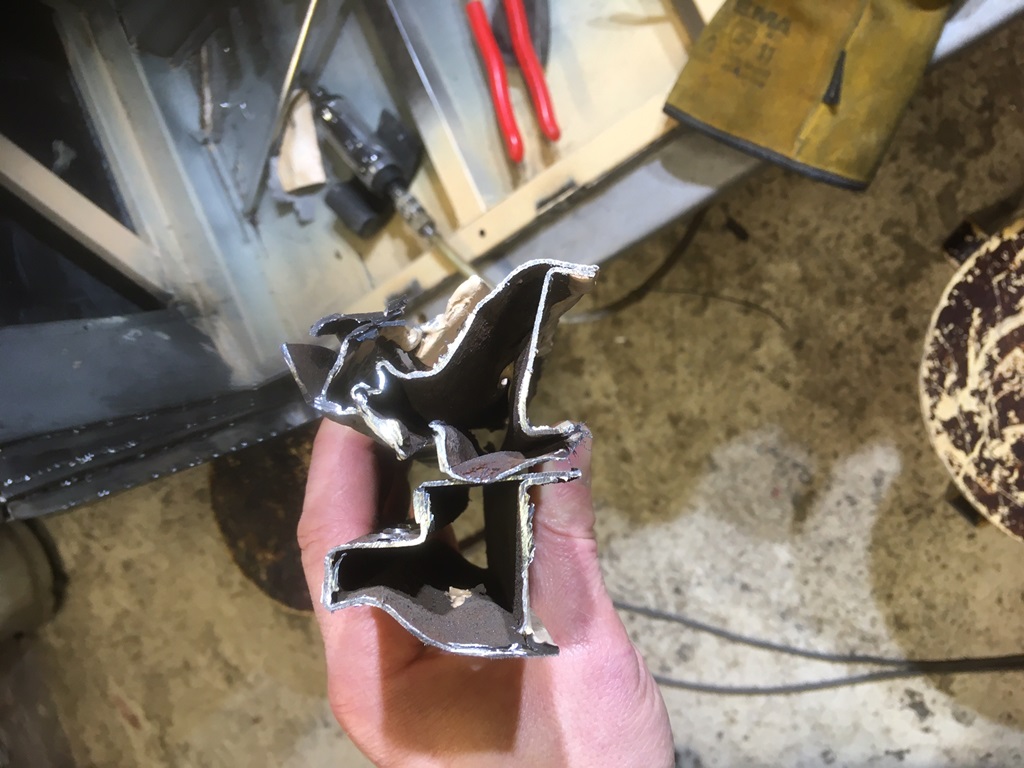
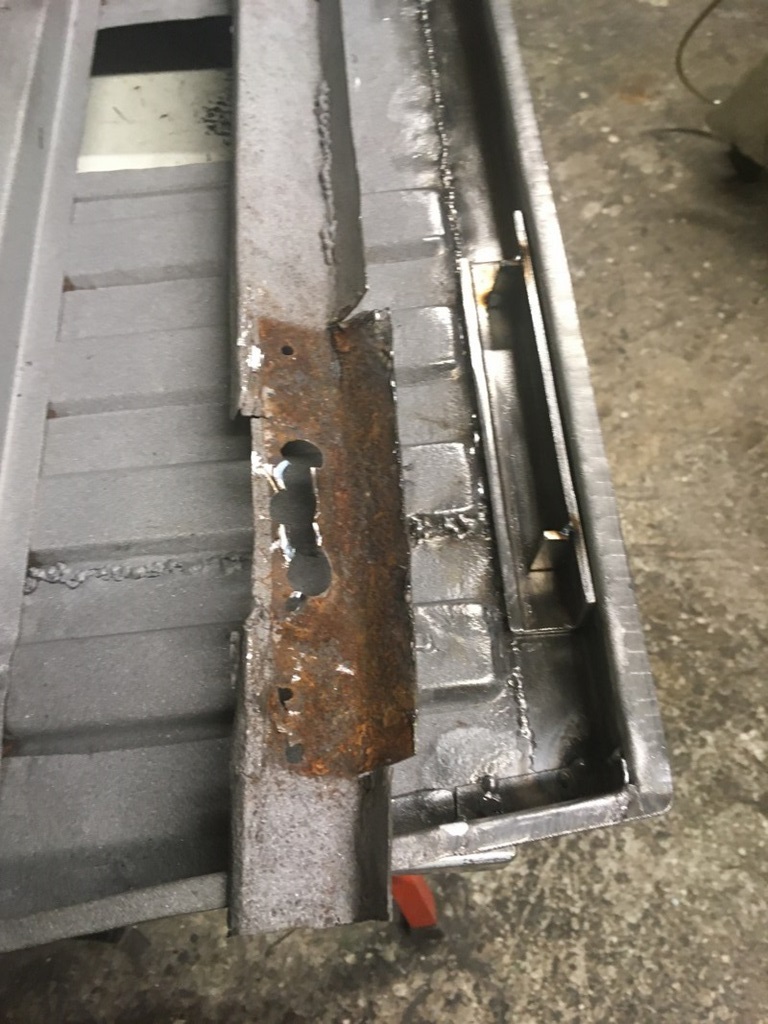
When you think, you found all rotten parts by now ... it turns out different. The cargo door frame (left and right) was also so badly corroded and bent, that it has to be done from scratch. The picture with the two parts shows two identical parts (at least they should be) ... well you can see, how one is bent. They just put another sheet metal on top to cover this ...
It will just not happen in this project, that I receive an email like "Hi Thomas, this turned out much easier than I thought" ... ;-)
More - little - desaster ...
13 December 2020
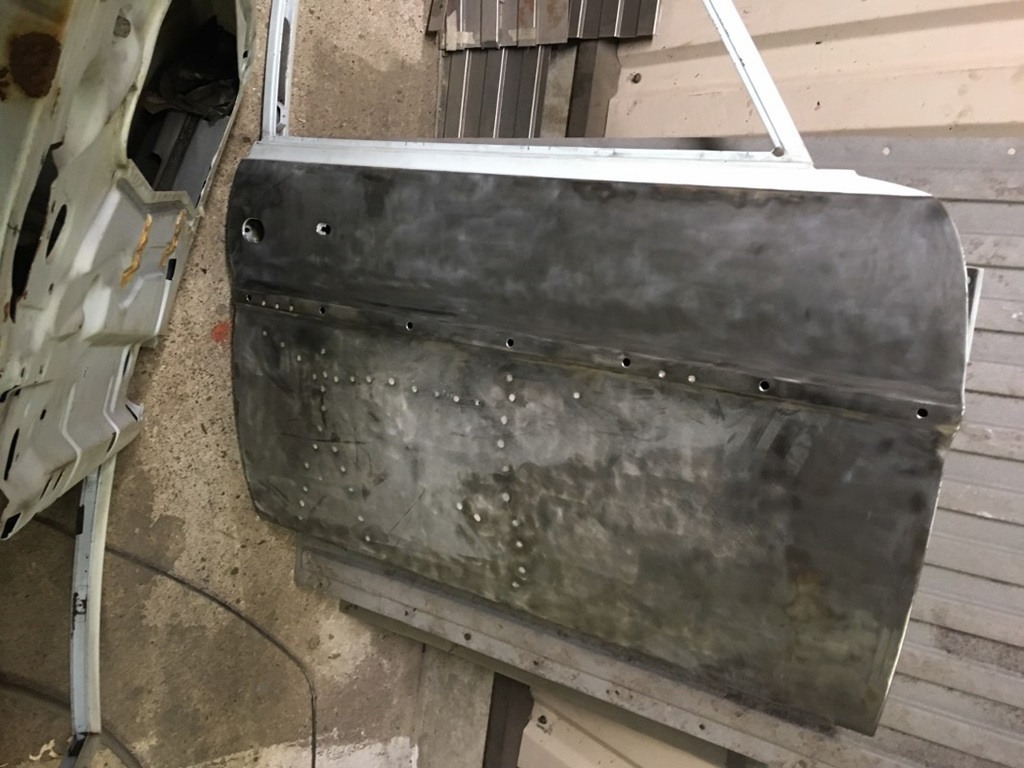
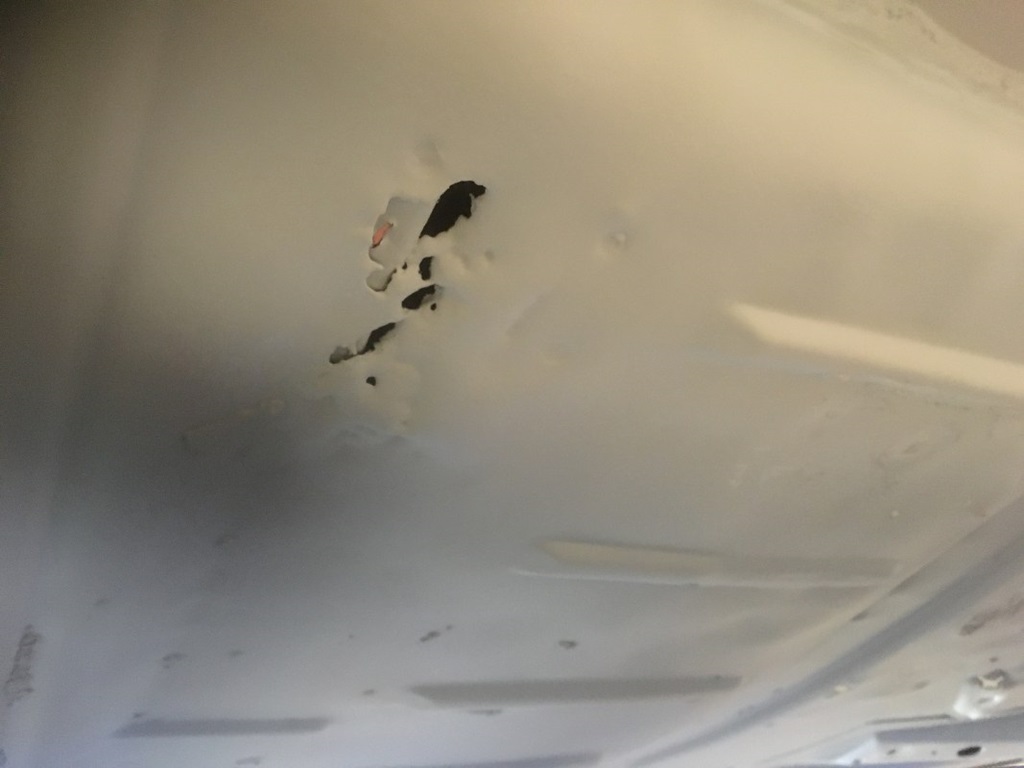
When you think, you've detected all rust ... the body is with sandblasting, so the doors could be examined. After removing the last rubbers ... voilà, some rust on the driver's door. At least it doesn't get boring. The passenger's door (right side) had an accident in the past, we knew that. However it was obviously an American machine gun repair ;-) ... lots and lots of little holes. Unfortunately, lots of filler, so Timo will restore the door. This door is - otherwise - completely rust-free. He just wanted to make sure, that the paint doesn't crack in a few years time ...
Back from Sandblasting ...
14 December 2020
The car has been at the sandblasters for a few days; especially the undercarriage. I wanted to get rid of all the factory undercoat so see, if there's more rust. Fortunately only some small holes, nothing major. It was painted directly with some epoxy paint to prevent if from rusting again ...
If you think you have a rust-free body ...
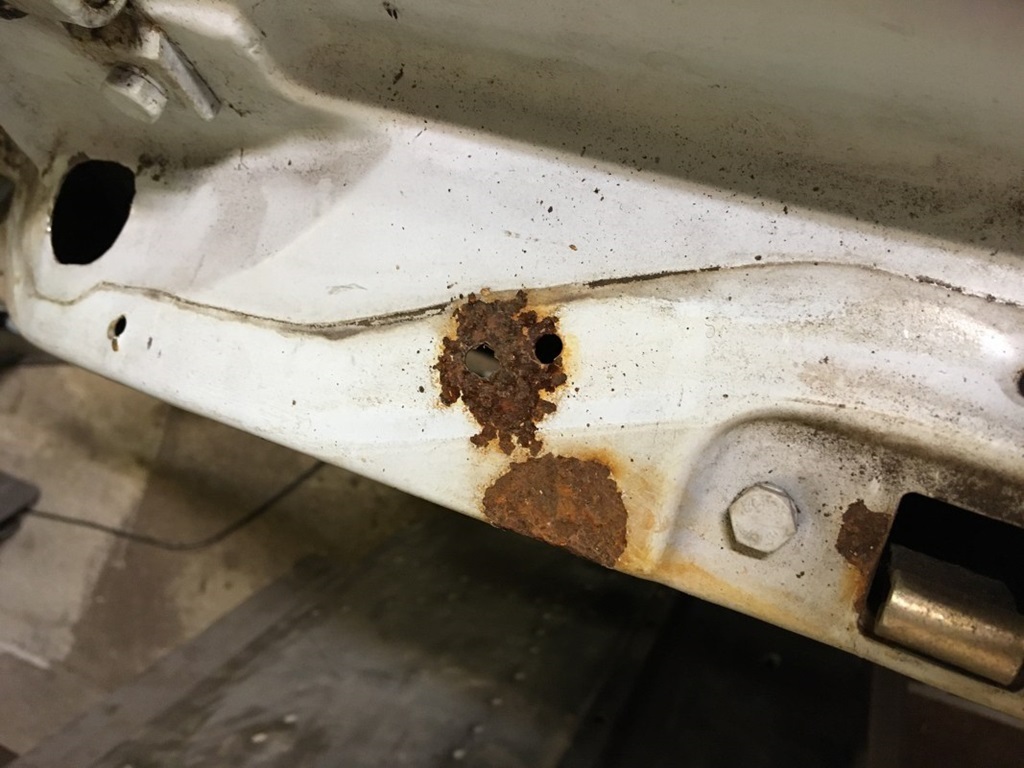
18 December 2020
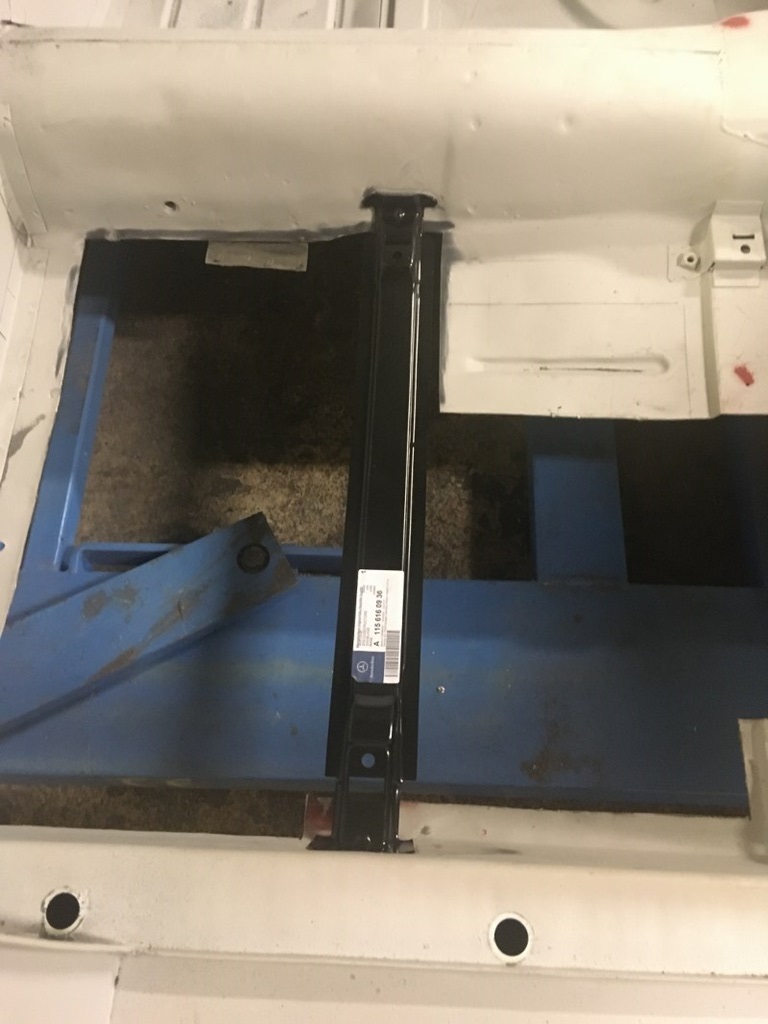
... think twice! I wanted to have all undercoating removed, Timo agreed. So this stuff was really resistant, didn't want to come off ... so it was nearly 2,000 Euros for sandblasting and epoxy paint (and 500kgs of sand).
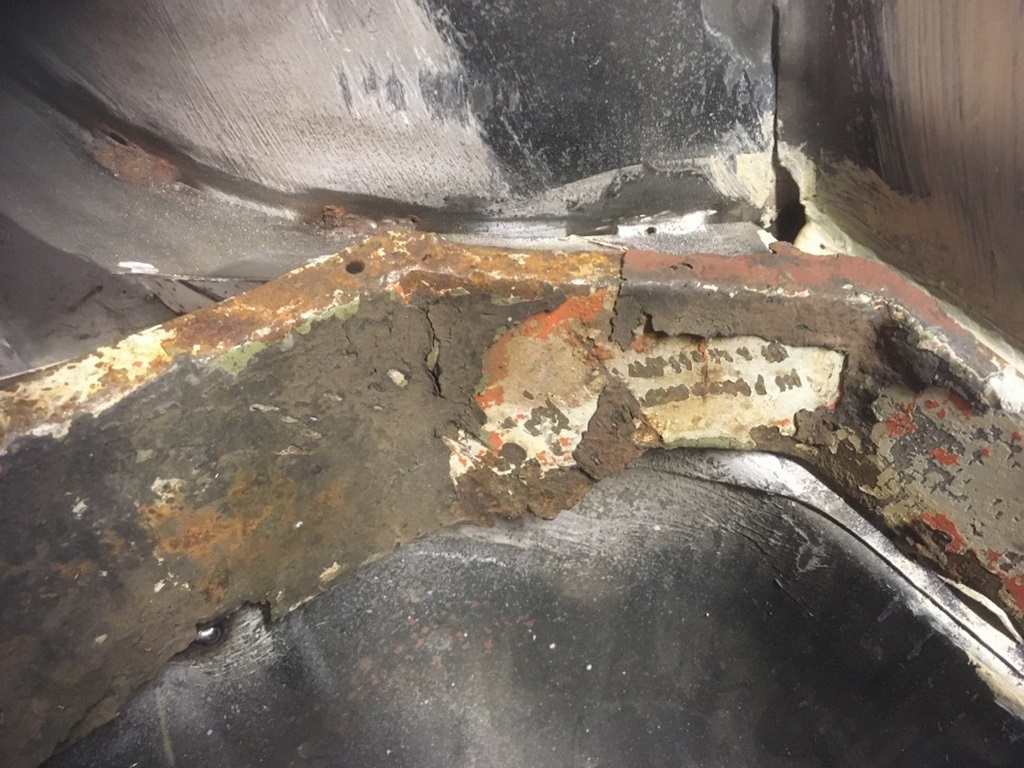
BUT, big but, what if we hadn't done it? We really thought, all rust was tackled, but no. Lots and lots of small rust holes all around under the undercoating (just remember, the donor car IS really good!). And a major hole where the cross bracket of the passenger's seat is located. I could source that cross bracket now (NOS), so it makes life easier for Timo. "Again what learned" as we say in German ;-)

Rust repair starting ...
24 December 2020
Timo has started repairing the rust areas, which became apparent after sandblasting. Already in 2017 I could source two original floors (left/right) from Mercedes; they were shipped with the cars to Timo. We thought, we don't need them ... well, now it's good to have them ;-). They aren't available anymore, so big parts of the floor can be replaced with original parts now. The rusted cross bar under the passenger seat (rusted from inside) I could source as NOS (one piece only!) as well ... it's on its way to Finland. Now it's christmas and we're all having a break!

Cargo door cont'd ...
8 January 2021
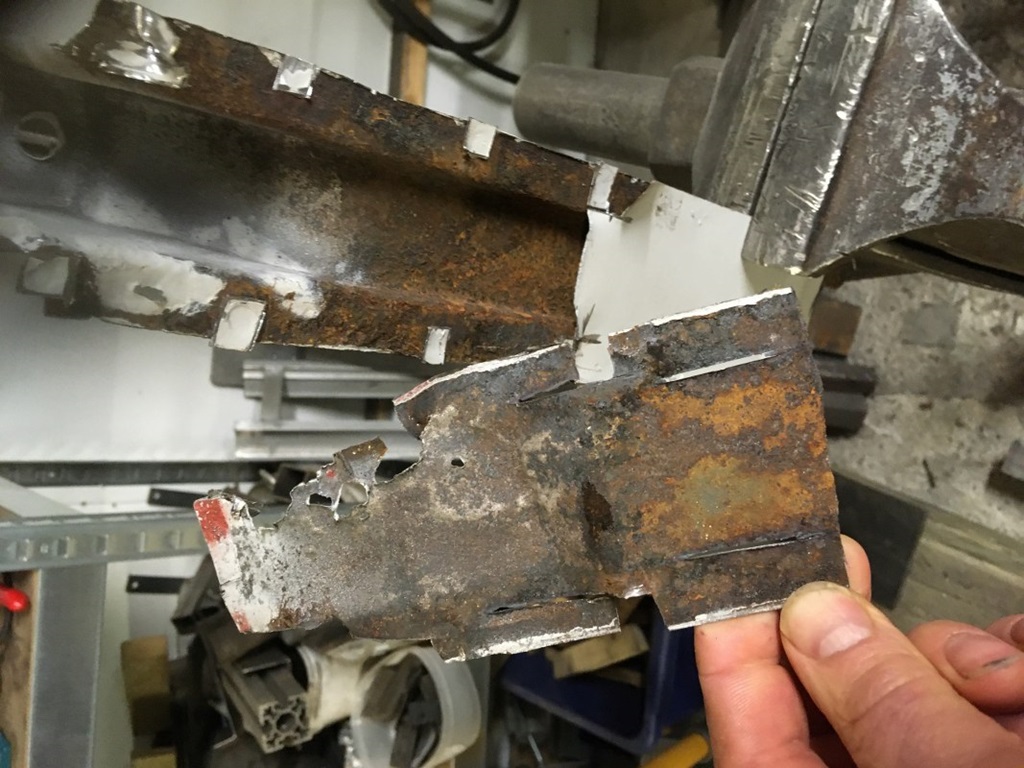
Timo continued on the cargo door. The inside frame could be used (partly). Partly - as usual, this is the best you can get out of the Pick-Up. The bottom frame really looked bad; there's two reasons why Timo made that from scratch:
a) the hinges are attached to it and if you sit on it ... ;-)
b) when you open the cargo door, this part is visible, so it should be "nice"
As you can see on the photos, the rusted original parts might not have lasted long. Especially the hinge brackets have been reinforced and made out of metal sheet. Imho that looks really great!
Besides that and the two rear inner fenders (NOS), the cross bracket for the passenger seat has arrived in Finland as a NOS; so this can be welded in now!

Material list ...
12 January 2021
Today there's no pics, but Timo sent me a list of materials used so far ... I think, it speaks for itself:
- 2 sheets 1mm steel (1mx2m)
- 1 sheet 1.5mm steel (1mx2m)
- 1 sheet 2mm galvanized (1mx2m)
- 6m 30mm x 30mm x 2mm square tube
- 6m 30mm x 30mm x 1mm square tube
- 2m 30mm x 60mm x 3mm square tube
- 3.5 bottles welding gas
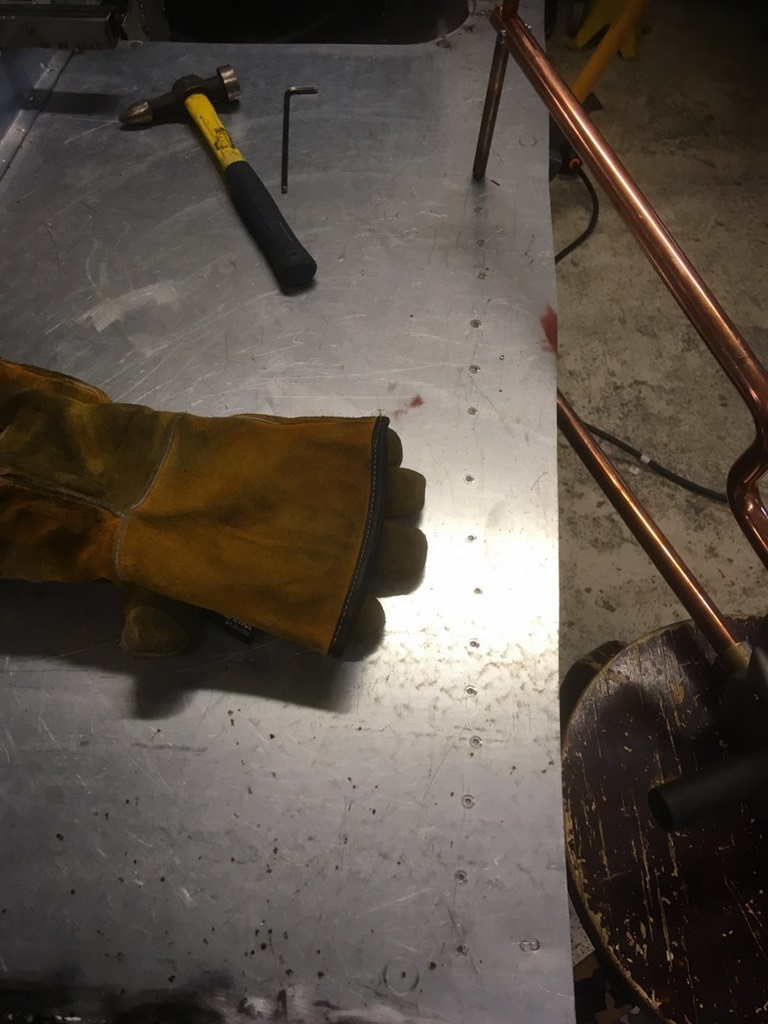
- 4 pairs of special welding gloves
- 2 automatic welding masks broken
- over 20 pcs nose and mouth masks ffp 2/3
- 1 face mask plastic renewed
- over 100pcs grinder disks, different thicknesses: cutting 0.8mm, 1mm, 2mm and grinding 5mm
- about 10pcs grinder rotary steel brushes
- about 30pcs grinder rotary sanding disks
- about 20pcs sanding disks for pneumatic rotary sander
- 4 liters of epoxy paint + solvent and hardener
- 4 pcs wheels for chassis transportation
- some drill bits and grinding bits
- too much bad language, tea and coffee
Design rear bumper brackets ...
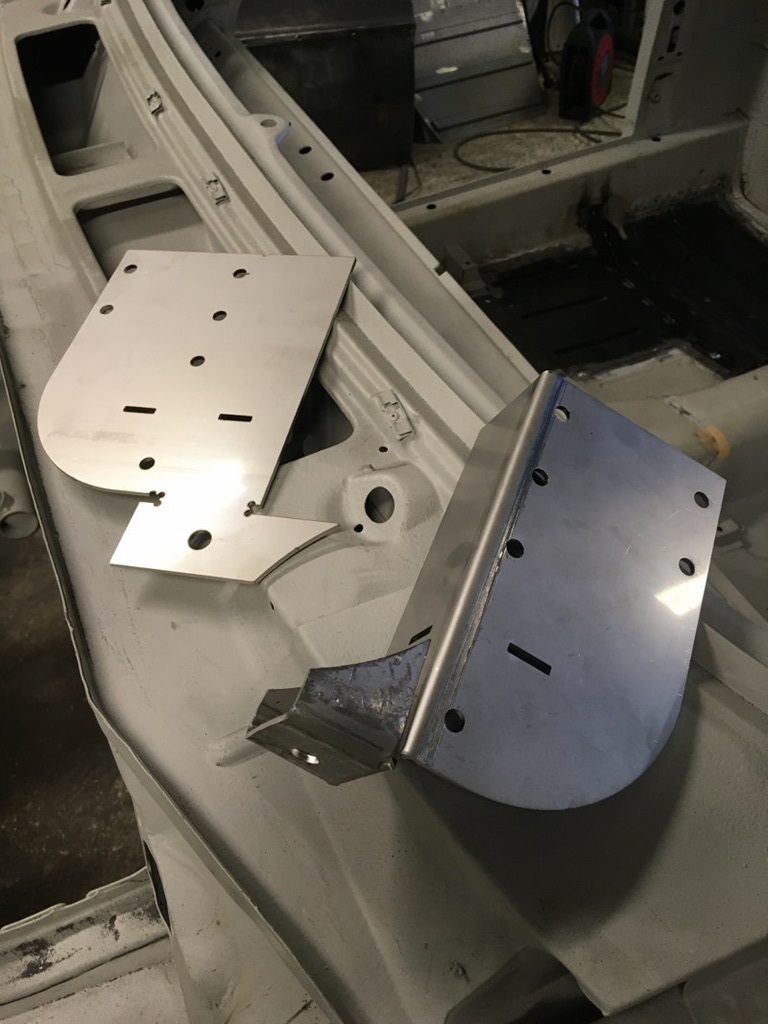
18 January 2021
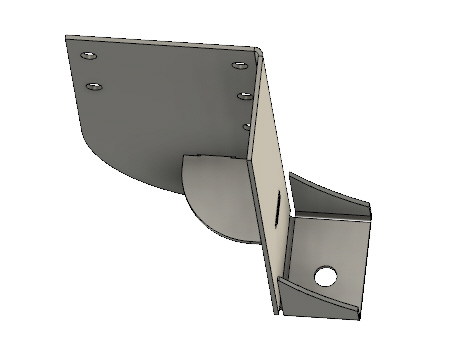
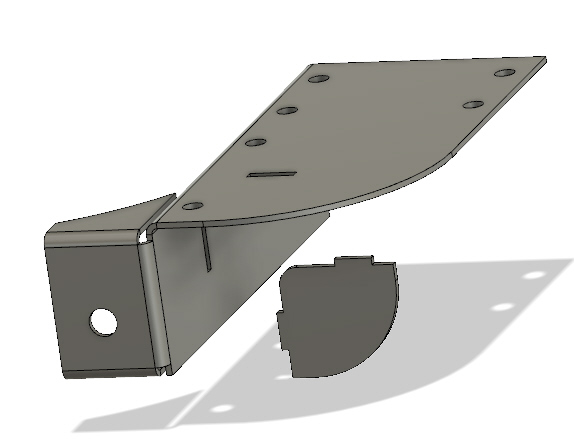
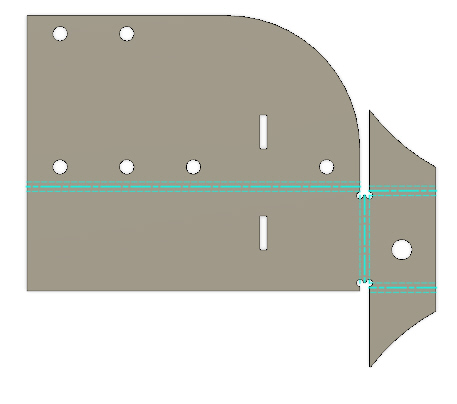
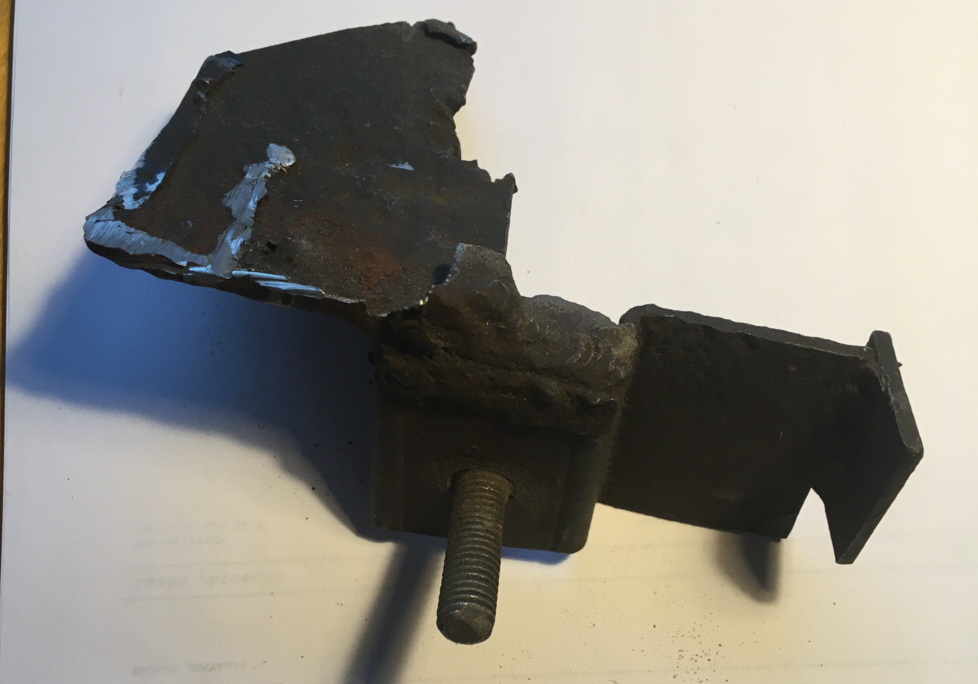
Today I want to show you something really awesome ... Timo has made it: The rear bumper brackets were rotten and bent (is it a surprise?), so making them by hand from sheet metal would have been a huge effort.
Timo designed those rear brackets in 3D, the program automatically produces a "flattened" version, so a laser cutter can produce that part and it only has to be bent. Less effort (and money) and - for sure - more sturdy than the original!
Repairs / Back end cont'd ...
23 January 2021
Repairs after sandblasting continue ... part of the original floors I sourced in 2017 (!) are now welded in. It turned out to be a general rule for me: buy parts as long as they're still available! I got so many parts in 2017/2018 which aren't available anymore at Mercedes ... so it was a good investment.
Timo also continues at the back end; "as usual" everything was so rotten and bent (must have had several accidents), that he has to do it from scratch. Together with the bumper brackets that part should be more sturdy than original!!!
Cargo door back ...
4 February 2021
The outside of the cargo door had to be done from scratch, as - due to many accidents - the original could not be rescued. The shape was quite tricky, especially the "dent" for the license plate holder. This recessed part is actually original.
As Timo was reluctant to do it himself, he asked an old friend to do it for him. "old" has a double meaning here; he refers to him as "the guy with JUST 60 years experience of panel beating" ;-) ... so imho this looks really good!
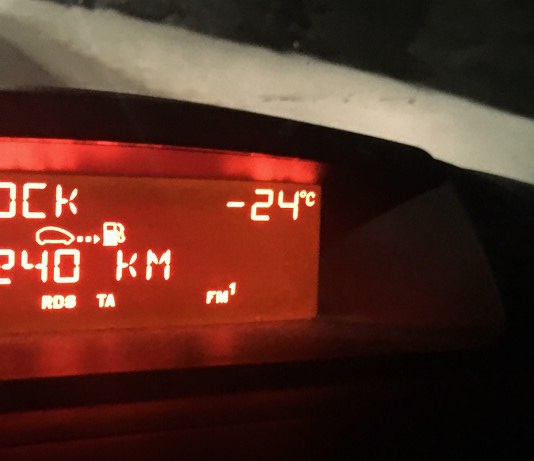
Final body works started ...
10 February 2021
It's hard to believe - after nearly two years - that the final body works started. Finishing the rear end corners, grinding, cargo covers and a few other bits and pieces. At -24°C it's hard work ;-) ...
Luckily we found a paint shop now, who is able to start on this car in March. It's quite a challenge to paint this. For example, the long rear fenders are tricky to get done properly and in the end you're painting nearly two cars. Why? There are just much more visible areas than in a "normal" car, i. e. the cargo covers, the cargo side walls, the rear cabin wall (inside and outside) and the motor area should be "nice" too, as the V8 will be quite prominent there. Let's cross fingers!
Final body works started II ...
19 February 2021
Quite some progress on the body works front. The cargo covers are welded and Timo managed to make them completely removable. Contrary to the original, where certain corners were permanently welded in place; quite a practical option ... so thanks for that! The passenger door is being repaired and the rear end is close to being finished. There's also first ideas how to fix the tonneau cover behind the passenger cabin ... stay tuned!
Cargo Panels finishing touches ...
25 February 2021
Timo has finished the cargo covers, lots of tinning done. Hopefully the paint-shop can start soon. As you can see there's only two (!) big covers for the whole cargo area, which are completely removable. Quite handy for the future, but - to be honest - not completely original, as there were smaller and more pieces ;-)
Final body works started III ...
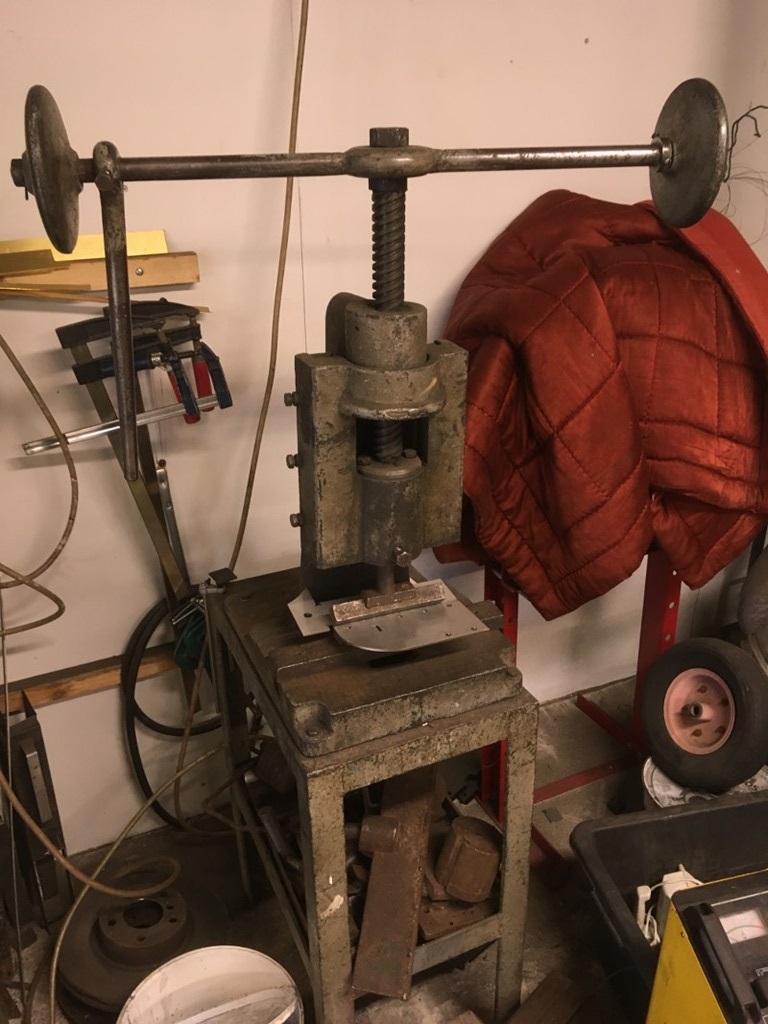
2 March 2021
As the painter will start next week, the finishing works on the Pick-Up are progressing! Timo has designed himself some stainless steel brackets for the rear bumpers. The bending was done on a modern CNC-controlled machine (see photo ... I like the use of these old tools) ;-) ... imho it gives it a great touch! I guess, when this car ever rusts, the rear bumpers will fall off last!
Also the fastening of the cargo covers progresses ... first rivets are in place; as mentioned before, the cargo covers will be held by threaded screws instead of tapping screws.
Final body works started IV ...
6 March 2021
After starting the fastening of the cargo covers, Timo decided to add more reinforcements to the floor. The covers shouldn't be rattling at 200km/h ;-) ... seriously ... they should be held properly and - especially - flat. That's also the reason for the amount of threaded rivets ... it'll be fun in the future, if I have to take those covers off ;-) ... but I appreciate the great work!
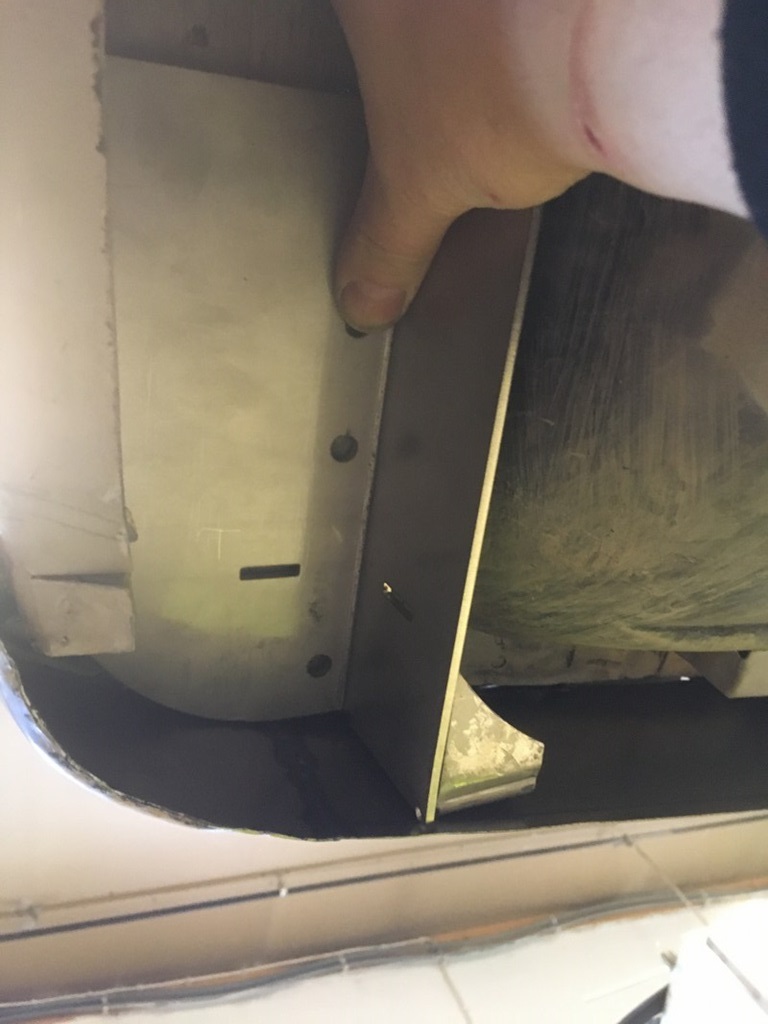
Rear bumpers fit now ...
16 March 2021
According to Timo it was quite tricky to fit those rear bumper brackets in a way, that the bumpers are centered and straight. I think it looks fantastic with the old Pick-Up bumper test fitted. Hopefully soon the first pictures of painted parts will be posted!
License Plate Holder rebuilt ...
2 April 2021
The swivelling license plate holder was made out of aluminium, but badly damaged and with a lot of holes. Rewelding the aluminium turned out to be impossible, so Timo actually rebuilt a 100% copy himself. Completely original, made out of aluminium ... hats off to that work!

License Plate Holder finished...
23 April 2021
The license plate holder was not only built from scratch, the mechanism is "new" (but original) too. It has to be fixed in two positions: when the cargo door is closed and - 90° - if it is open. The holder shouldn't swerve around, so Timo rebuilt the complete mechanism. Inside the cargo door additional reinforcements are installed, so that the forces on the outside sheet metal are reduced. Holes for the license plate and the lights are done too, I'm impressed with his works!