Spare Parts (I): Dashboard ...
23 January 2020
Quite a few spare parts aren't available anymore and taking "old ones" actually doesn't help, as they are most likely in the same state.
The first - of many - I want to report is the flap inside the outside dashboard air vents. As you can see on the first photo, everything's broken and the rubber is hard and damaged. So I tried to design that flap, including a "negative form" to produce my rubber myself.
After some test prints (in white; that increases the contrast when you want to see where the collisions are), the thing fit.
The rubber thing I started with the rear Pick-Up lights. That sealing isn't available anymore. So after a lot of trying (and spending money) I found components, that give me a rubber roughly in the consistency of the original one. You mix the stuff, put it in the negative form and after approx. 3 hours you can take it out.

Spare Parts (II): Rubber blocks ...
10 February 2020
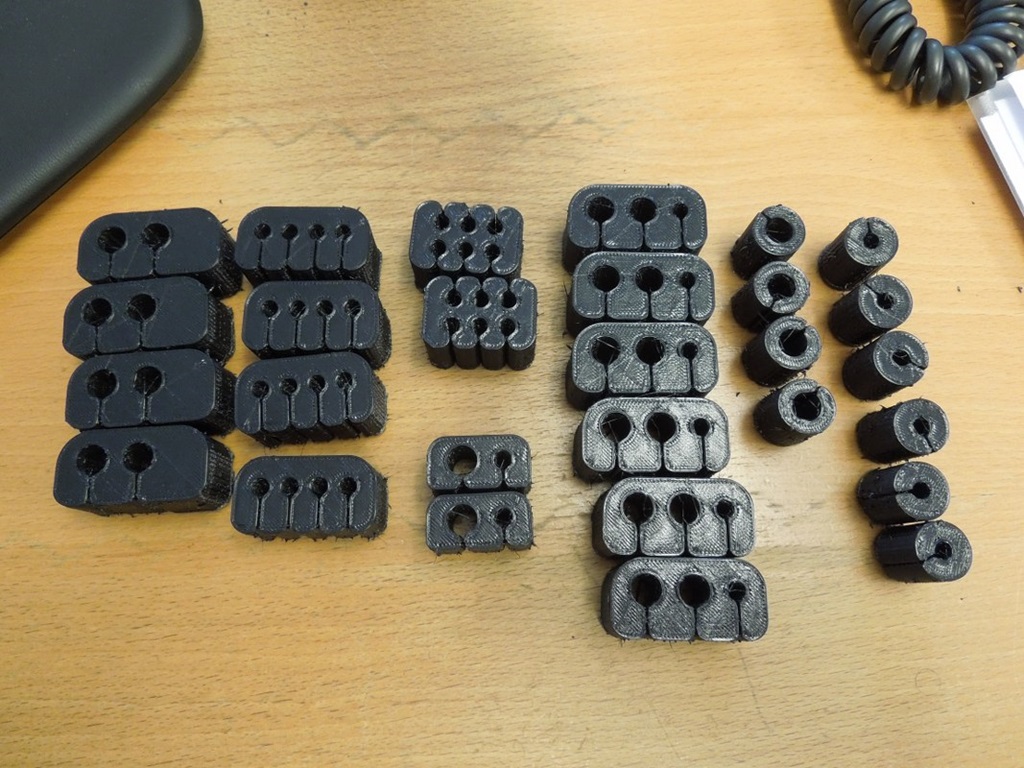
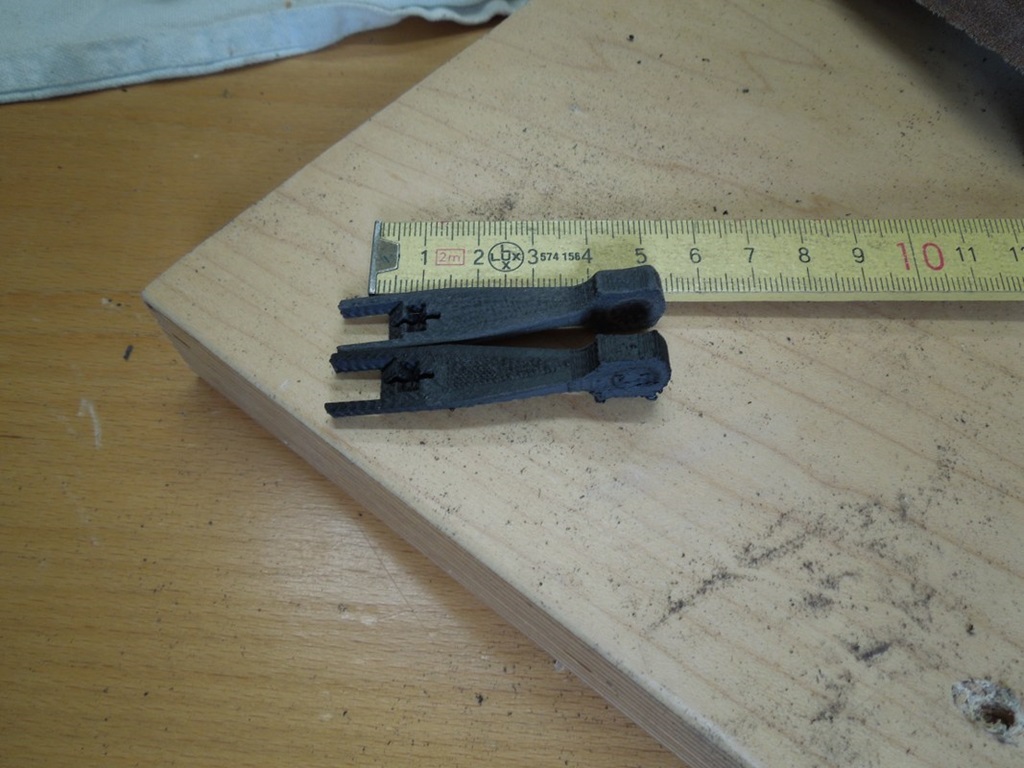
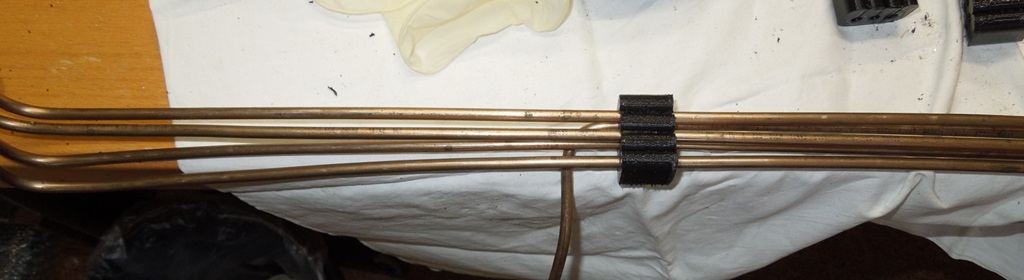
Another stuff I experimented with are the rubber blocks, that are used for brake lines and fuel lines. Some aren't available any more and - due to the conversion - I needed some "special ones".
I designed them and after a lot of experimenting I found a flexible filament, that is very very close to the original rubber consistency. It is a bit stiffer than original, but the lines get in.
Tipps for the 3D-print:
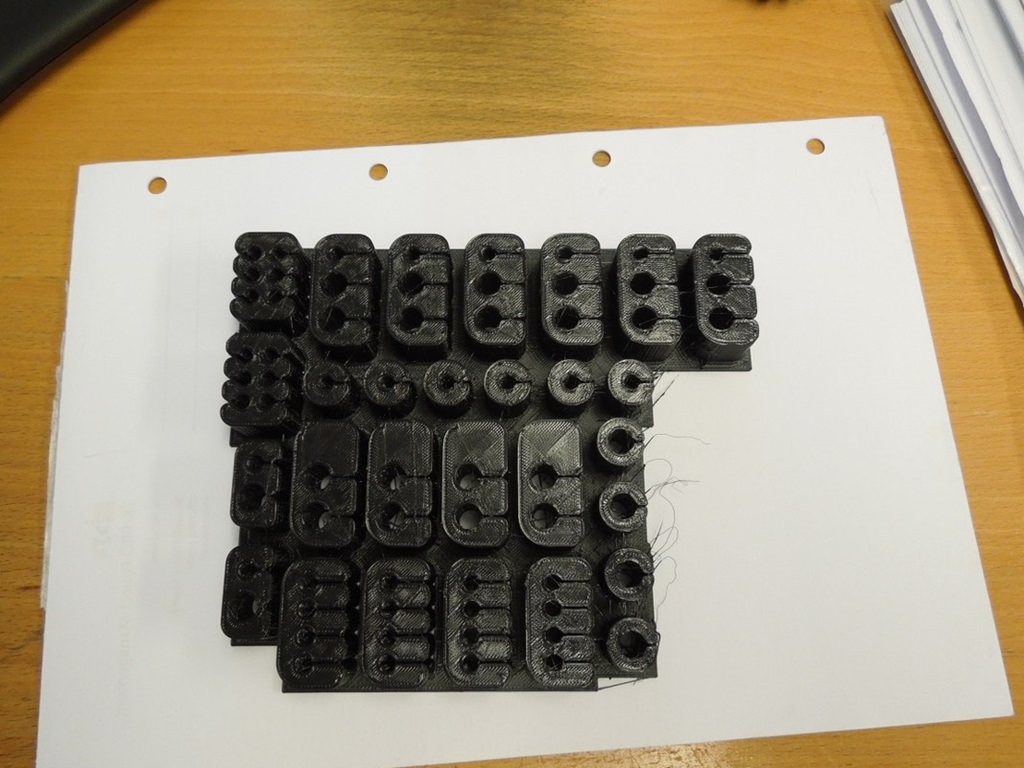
1. The filament is from FormFutura and is called Flexifil (ABS)
2. Flexifil does not stick to the printing bed (I tried a lot ;-) … so I constructed a "holding plate" around the rubber parts to hold them in place. Therefore you need a dual extruder Printer, black ABS in the one and Flexifil in the other one.
The print went for 23 hours and it turned out good … so just breaking off the plastic plates around the rubber blocks and it's done!


Spare Parts (III): Gasket Wiper Motor ...
1 March 2020
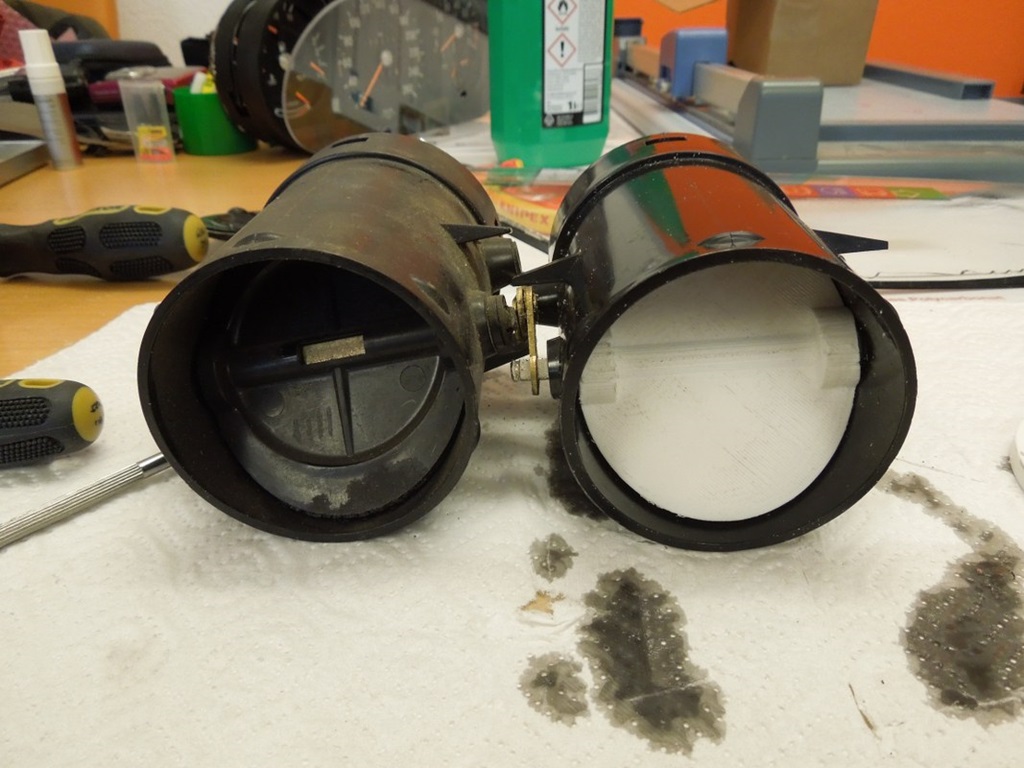
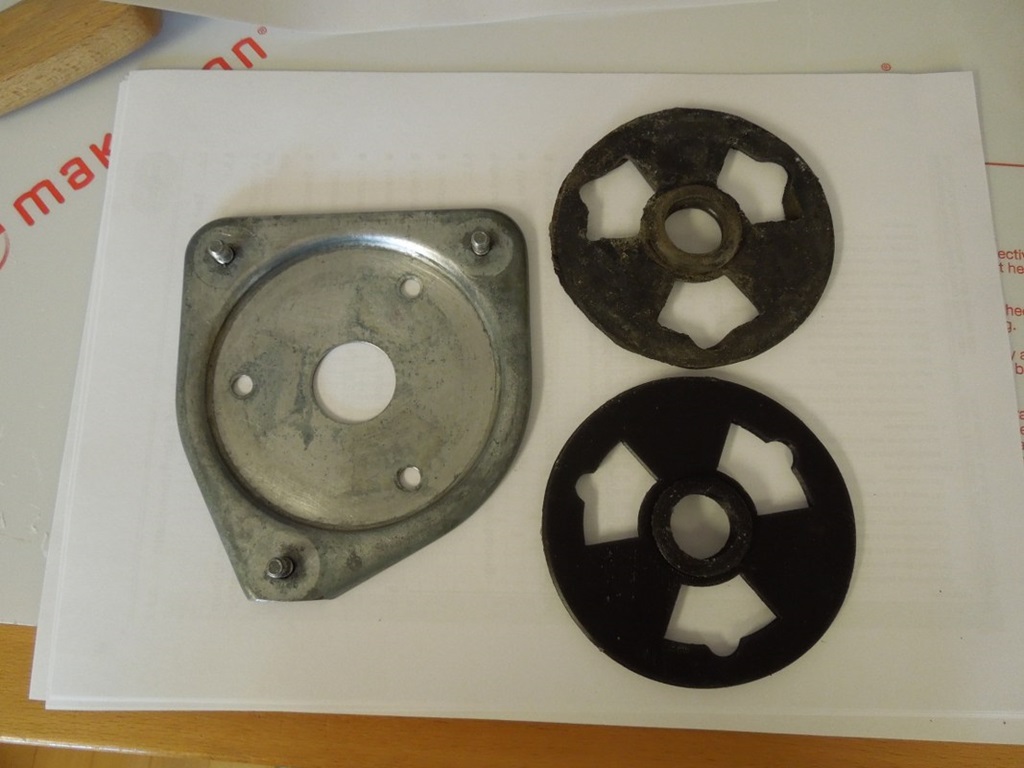
"As usual" I had two windscreen wiper motors; the one from the pickup didn't work, the one from the sedan did. I had to get rid of the intervall electronics attached to the motor, as the R107 had a relais for that already, which I included in the harness.
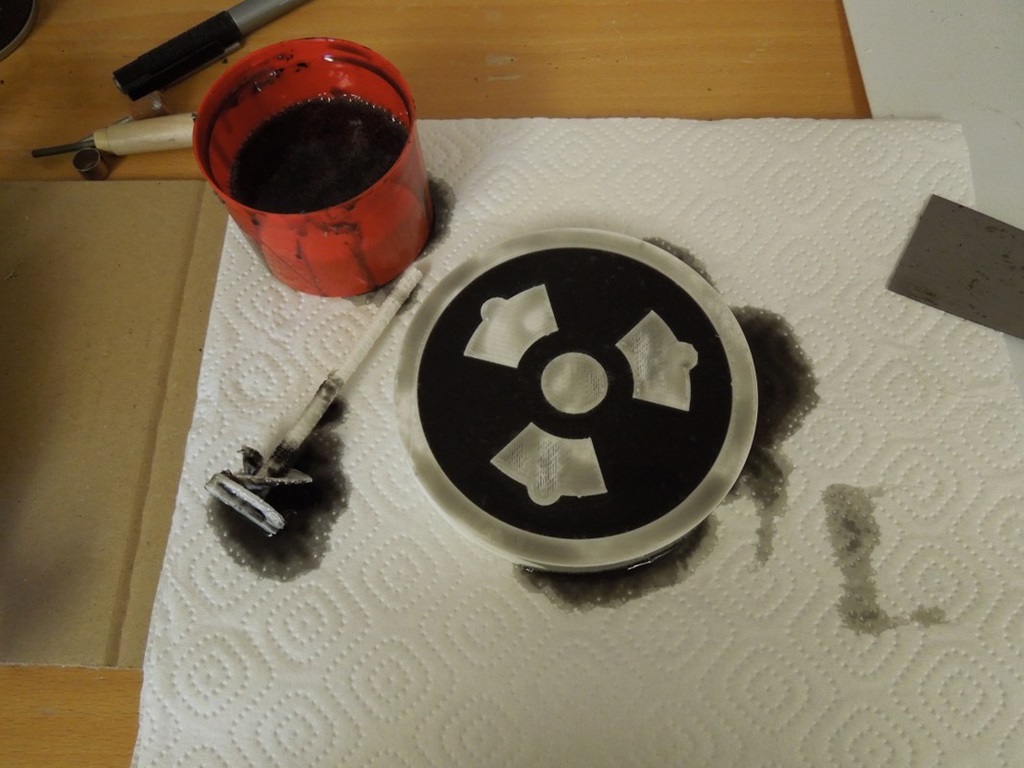
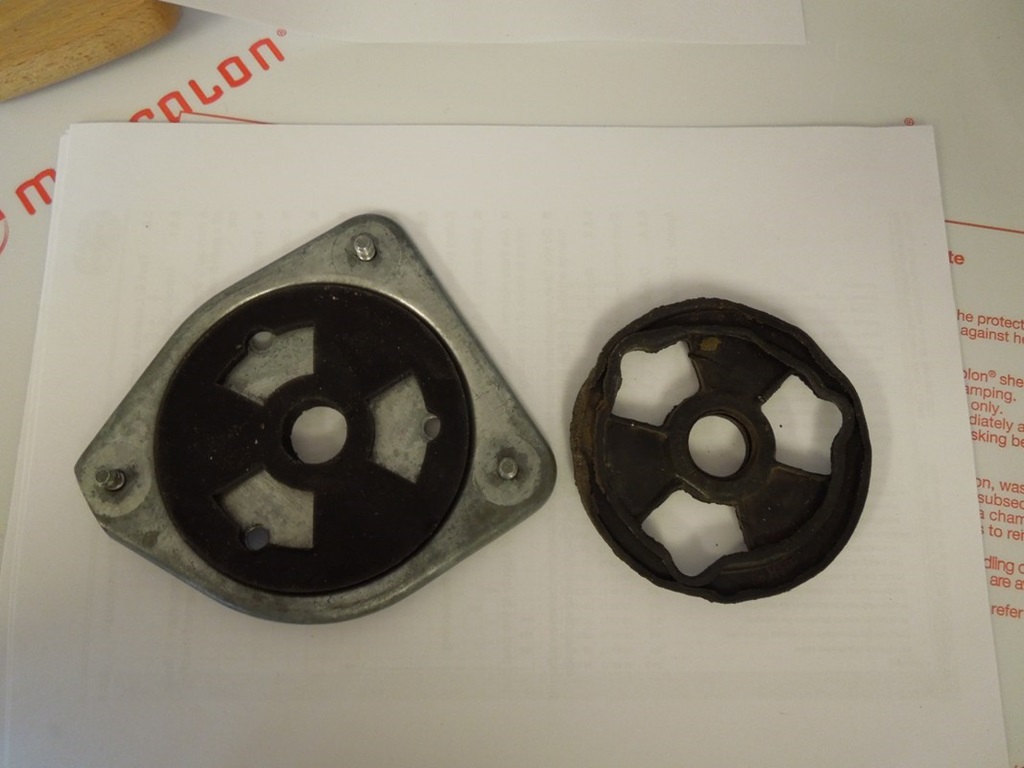
However, both gaskets were 40 years old and done. They're not available anymore, so I thought I do them myself. Having already experimented a bit for the rear light gaskets, I found a 2k silicone which met my requirements. I am mixing two of different shore hardness and add black colour to it.
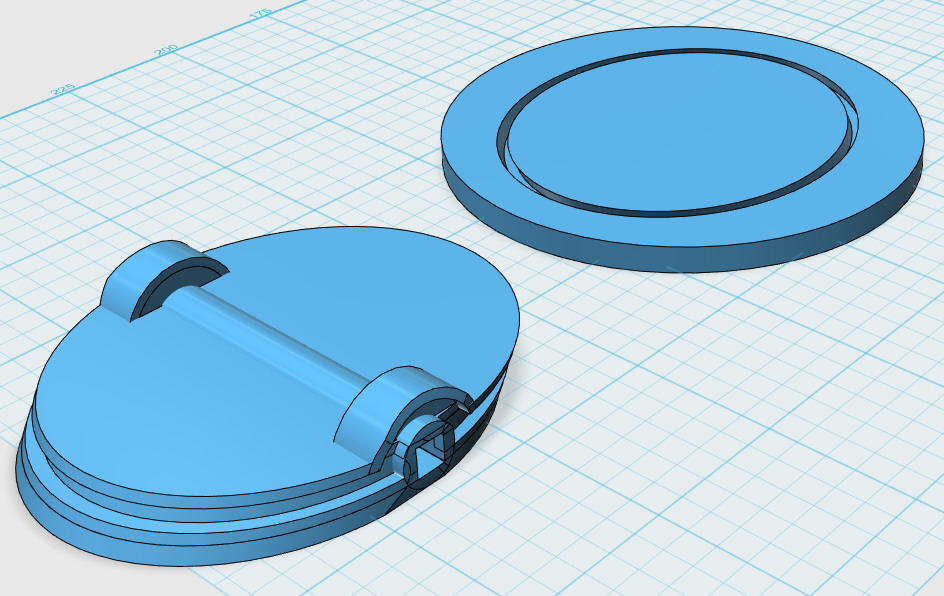
I designed the gasket itself in 3D and then used a cylindre to "substract" the gasket from the cylindre, i. e. I had the "negative" form.
The design of the gasket is simplified, as in those days they tried to save material. It fits in the frame and hopefully prevents water from getting inside the car.

Spare Parts (IV): 2-pole Cable Connector ...
3 March 2020
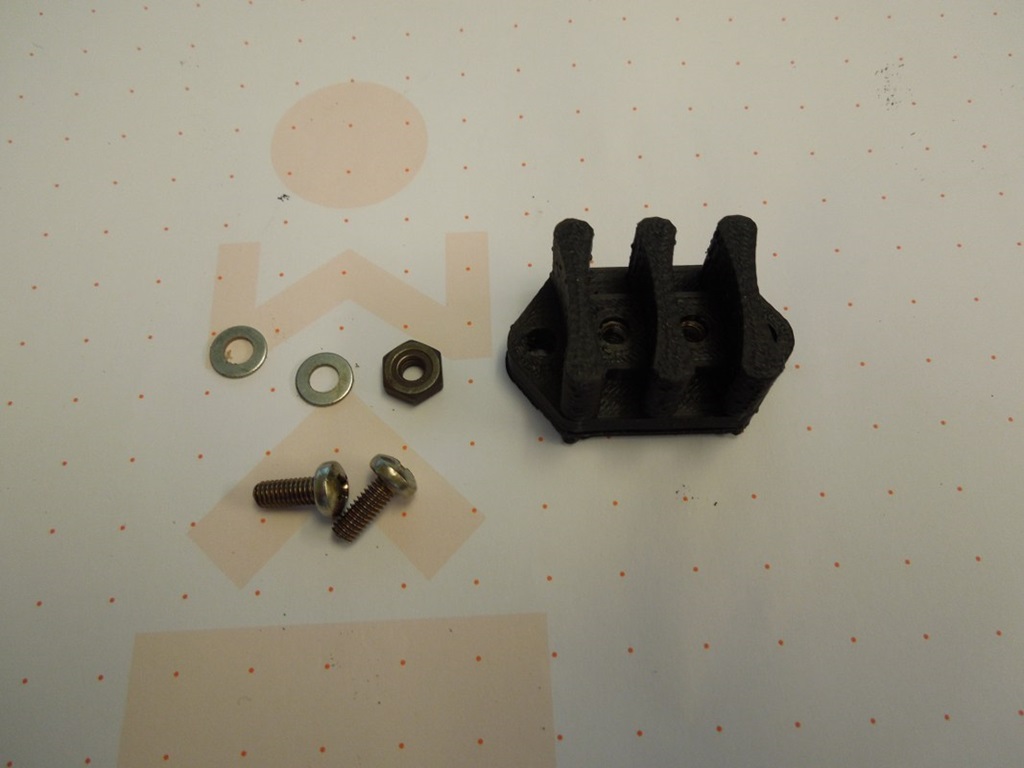
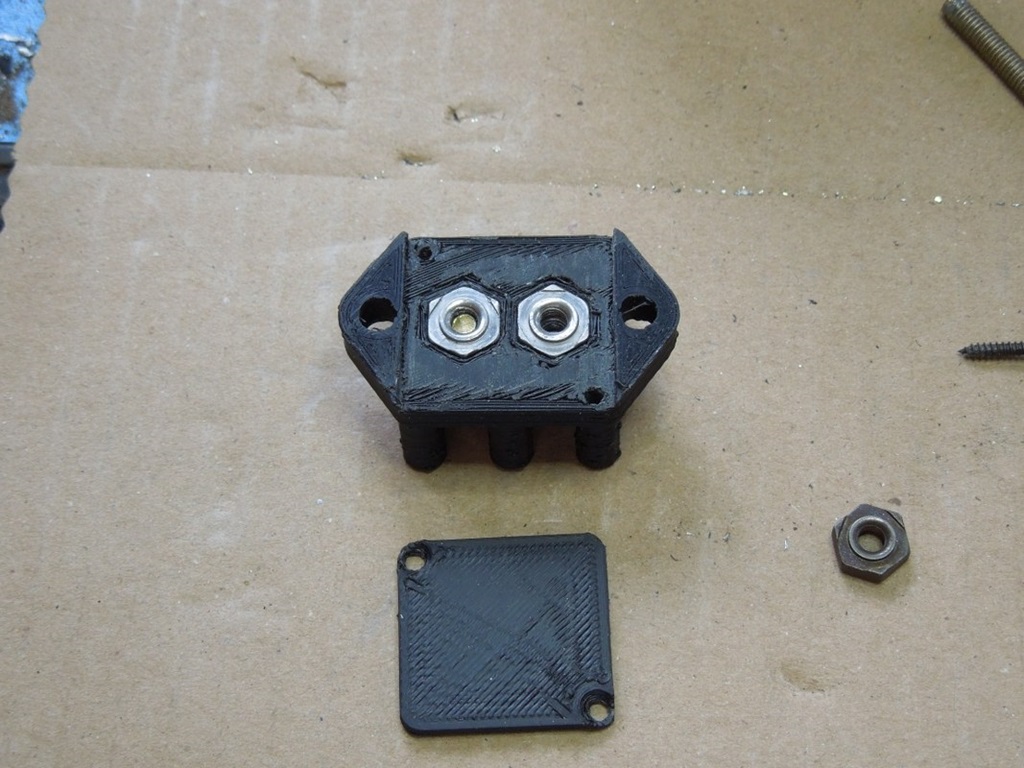
There's quite a few of those 2/3/4-pole cable connectors used in a Merc, e. g. in the doors for the electric windows. Most of them are broken, but beside the "optics" it could also be an electrical problem, if they are not 100%.
They aren't available at Mercedes anymore, but as a reproduction. The last time I looked them up, one was around 35 (!) Euros. Too much for me. So I started designing them in my own way. I used two M4 nuts, which are pressed into the plastic. Then a little cover plate is screwed on the bottom.
Not as sturdy as the originals, but good enough for me!


Spare Parts (V): Air vents dashboard ...
11 May 2020
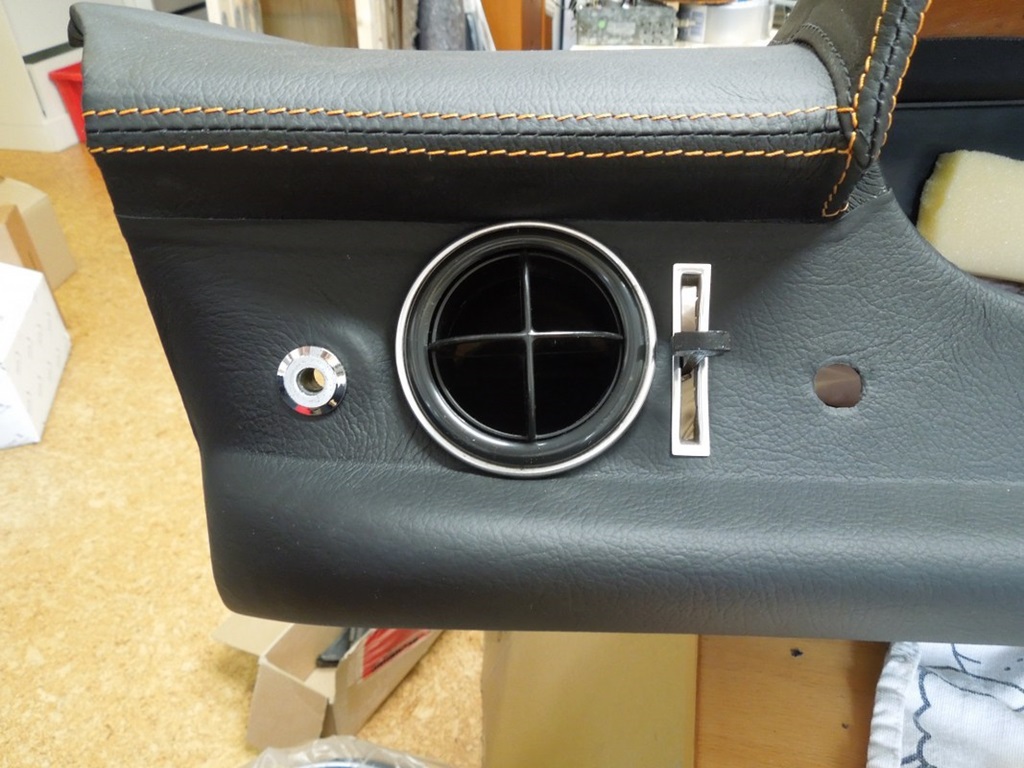
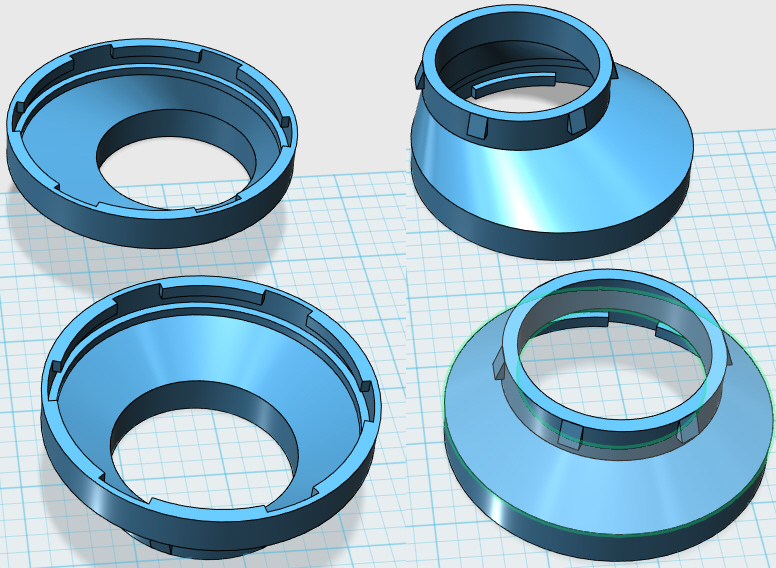
After designing those parts already quite some time ago, I finally printed them and installed them into the dasboard. It started with the little lever, that opens the outside vents. They are either not there anymore or broken; on top of that they're not available anymore. So I designed them and printed them.
Furthermore - due to the modern aircon - the hoses from the aircon to those vents have a different diametre. The modern aircon has 52mm while the W115 has 70mm. So I designed an adapter which brings down the diametre. Instead of glueing it onto the original vent, I designed a sort of bayonet socket, so it can be screwed on.
Now it's finally in the dashboard; surprisingly it works ;-)

Spare Parts (VI): Mushroom nut ...
13 May 2020
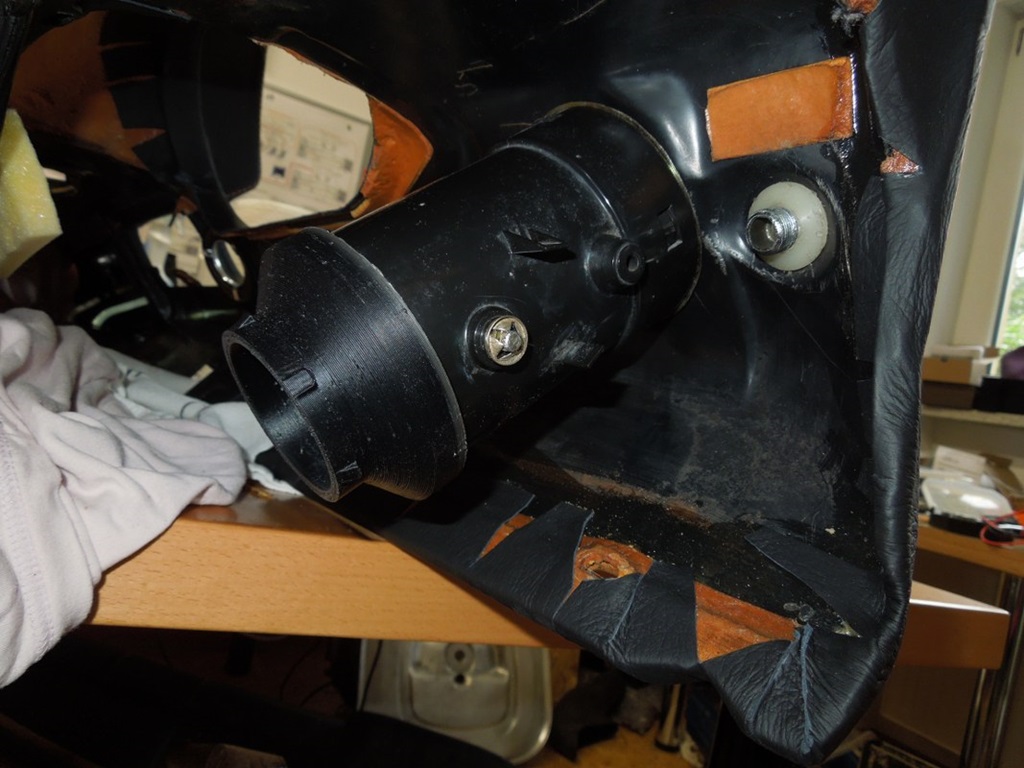
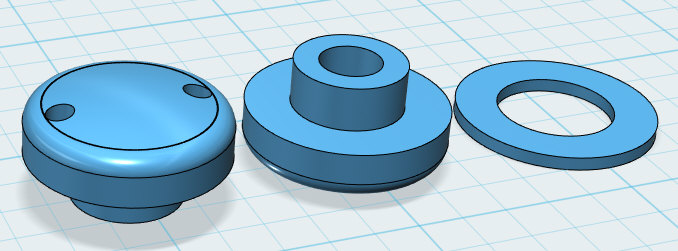
The centre console is not only fixed to the bottom part, but also to the two vertical bars going down from the dashboard to the tunnel. Inside there's a M8 screw and outside there's a plastic "mushroom nut" to cover the hole in the centre console.
I didn't have it, not available anymore ... but I was lucky that someone measured the whole thing for me. So - as you know by now - I designed it incl. a rough M8 thread, printed it, used a tap to make a proper M8 thread inside and painted it. Looks like the original ... good enough for me.

Tool: Tube Straightener ...
8 November 2020
As you might remember I replaced all fuel and brake lines with Kunifer-tubes, 8 and 4.75mm. They come on a roll, so you have to somehow straighten them. However it didn't look too well, so what to do? There are professional tools available, but the one I found was 130 Euros ... too much (there's some, that have to be put on the tube's end, but I wanted to also be able to straighten parts in the middle).
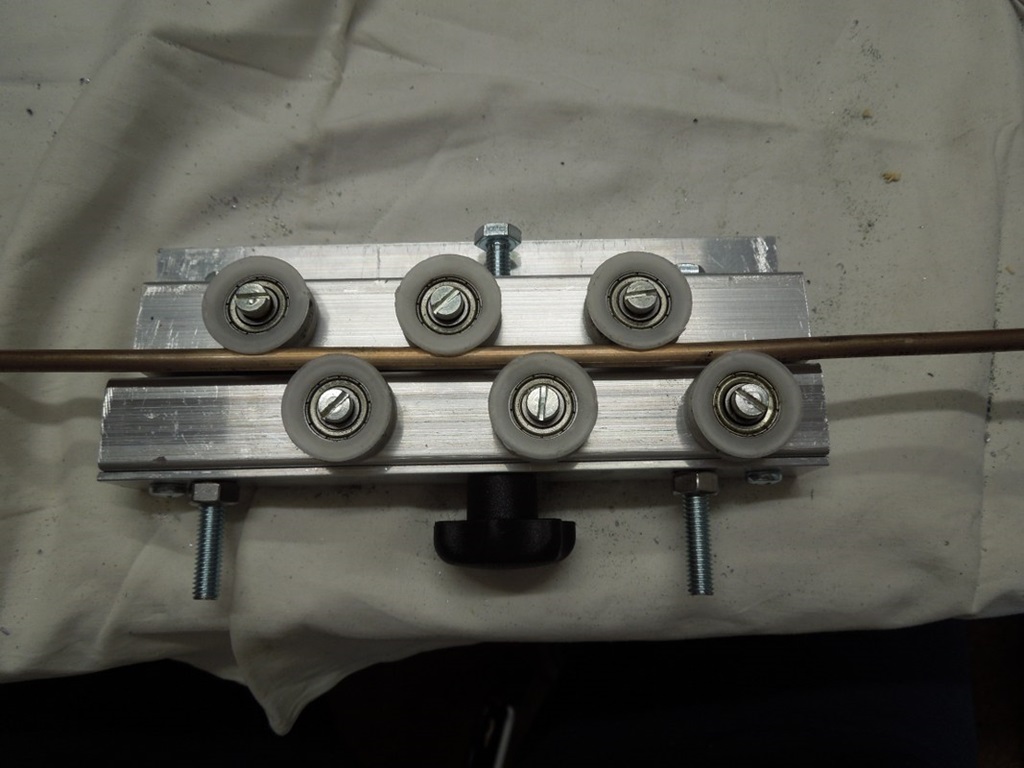
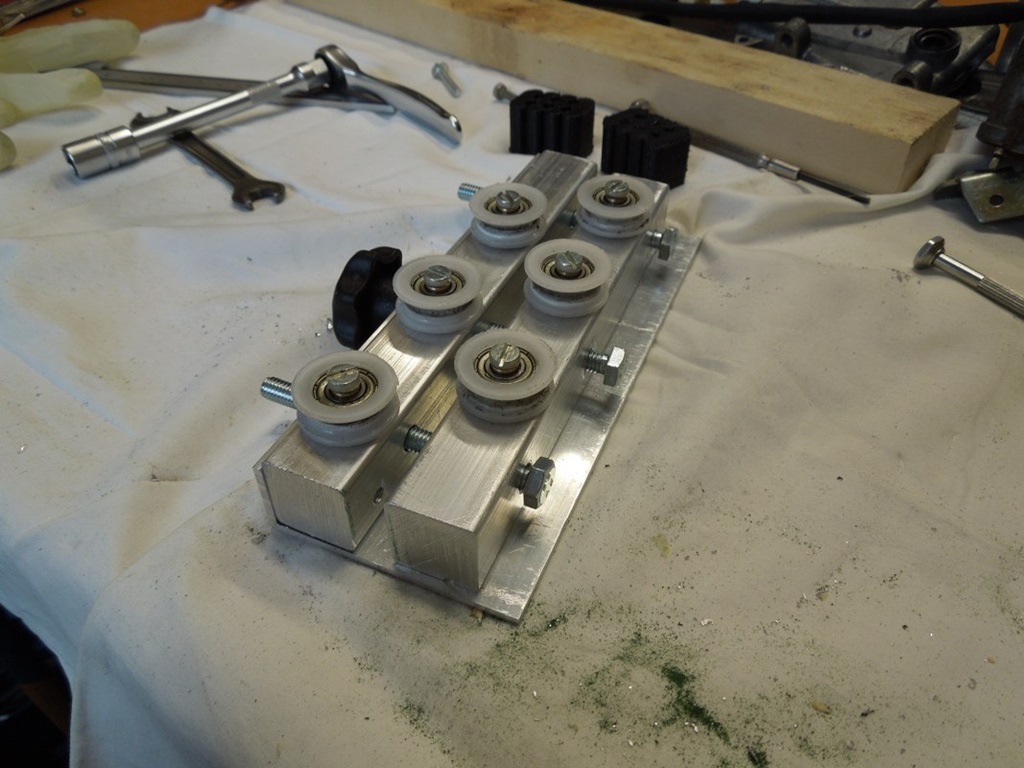
So I thought about a simple self-made solution. I bought (all millimetres):
- 2 aluminium profiles 20 x 20 x 150
- 1 L-shaped aluminium profile 150 x 60 x 20 x 2
- 6 shower door reels, 22 mm diametre, M4 thread
- Screws M6x70, M4x20
The lower square profile is screwed to the L-shaped profile, so they're fix. The upper profile has an M6 thread in the middle, so you can adjust it with the black handle. The two M6x70 screws on the left/right are just for guidance and further tightening of the tube. Not a perfect solution, but the tubes are much straighter after you moved that tool along the lines (turn 90° several times).


Tool: Bending Brake / Fuel Lines ...
16 November 2020
That is an old tool from 2018, when I installed completely new brake and fuel lines. Of course there are "official professional" tools for bending those lines in a radius, but it didn't work for me. It is more or less impossible with those tools to "find" the starting point of a radius. Therefore, parallel lines weren't parallel around the curves. So what to do?
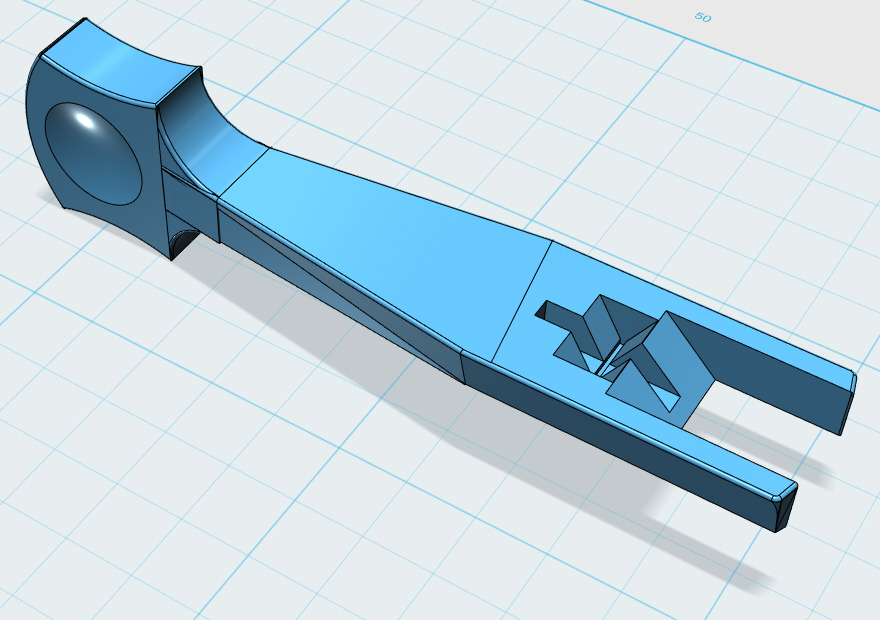
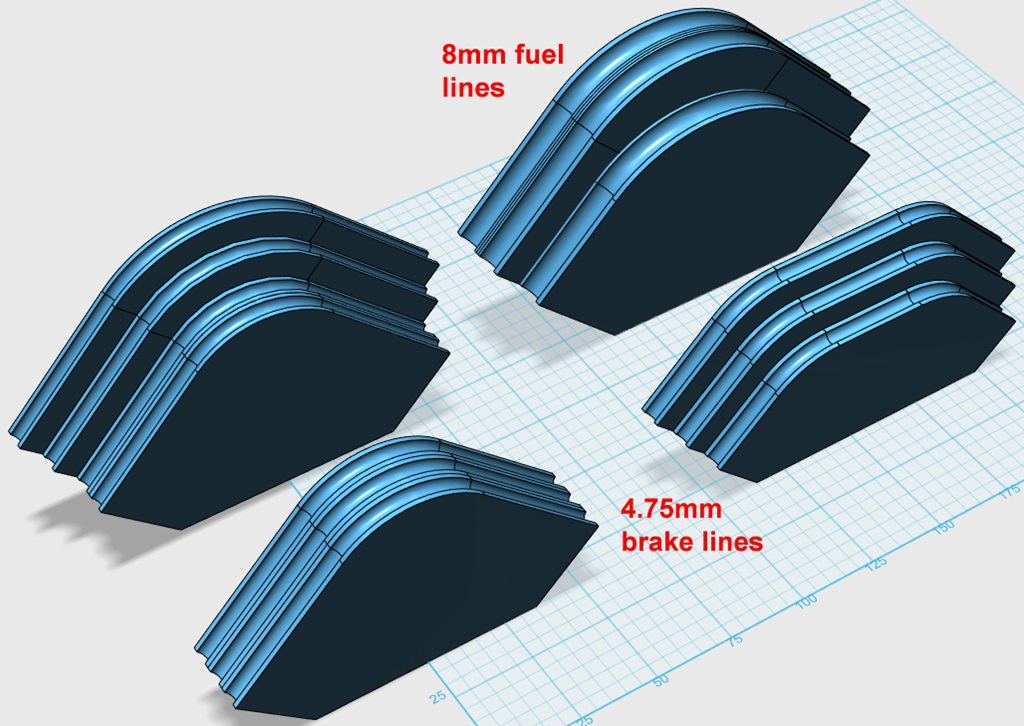
Again, 3D-printing helped. I designed this tool here, for 4.75mm brake lines and 8mm fuel lines. As you can see, parallel lines can be made easily, as you just mark on the lines the starting point of the curve, put both lines into the tool and bend them by hand. This works with different radius' in parallel (e. g. two lines running on the bottom of the car) as well as two lines with the same radius (e. g. coming from the undercarriage up the firewall).
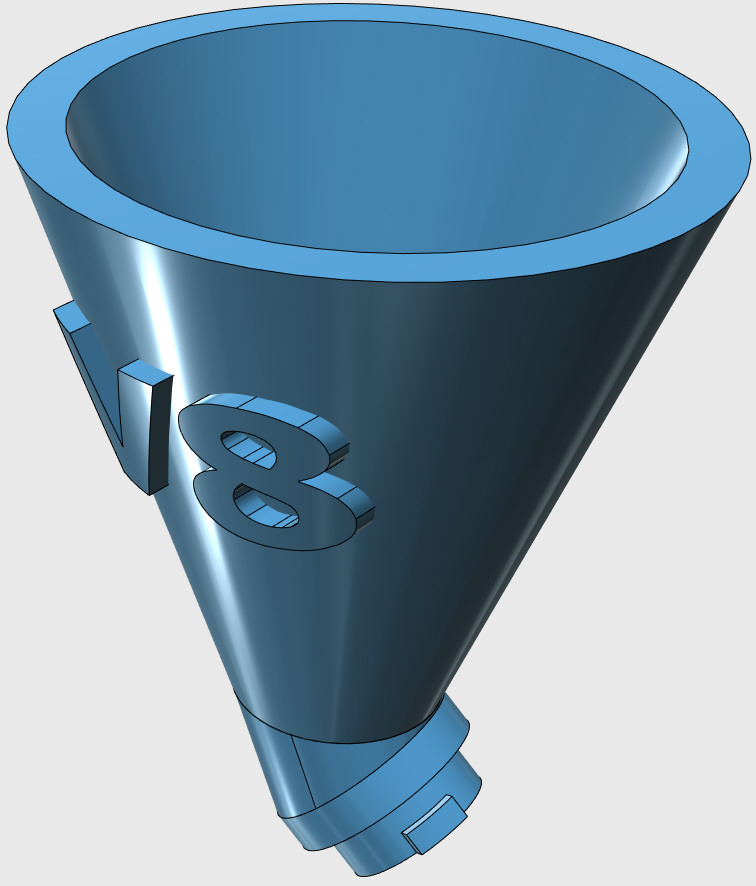
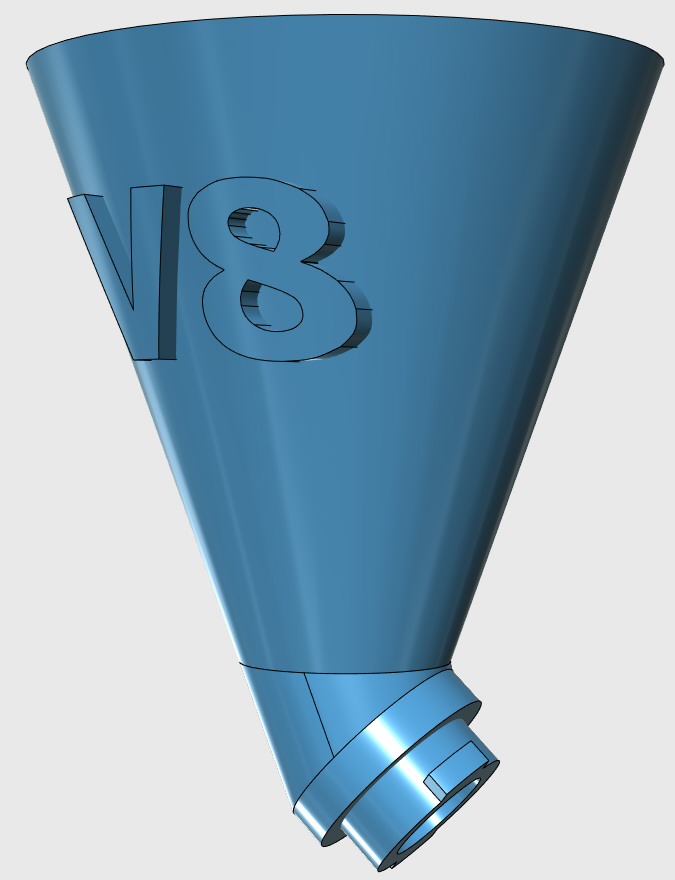
Tool: Motor oil funnel with style ;-)
9 March 2024
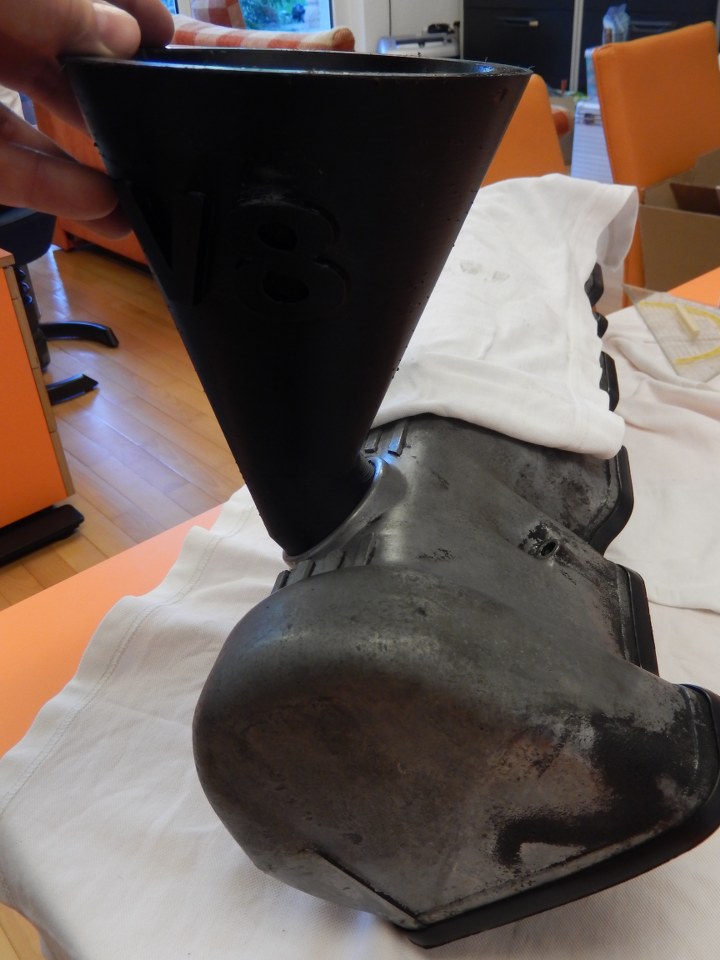
Remark 09 April:
Don't print it right now. I made two mistakes:
- Although it's a 90° Block, the opening is NOT 45°, so the funnel is not upright
- With the ute you can install it, but with a regular R107 the cooling liquid container is in the way
I will redesign it asap and update the STL-File. Sorry ;-)
With the 90°-V8, a normal funnel is always tilted 45°, you have to hold it ... real first world problems. So I thought I desgin a - rather outsized - oil filling funnel, that can be screwed in like the oil cap ... got a bit "sturdy", but it should work.
I attach the STL-File, in case someone wants to print it himself (I used 20% infill - 10% should do as well - with a printing time of roughly 12 hours).