Retro Radio ...
10 February 2017
A Retro Radio for the car ...
While waiting for the next steps regarding the body, I'd like to report a "little" project of last year.
One warning at the start: This makes no sense, it's of the type "why does a dog lick his balls?" ... because he can ...
So what's it about? I wanted a retro radio for my pickup project. Well I could have bought a Becker Mexico Retro or a modern retro radio or an original Becker with an AUX-Input ... no no no, much too easy!
When I was young (!?) I saved up quite some time as a student to be able to afford a Blaupunkt Nashville R24 for my first VW Polo. Autoreverse, Cassette Program Search ... that wasn't too bad for those days! So the thought was in my head to modify such a radio with the following requirements
- Radio function as it is
- MP3 Player with a memory card and a random function
- Up-to-date power supply
- Cinch-jacks for an external amplifier (internal 2x5W aren't too impressive)
So I got one at Ebay (two more should follow) and started. Done the following:
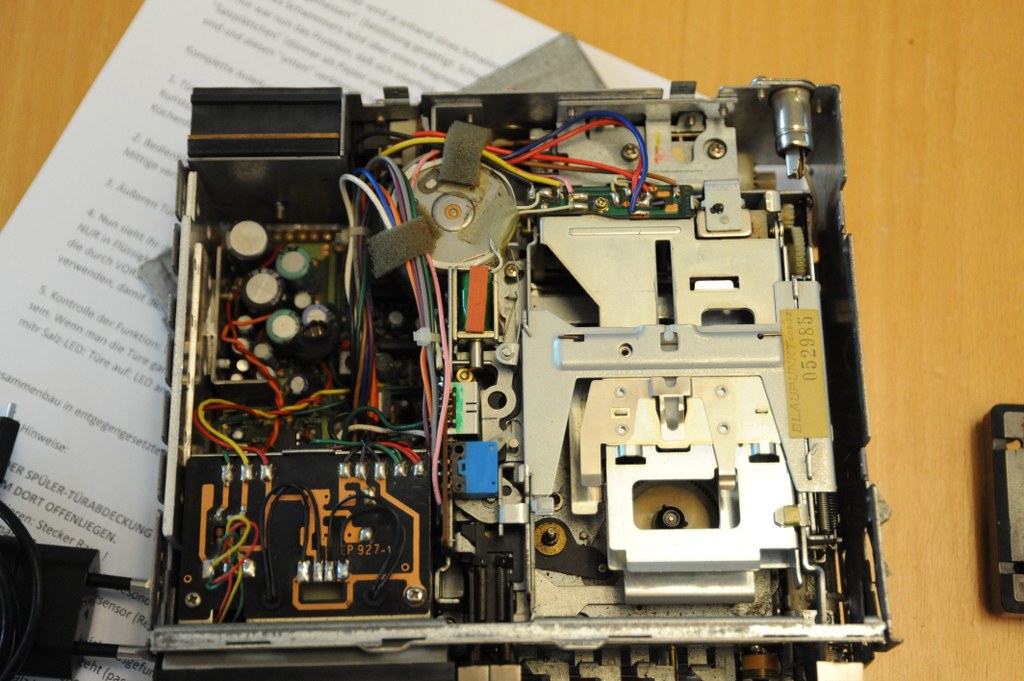
- Firstly removed the cassette part
- Replaced the DIN-Power-Block; rearranged the built-in capacitors and coils as well as the fuse on a separate circuit board
- Replaced the DIN-Preamp by Cinch-jacks
- Complete circuit board layouts and wiring diagrams bought on Ebay (a full 4 Euros)
- With the help of a HW-developer I found the connecting points in the circuit diagram, where the MP3-Player should be connected
- Changed the front lights to LED (white)
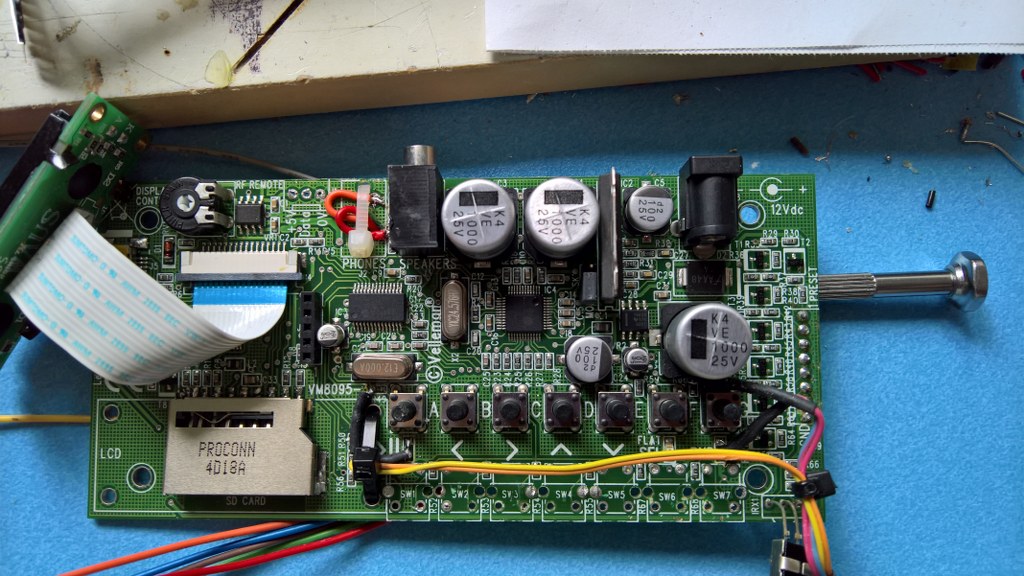
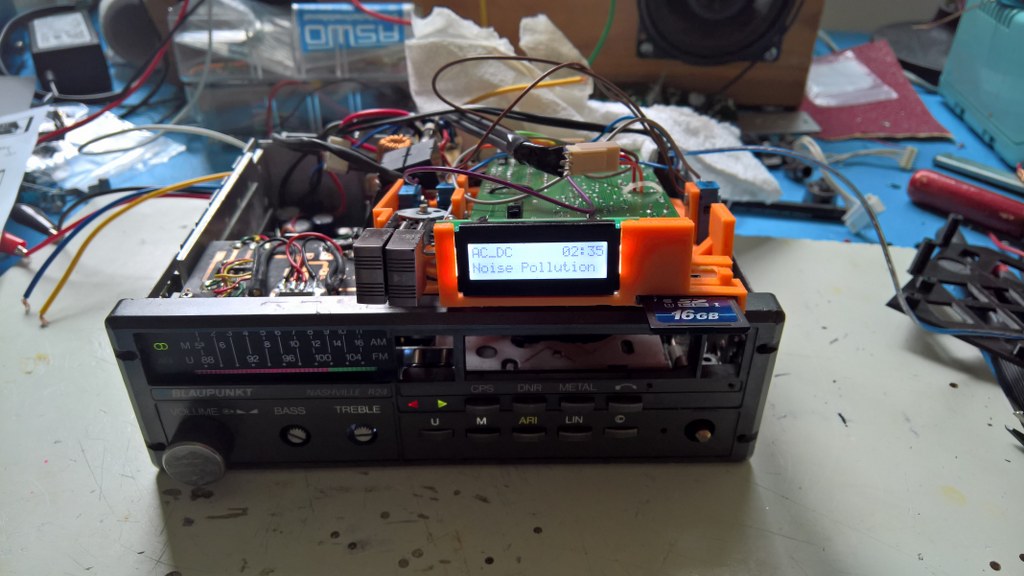
- MP3-Player (Velleman) bought. Reason: all 7 buttons can be connected externally, SD-Card, small Display (Photo shows already modifications)
The "Need" for a 3D-Printer ...
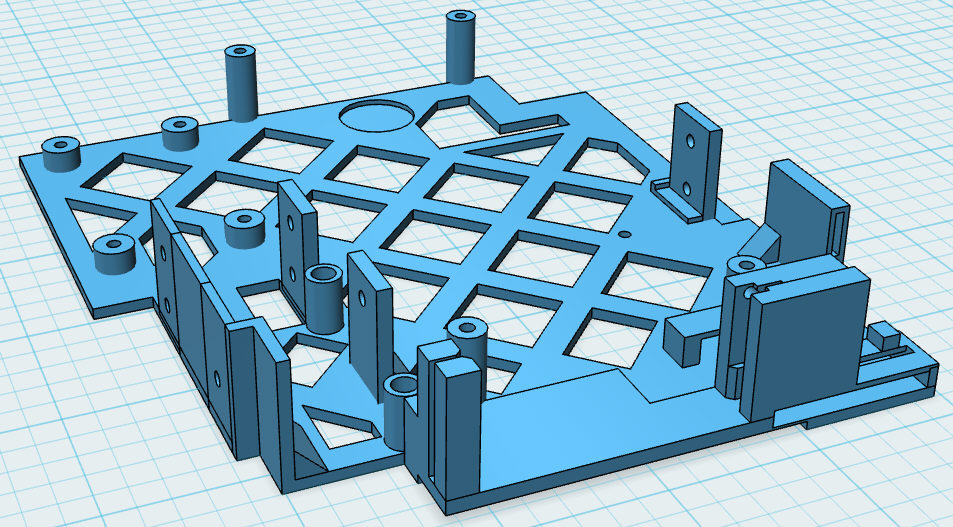
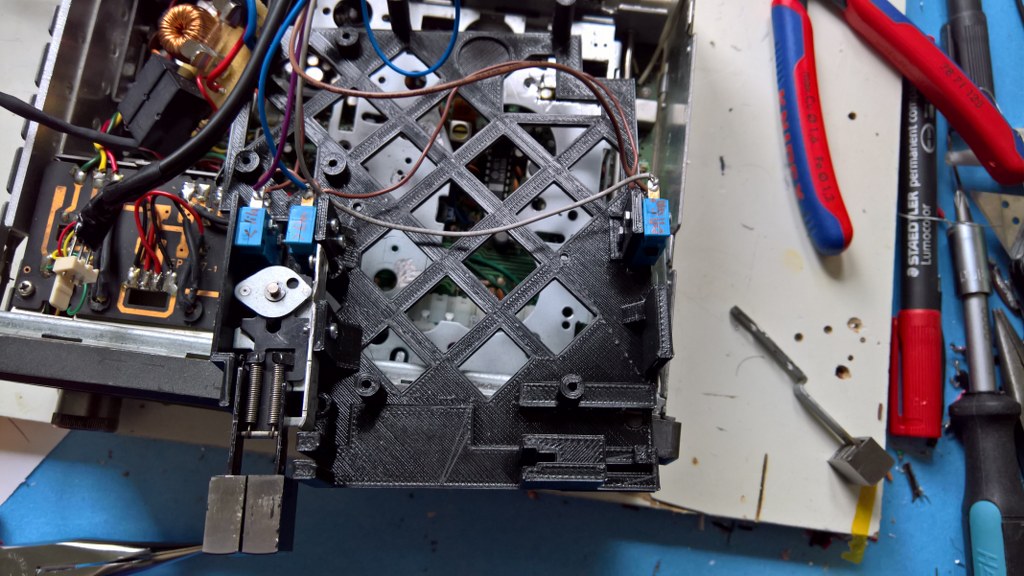
Next Problem: How to get the MP3-Player in and - especially - mounted? And the Display into the cassette slot? And the SD-card slot into the front?Solution: Finally found a reason to buy a 3D-Printer and I experimented quite a bit ... and printed a frame for the MP3-Player.
Further Modifications:
- Connecting plug for the MP3-buttons was on the wrong side: resoldered and bent
- Rebuilt SD-card slot, i. e. by means of an extended ribbon cable; added a slot into the front cover
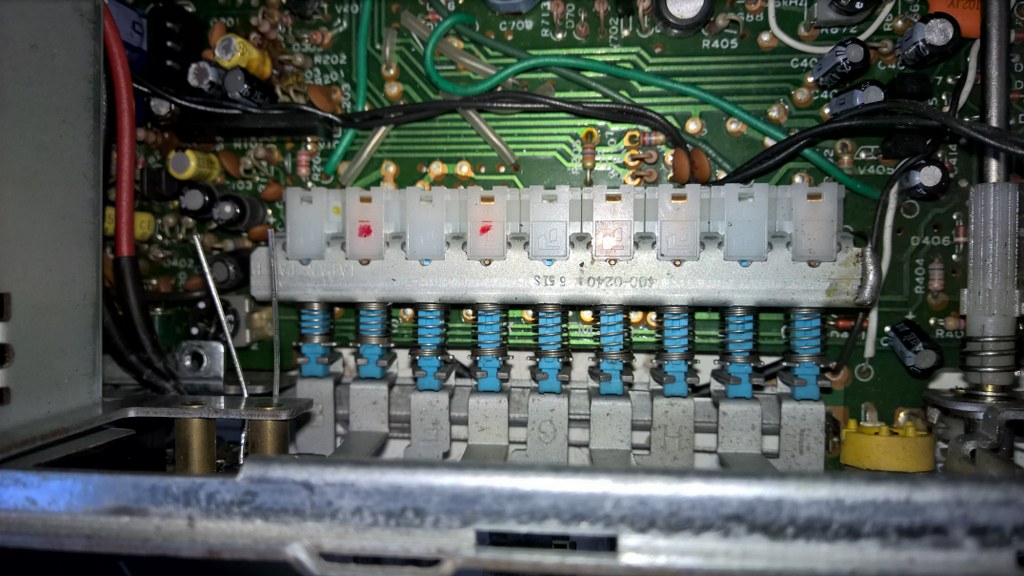
- Disassembled and rebuilt all radio buttons, so that the buttons are working in a tip-function. All buttons insulated on the main circuit board and soldered cables to it. The "Mono-button" now switches between Radio and MP3.
- Installed micro switches, so that the "fast forward/backwards"-buttons now operate "Track forward/backwards" and the Autoreverse-button works as "Play/Pause"
- Desoldered the SMD-LED's of the MP3-Player; unfortunately not enough output voltage for normal LED's: installed two Relais, which then switch the 3mm-LED's (with a 470Ohm resistor). So now the green LED is the "Play-LED" and the red LED at the front is the "Random"-LED
The housing and the cassette holder had to be modified significantly. One circuit board I fxyxed up and I finally used the parts of 3 Blaupunkts. Just the best front cover and the best knobs.

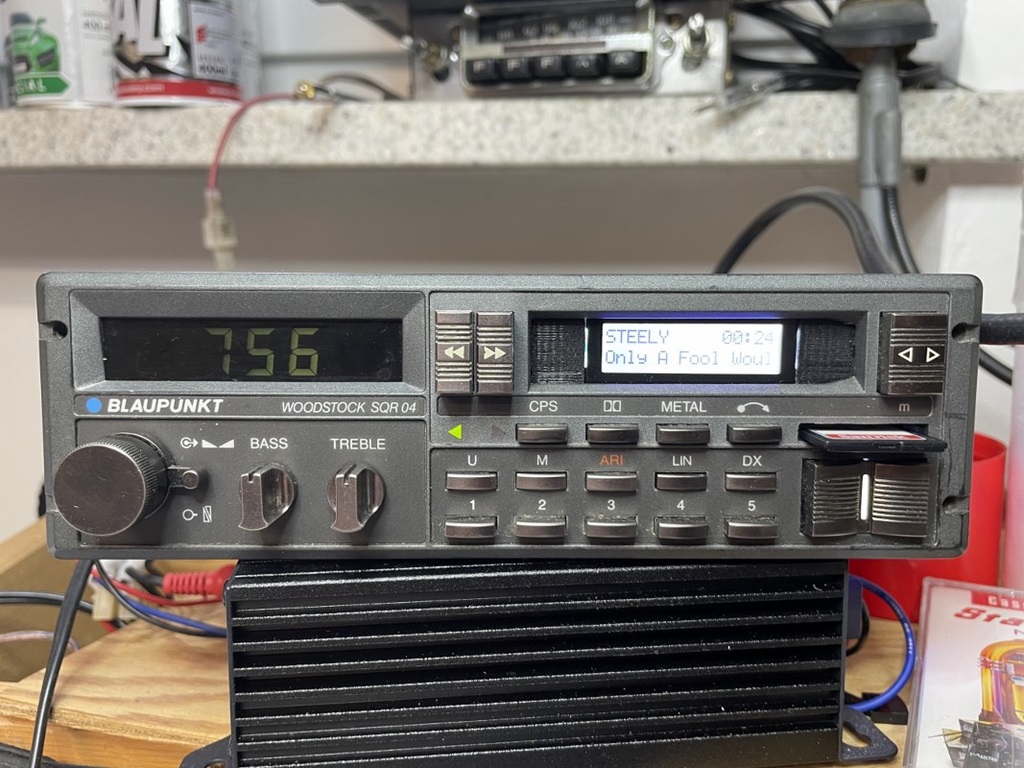
2nd alternative Retro Radio ...
08 February 2022
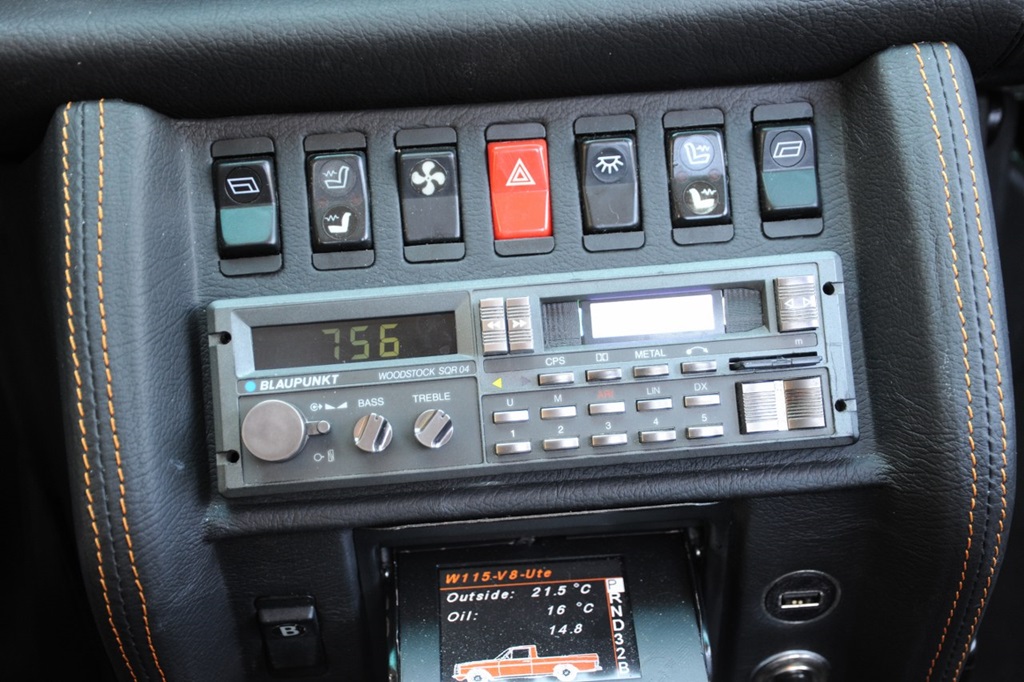
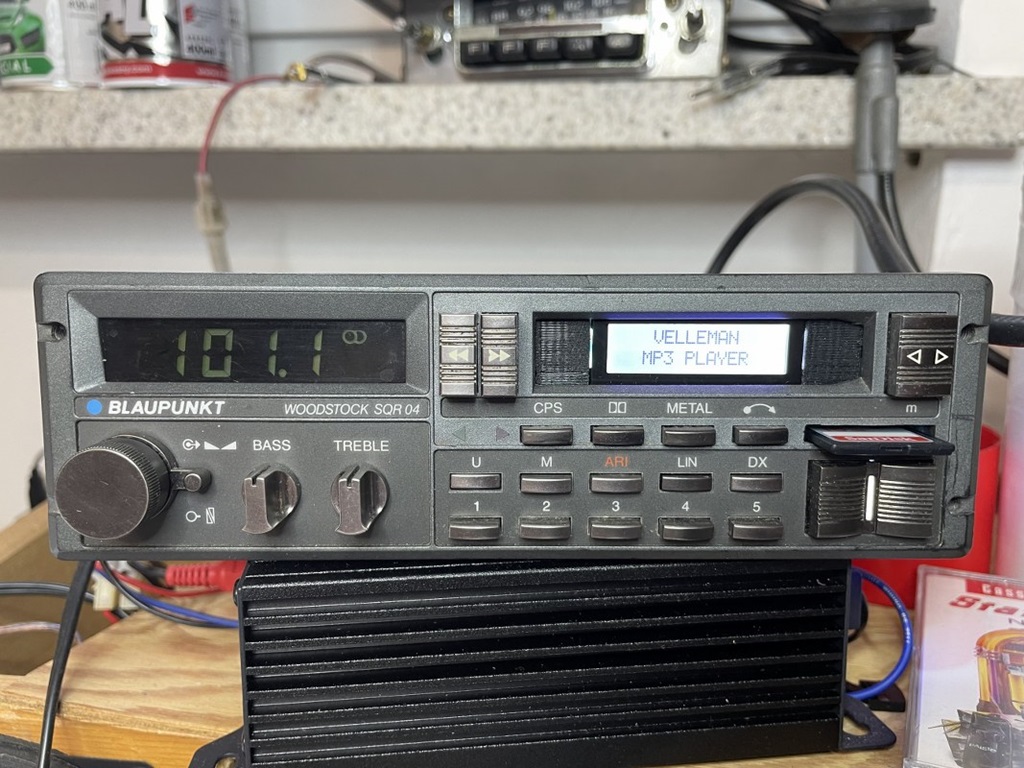
Already a while ago - while waiting for the body to come back - I bought two successors to the radio above: Blaupunkt Woodstock SQR04. Additional features: Digital Display, 5 preset buttons, no amplifier.
So I put the same MP3-player inside and I hoped, that my 3D-printed frame would fit one on one ... nope, everything had to be changed ;-) ... If you press "U" (FM), you have the radio playing, if you switch to "M" (AM) the MP3 player is active.
I also installed "modern" power connectors and a cinch output to the amplifier. An alternative to the radio above ...

Woodstock SQR04 built-in ...
12 September 2022